15 Practical Tips For Cooking With Tuna
Tuna can save dinner in minutes, but it can also turn dry and flat if you treat it casually. The good news is that a few smart techniques instantly boost flavor, texture, and juiciness.
Whether you are opening a can for lunch or searing a beautiful steak for date night, these tips will guide you. You will taste the difference starting today.
1. Pick the right tuna for the job
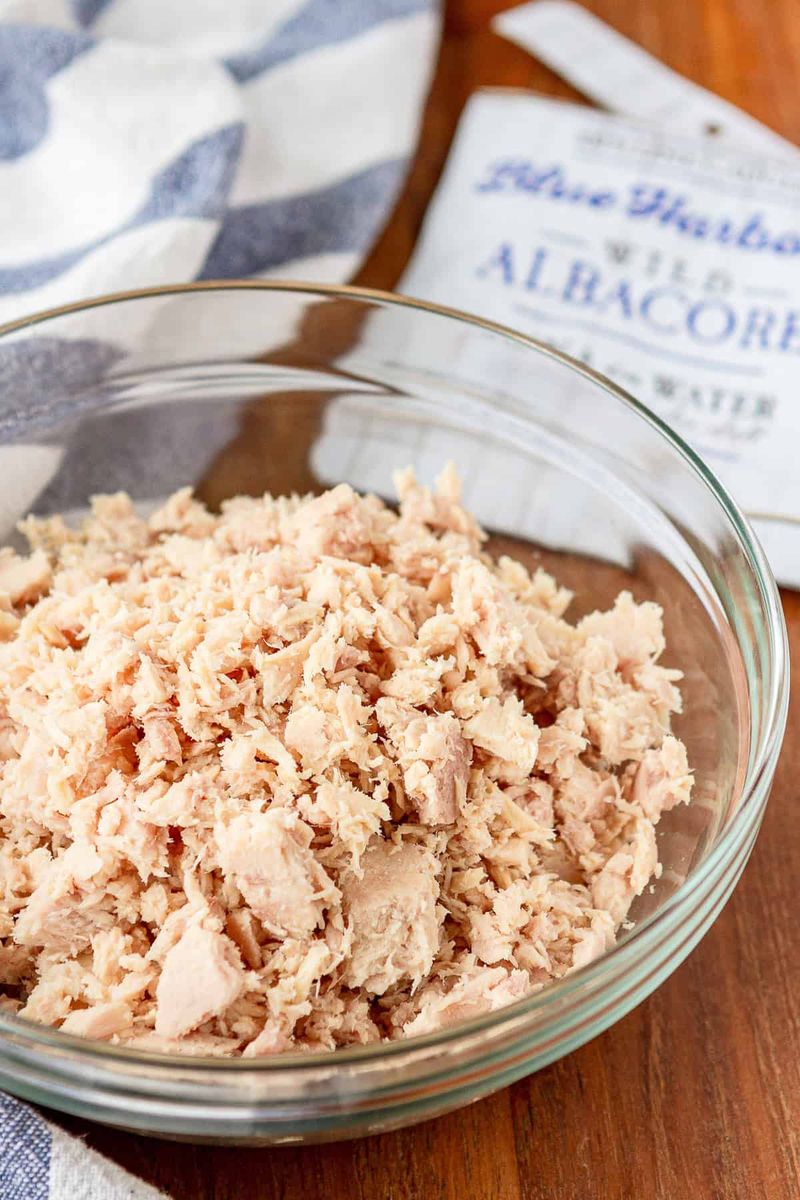
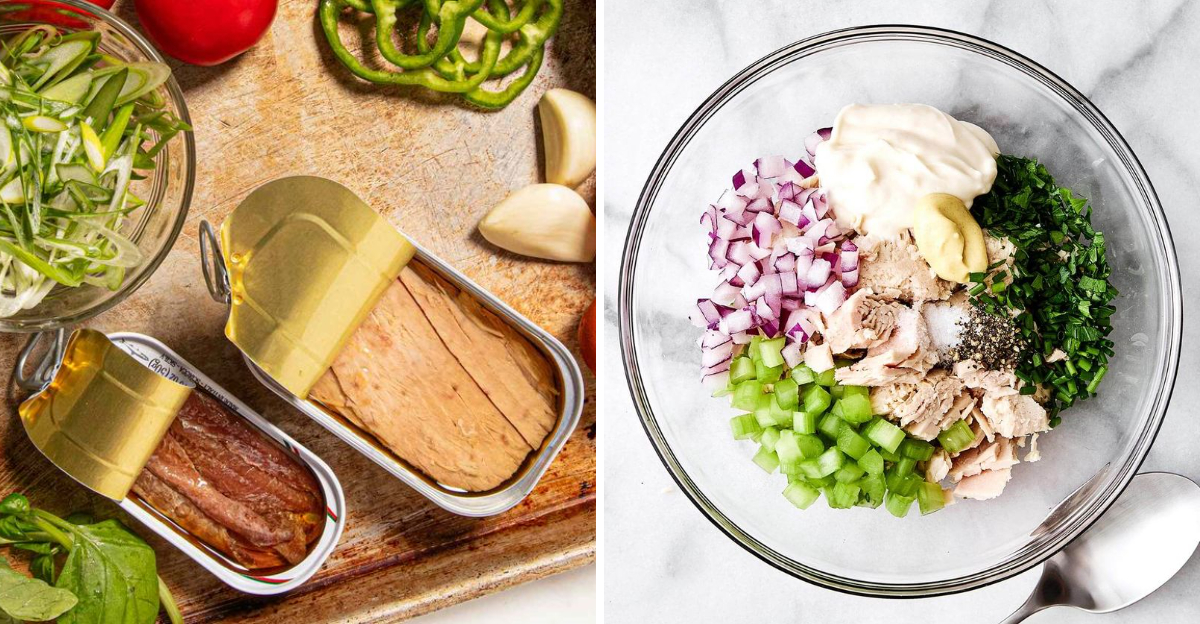
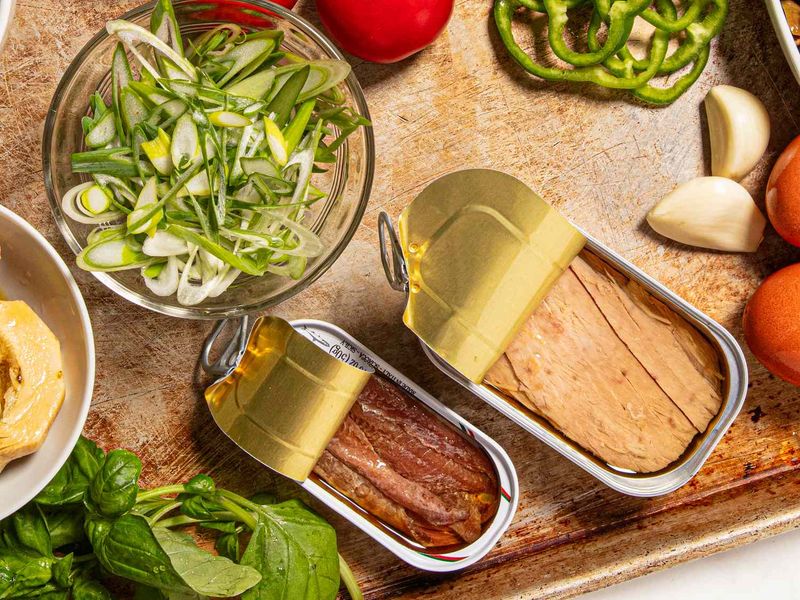
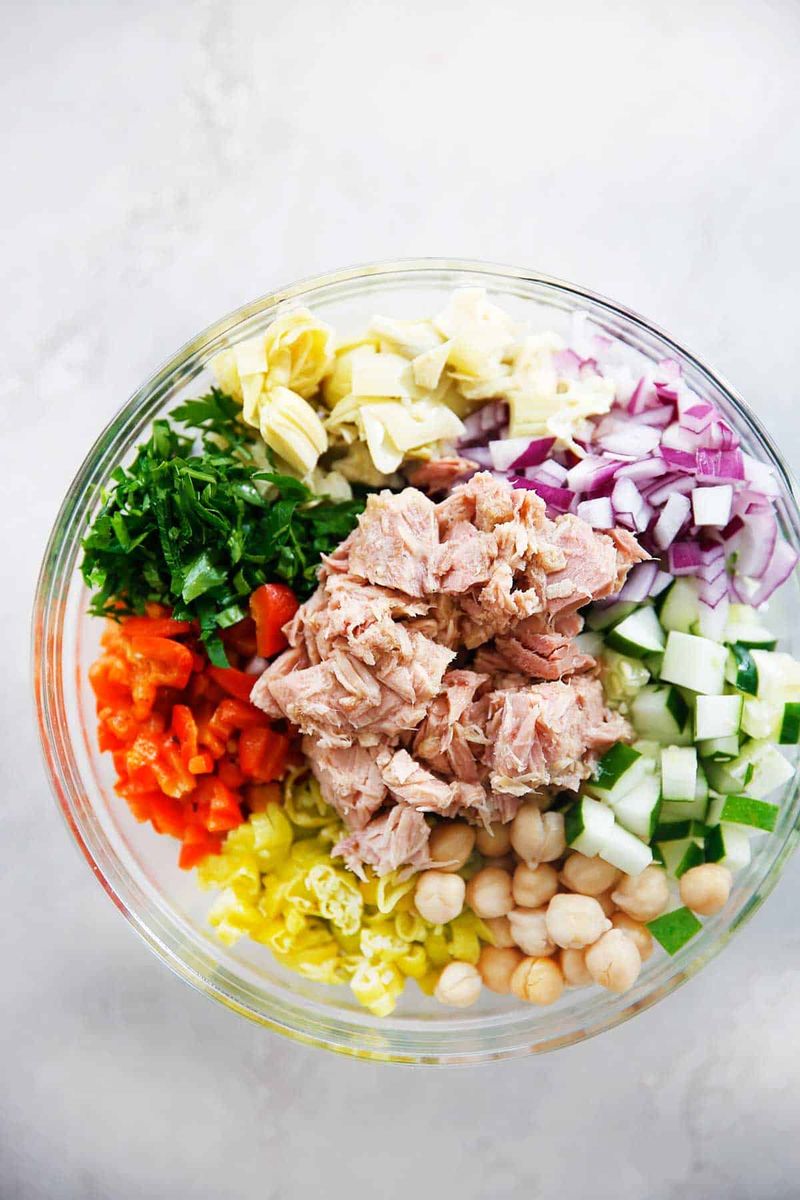
Choosing the right style sets you up for success from the start. Solid or chunk tuna holds its structure, so it works best for salads and patties where you want discrete pieces.
Flaked tuna breaks apart easily, which makes it ideal for casseroles, melts, and any mix that benefits from even distribution.
Check the label so you know exactly what you are getting. If you want satisfying bites in a salad, go for solid or chunk.
When you need tuna to blend smoothly with pasta, sauce, or cheese, flaked is your friend.
Match texture to the recipe, and you will get better flavor delivery and mouthfeel. That one choice prevents mushy lunches and crumbly patties.
2. Choose oil-packed for richer flavor
Oil-packed tuna usually tastes rounder and less sharp because the oil cushions and carries flavor. It also tends to be more tender, which helps when you are serving tuna simply with crackers or layering it onto a sandwich.
Water-packed is leaner, so it reads cleaner but can dry out faster.
Think about how you are using it. If the recipe has lots of fat already, water-packed might be fine.
If your dish is minimal, oil-packed provides built-in richness and helps with mouthfeel.
Do not waste that flavored oil either. If it smells good, use a spoonful in dressing or mayo to reinforce tuna flavor softly.
Small choices like this make your lunch sing.
3. Drain it well but not to death
Excess liquid dilutes dressings and turns salads watery, so draining thoroughly matters. Tilt the can, press gently with the lid or a spoon, and let it drip for a minute.
That quick step keeps seasonings potent and textures lively.
Still, do not squeeze tuna into sawdust. If it seems overly dry, fold in a little olive oil, mayo, or yogurt to bring it back.
You want juicy, not dripping, for balance.
Pay attention to how the drained tuna feels between your fingers. It should hold together but remain supple.
This mindful middle ground keeps tuna salad creamy and prevents patties from steaming instead of browning.
4. Press out extra liquid with a fork

For tuna melts, patties, and cakes, too much moisture is the enemy of browning. After draining, press tuna gently against the side of the bowl with a fork.
This pushes out lingering liquid so the mixture sears instead of steams.
You are not trying to pulverize it, just compact and dry the surface slightly. Less moisture also helps patties hold together during shaping and flipping.
You will notice tighter edges and a better crust.
If your mix still feels wet, add a teaspoon of breadcrumbs or crushed crackers. Then press again lightly.
It is a small move that pays off with crisp, golden results and far fewer crumbles in the pan.
5. Season canned tuna like you mean it
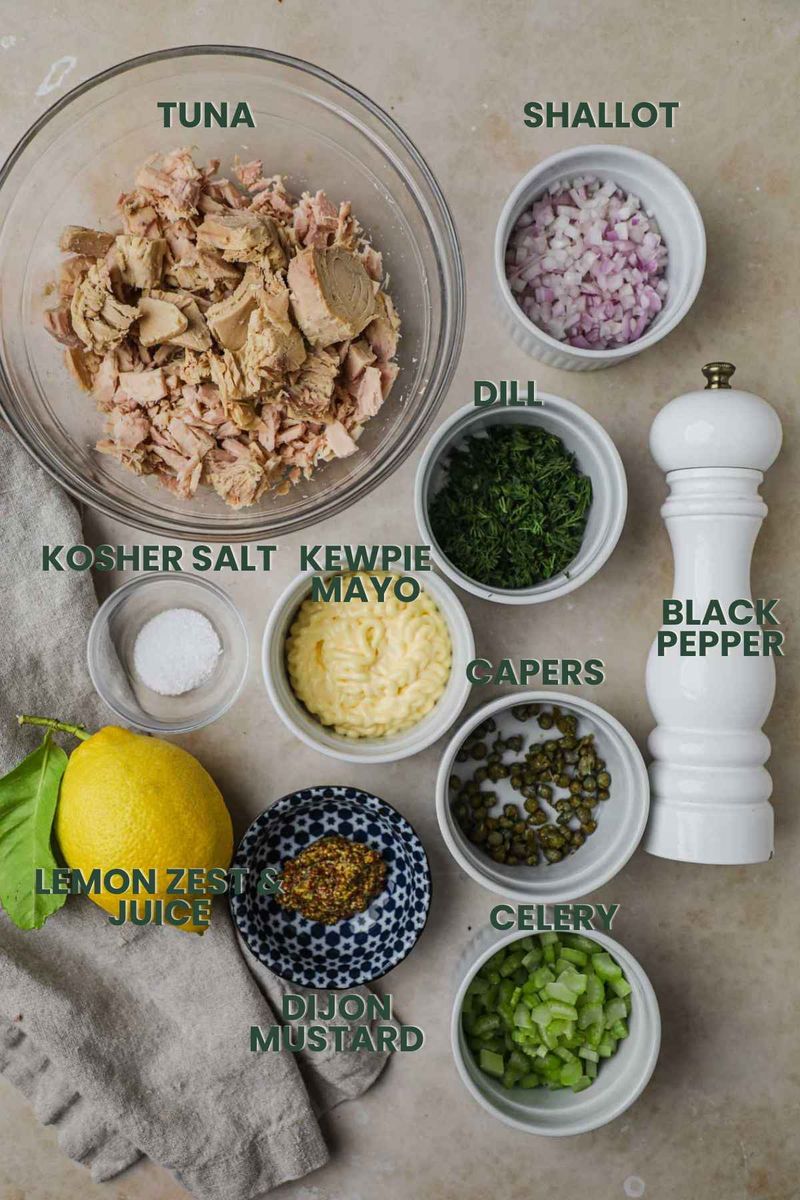
Tuna needs assertive seasoning to shine. Salt is essential, but acid and punchy elements make the biggest difference.
Think lemon juice, vinegar, Dijon, capers, pickles, hot sauce, or a bold spice blend to cut through richness and temper any canned flavor.
Start with a small pinch of salt, a squeeze of lemon, and a dab of mustard. Taste, then add capers or chopped pickles for brightness.
A few red pepper flakes or hot sauce can wake everything up without overwhelming.
Balance is your goal. Creamy ingredients can mute flavors fast, so season a touch heavier than you think.
Let the tuna rest a minute, taste again, and adjust until every bite pops.
6. Add acid at the end for freshness
A squeeze of lemon or splash of vinegar right before serving makes tuna taste fresher and less canned. Acid perks up aromatics and cuts through mayo or oil, resetting your palate between bites.
It is the fastest way to brighten a heavy mix.
Season early, then finish with acid late. The contrast creates dimension, especially in melts and pasta salads.
If you add it too early, the spark can fade or get buried.
Keep a lemon on the counter as a reminder. Rice vinegar, sherry vinegar, or white wine vinegar also work beautifully.
Add just enough to wake the dish without turning it sour, and you will notice a clean, lively finish.
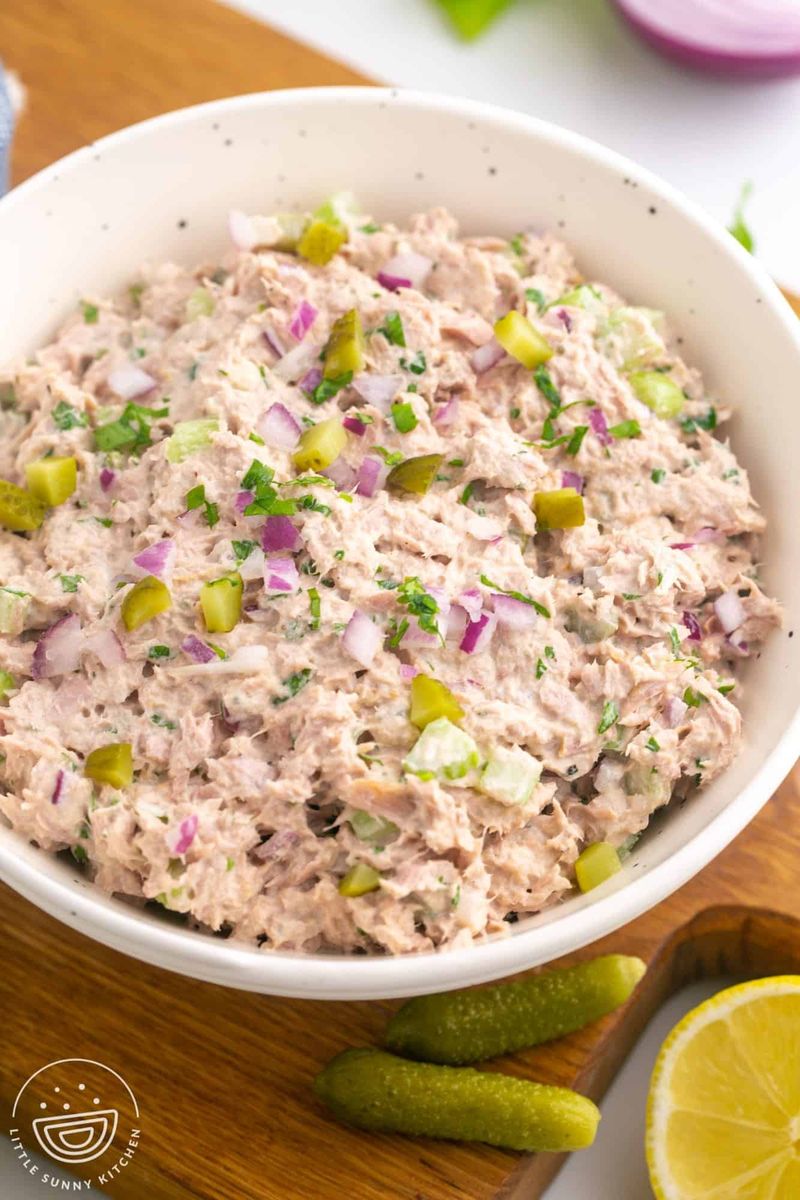
7. Use crunchy add-ins for texture
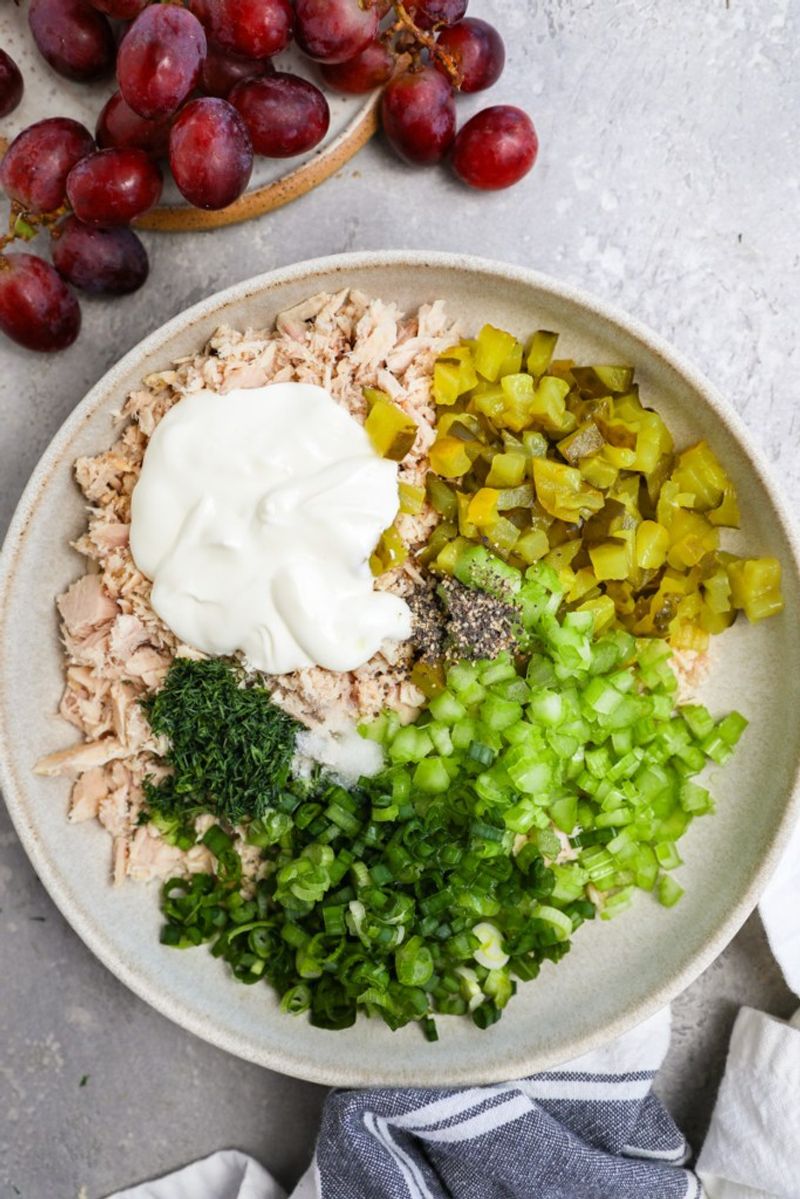
Creamy tuna needs contrast, and crunch delivers it. Celery, red onion, scallions, chopped pickles, cucumber, or radish bring snap and freshness that keeps each bite interesting.
The added texture prevents the dreaded mushy mouthfeel.
Dice ingredients small so they distribute evenly and do not overwhelm the tuna. Rinse red onion to tame sharpness if you prefer a gentler bite.
Pickles pull double duty, adding both acid and crunch.
Adjust amounts to match how you will serve it. For sandwiches, go slightly finer so the filling stacks neatly.
For salads or crackers, leave a few pieces bigger for satisfying pops of texture that make the whole dish feel brighter and more balanced.
8. Do not over-mayo your tuna

Mayo is a helper, not the main event. Start with a small spoonful, mix, then add more if you need it.
The goal is creamy, not swampy, so the tuna still tastes like tuna and the mix holds its shape.
Too much mayo drowns seasoning and makes sandwiches slip around. A measured approach lets lemon, herbs, and capers sparkle.
If you overshoot, add more tuna or a crunchy vegetable to rebalance.
Try blending mayo with olive oil or yogurt to lighten the texture while staying luscious. Think of mayo as a binder and flavor carrier rather than the star.
Your salad will feel fresher, less heavy, and more satisfying to eat.
9. Try Greek yogurt or half-and-half
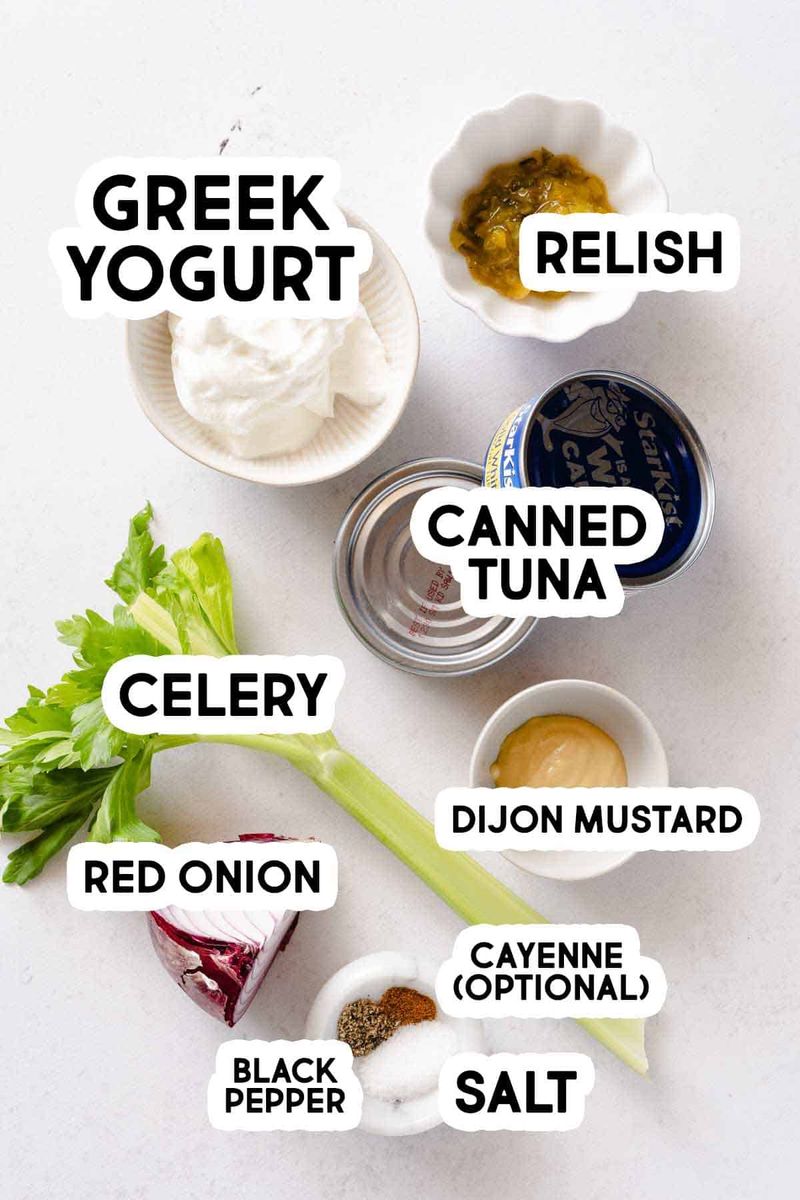
Greek yogurt brings creaminess, subtle tang, and extra protein without weighing things down. You can go half-and-half with mayo to keep familiar richness while gaining freshness.
This mix lets herbs and acid shine instead of getting smothered.
Whisk yogurt with a drizzle of olive oil for better mouthfeel. Season confidently, since yogurt can mute salt and spice slightly.
If it tastes flat, add a splash more lemon or a pinch of garlic powder.
Use this approach for lunches you want to feel good about. The texture stays silky, and the flavor profile feels bright and modern.
It is an easy swap that keeps the tuna front and center rather than hidden under heaviness.
10. Bind tuna cakes without gumminess
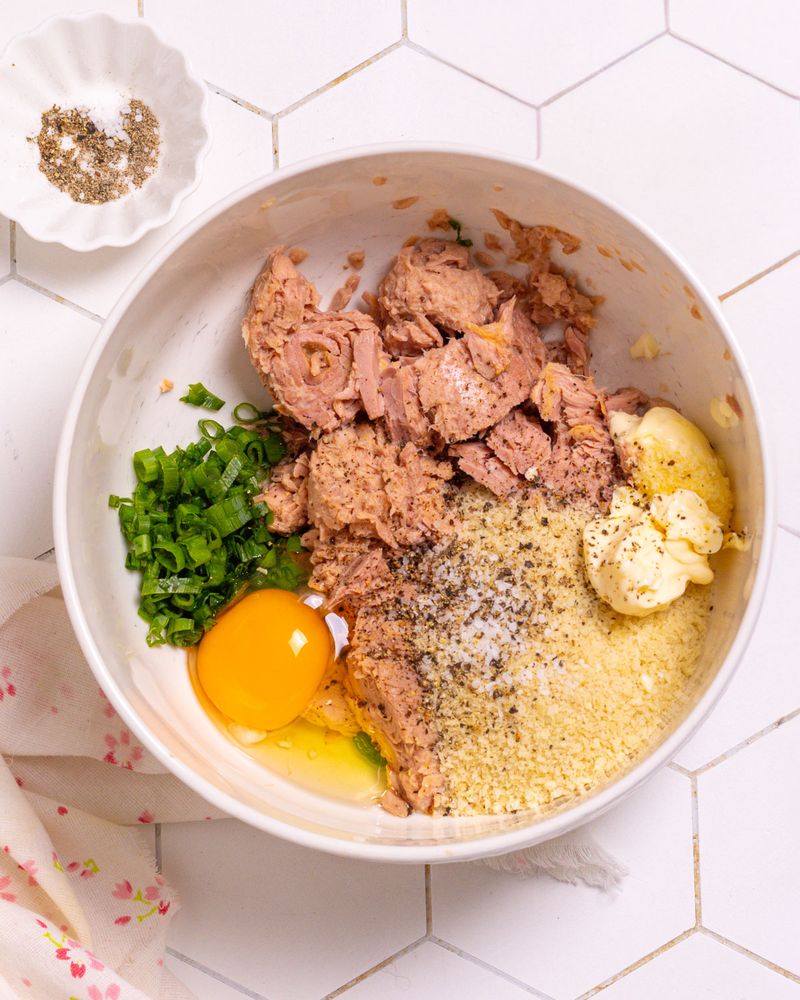
Tuna cakes need structure, not paste. An egg plus a small amount of breadcrumbs gives lift without turning gummy.
Alternatives like crushed crackers, mashed potato, or cooked rice can hold everything together while adding pleasant texture.
Hydrate breadcrumbs slightly with a splash of milk or mayo so they do not steal moisture from the fish. Mix gently to keep the cakes tender.
You should be able to press a patty that holds its edges but still feels light.
If the mixture crumbles, add a teaspoon more binder. If it feels dense, fold in a bit more tuna or herbs.
Aim for cohesive, airy patties that fry up golden and stay juicy.
11. Chill tuna cakes before cooking
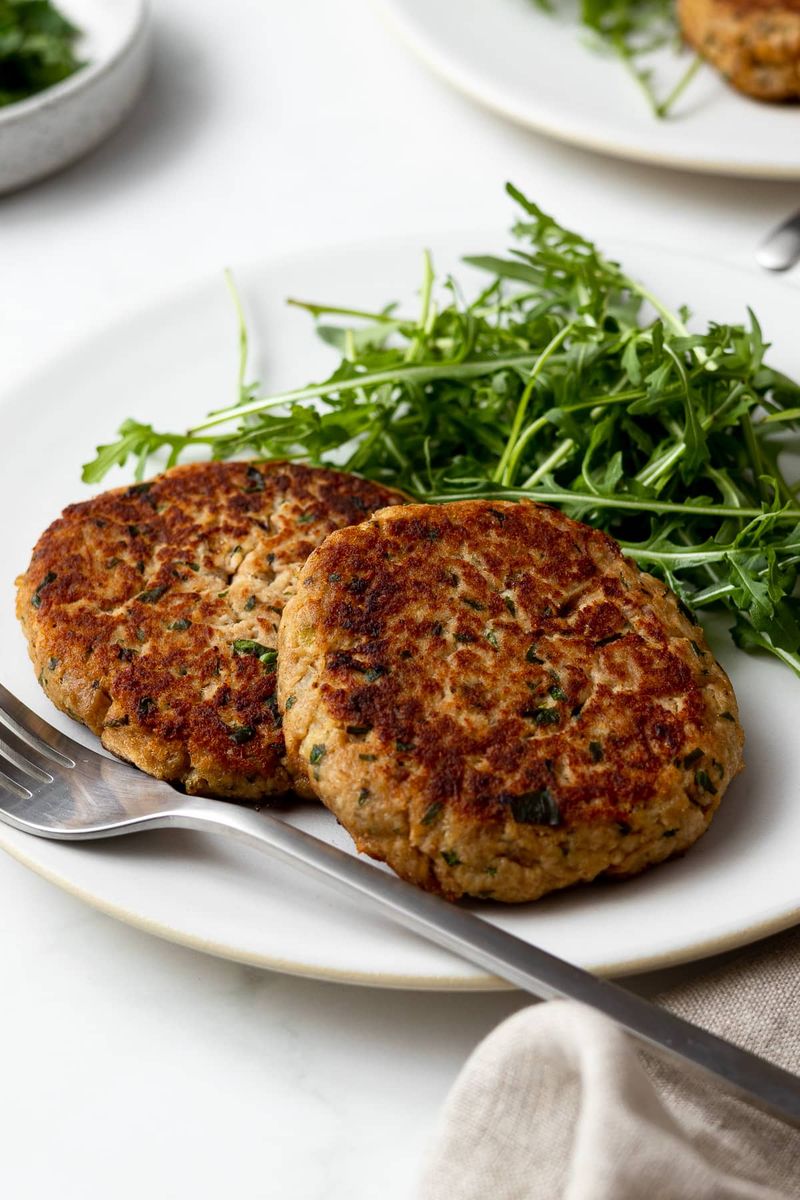
A short chill firms patties so they do not break apart in the pan. Even 15 to 20 minutes helps the binder set and the surface dry slightly for better browning.
This pause also gives flavors time to mingle.
Place patties on a lined tray, cover lightly, and refrigerate. If the mixture was very soft, extend the chill to 30 minutes.
You will notice easier flipping and cleaner edges.
When ready to cook, preheat the pan properly so the patties sear on contact. Avoid moving them too soon.
That initial crust is your insurance against sticking and crumbling, delivering a crisp exterior and a tender, moist center every time.
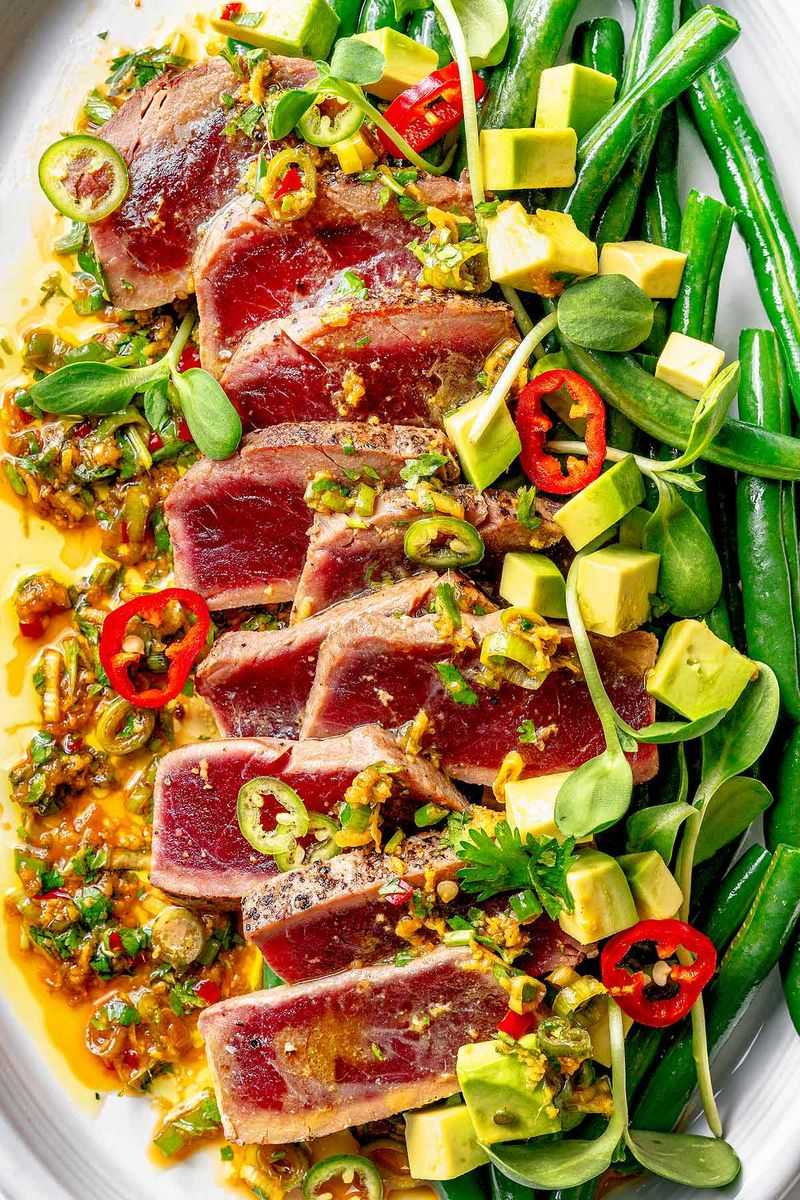
12. Sear fresh tuna fast and pink
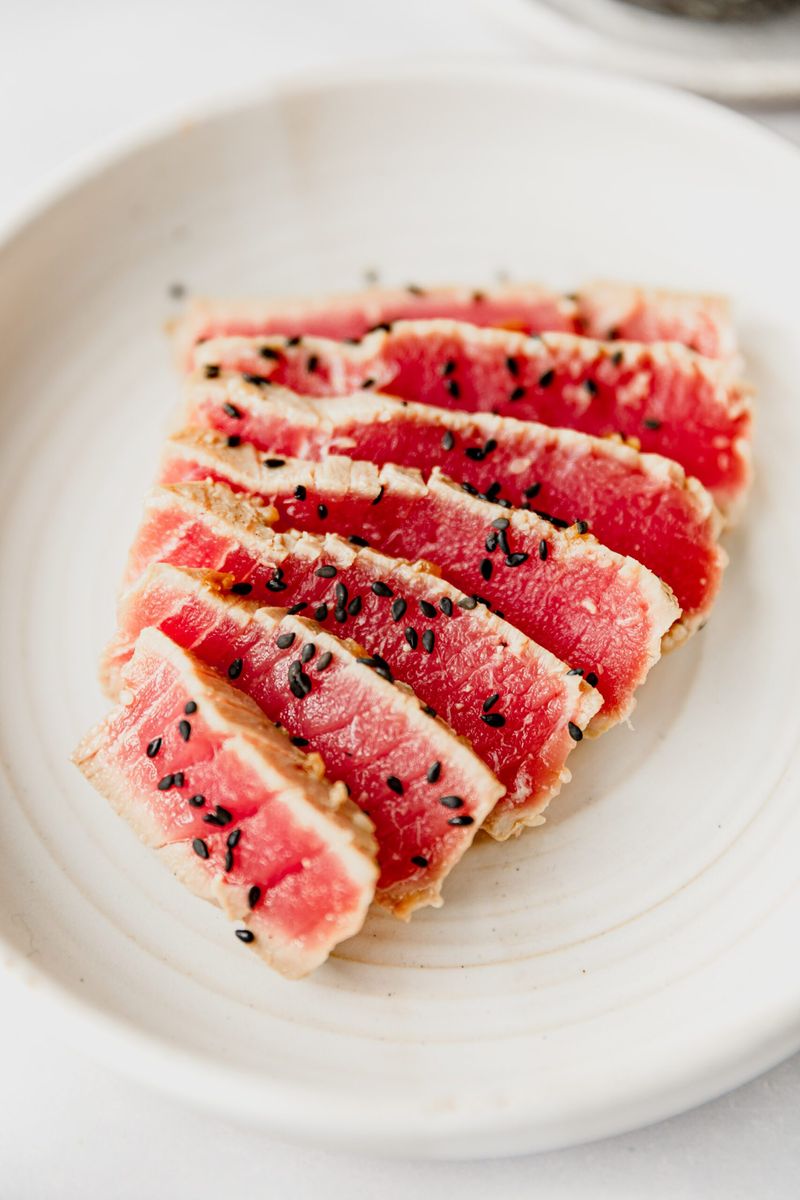
Fresh tuna turns dry if you linger. Use high heat and a quick sear so the center stays pink and silky.
Think 45 to 90 seconds per side for thinner steaks, a touch longer for thicker cuts, depending on doneness.
Preheat the pan until it is ripping hot, then add a thin film of high-heat oil. Lay the steak away from you and do not fidget.
A deep crust forms fast while the interior stays tender.
Rest briefly on a warm plate, then slice across the grain. The contrast between charred edges and rosy middle is the sweet spot.
It tastes luxurious, not dry, with minimal effort and maximum payoff.
13. Pat fresh tuna dry before seasoning
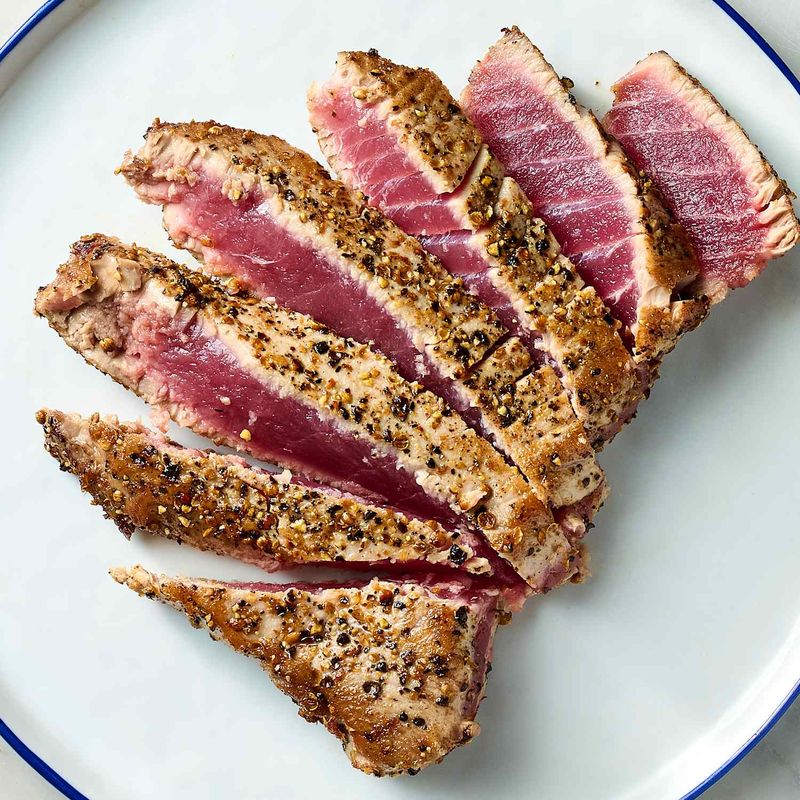
Surface moisture blocks browning and creates steam. Pat tuna steaks very dry with paper towels, then season right before they hit the pan.
Dry fish plus hot skillet equals a faster crust and cleaner, deeper flavor.
Salt draws moisture, so avoid salting too far ahead unless you plan to wipe and reseason. A light coat of oil can help spices adhere without burning.
Keep the surface matte, not glossy-wet.
This small prep step improves texture dramatically. You will get distinct grill or pan marks and less sticking.
The result is a seared exterior and a tender interior, proving that dryness on the outside translates to juiciness inside.
14. Use bold sauces with fresh tuna
Tuna loves big flavors that cut through its meaty richness. Pair seared steaks with sesame ginger, chimichurri, spicy mayo, wasabi soy, olive tapenade, or a lemon caper butter.
These sauces add contrast, aroma, and personality without hiding the fish.
Build a simple base: acid, fat, salt, and something punchy. For weeknights, whisk soy, rice vinegar, and sesame oil.
For guests, blitz herbs with olive oil and garlic for a fresh, green drizzle.
Serve sauces on the side so everyone controls intensity. A small spoonful goes far.
When the seasoning lands at the last moment, the tuna stays bright, and you get a restaurant-level finish at home with hardly any extra effort.
15. Build a better tuna melt
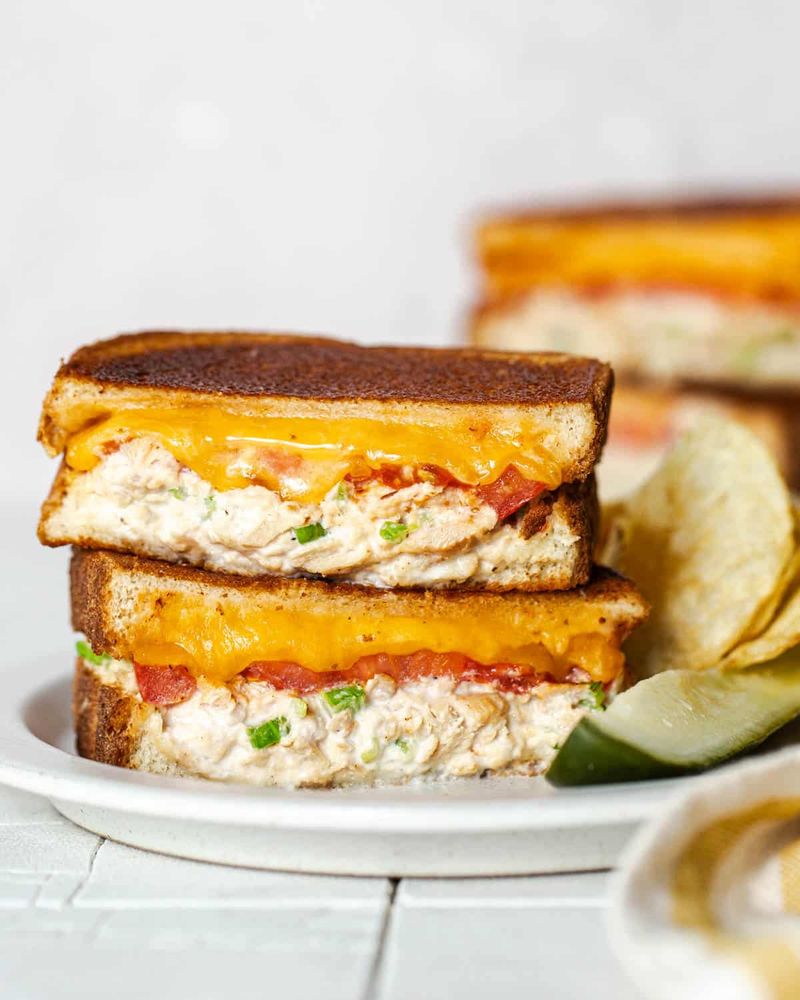
A great melt starts with well-drained, well-seasoned tuna and bread that can handle heat. Choose sturdy slices like sourdough, then layer cheese on both sides to create a gooey seal.
Press gently on the griddle for even browning.
Keep the filling modest so it does not spill. Add tomato slices only if well dried, or swap in pickled jalapenos for zing.
Cook over medium to medium-low heat to melt cheese without scorching the bread.
Finish with a squeeze of lemon or a swipe of Dijon before serving. That tiny boost cuts richness and keeps flavors lively.
The result is crisp, melty, and balanced, not soggy or overwhelming.
16. Pasta and tuna, simplified

For a fast dinner, save some pasta water and toss tuna with olive oil, garlic, capers, lemon zest, and parsley. The starchy water emulsifies a silky sauce that clings beautifully.
Use flaked or chunk tuna so it spreads evenly through the noodles.
Toast garlic gently to keep it sweet, not bitter. Finish with lemon juice at the end for brightness.
Red pepper flakes add warmth without stealing the show.
Do not overload the pan. You want glossy coating, not a heavy stew.
Taste for salt last, since capers and tuna bring salinity. This streamlined method delivers big flavor using pantry staples you likely already have.
17. Store leftovers safely and eat soon
Keep tuna salad cold in a sealed container and aim to finish it within a day or two. If it smells off, looks watery, or tastes metallic, do not force it.
Safety and quality drop fast with fish, especially once mixed with mayo or dairy.
Spoon out only what you will eat to avoid warming the entire batch repeatedly. Stir before serving and adjust seasoning with a little lemon or salt.
If the texture loosened, fold in a touch more tuna or crunchy veg.
When in doubt, toss it. Food safety peace of mind beats risking an upset stomach.
Treat leftovers with care and you will enjoy them at their best.