15 Years As A Chef Taught Me
Perfect grilled chicken is not an accident. It is the result of small choices that stack up to crispy skin, juicy centers, and bold flavor. If you have ever battled dry bites or flare ups, you are closer to a fix than you think. Steal these chef tested secrets and make your next cookout the one friends beg you to repeat.
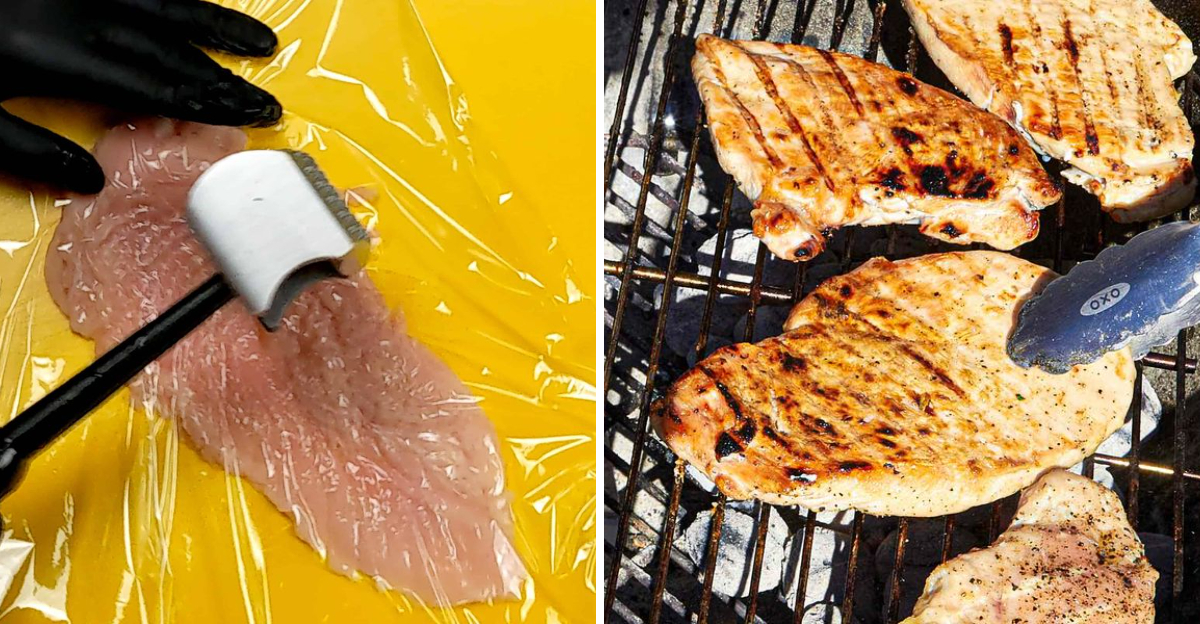
1. Start With Even Thickness
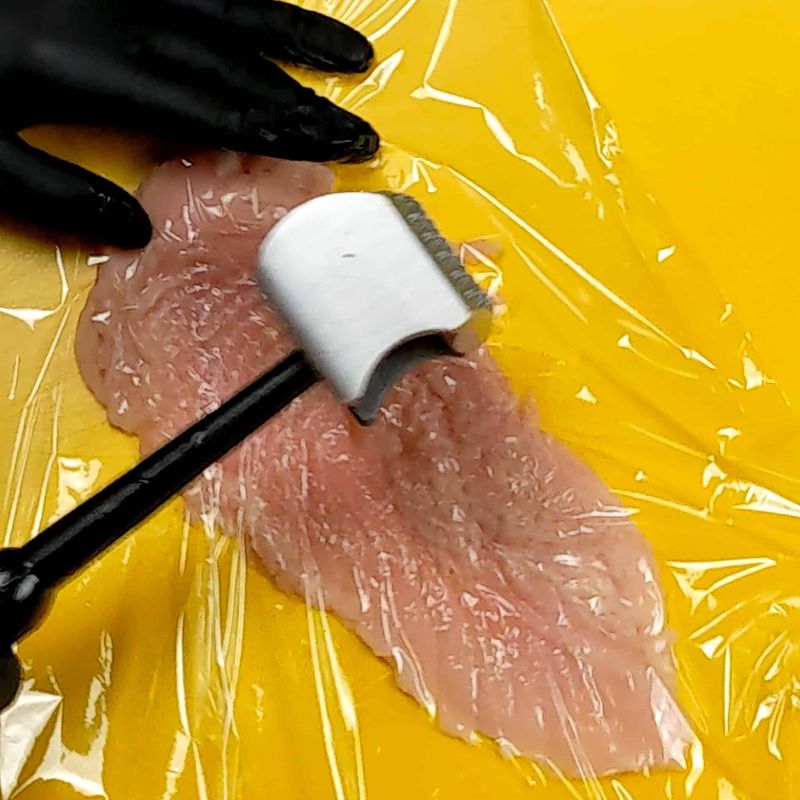
Uneven chicken cooks unevenly, so your first win is uniform thickness. Place breasts between plastic wrap and gently pound to about three quarters of an inch, or trim thighs for consistent size. This helps heat reach the center without overcooking the edges.
Consistent thickness also improves sear quality. You get predictable grill marks and less guesswork about doneness. It feels simple, but this one step dramatically reduces dryness and delivers tender bites across the board.
2. Dry Brining Beats Marinades
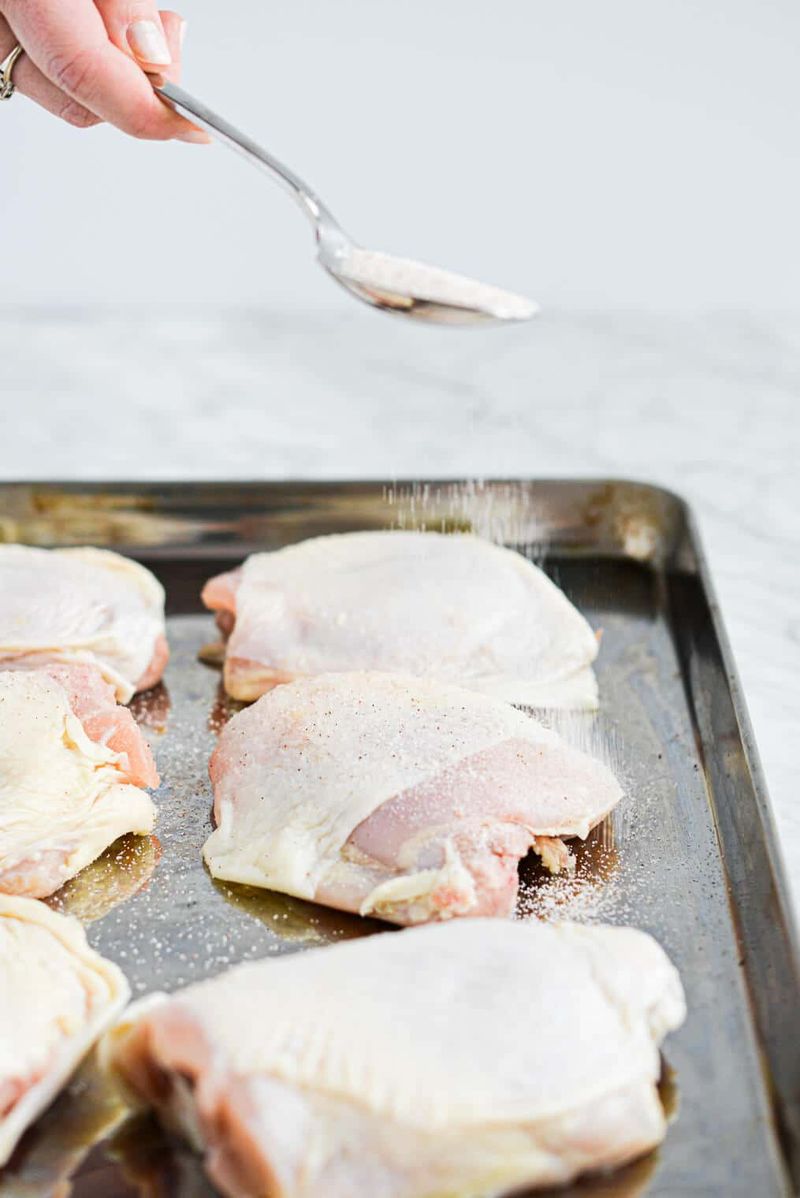
Salt the chicken directly and let it rest uncovered in the fridge for at least one hour, up to a day. Dry brining seasons deeply and helps proteins retain moisture. Unlike wet marinades, it will not dilute flavor or soften the exterior.
Use about one percent salt by weight, plus optional sugar and spices. The surface dries slightly, setting you up for better browning. Add a quick oil and spice rub right before grilling to layer flavor without sabotaging texture.
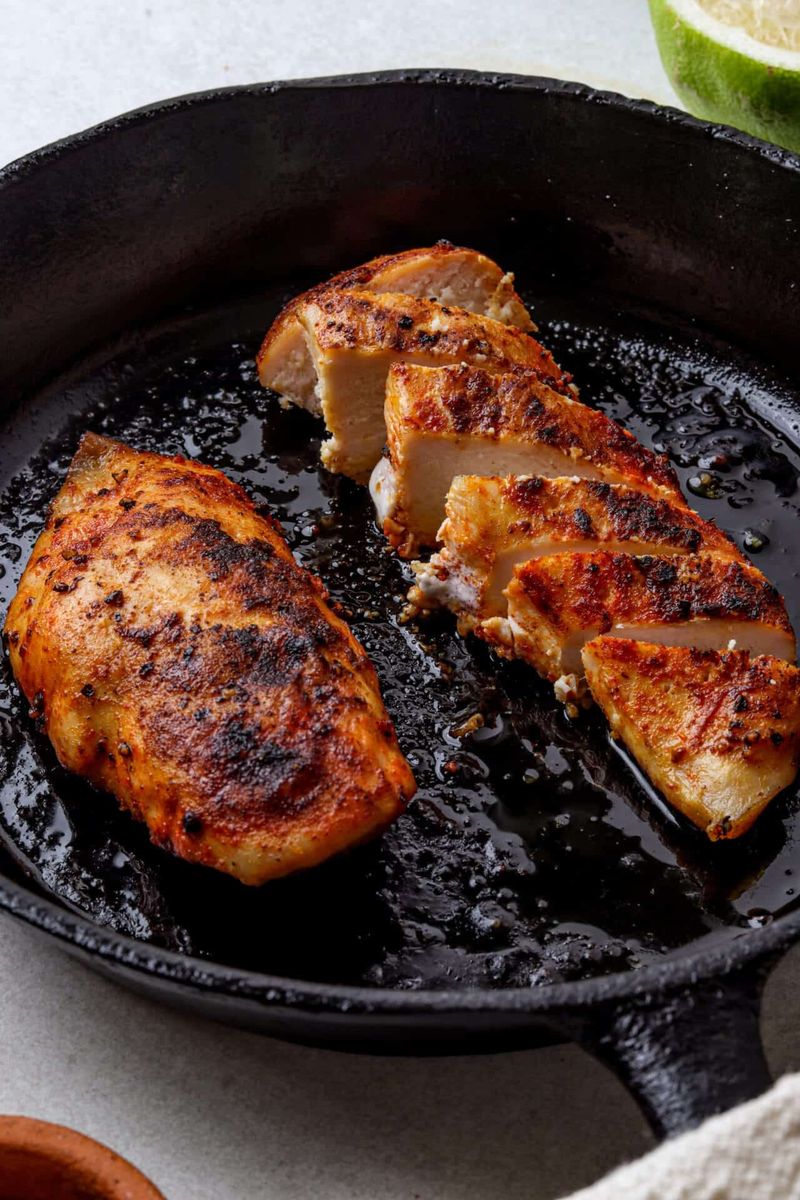
3. Pat Dry For Better Sear
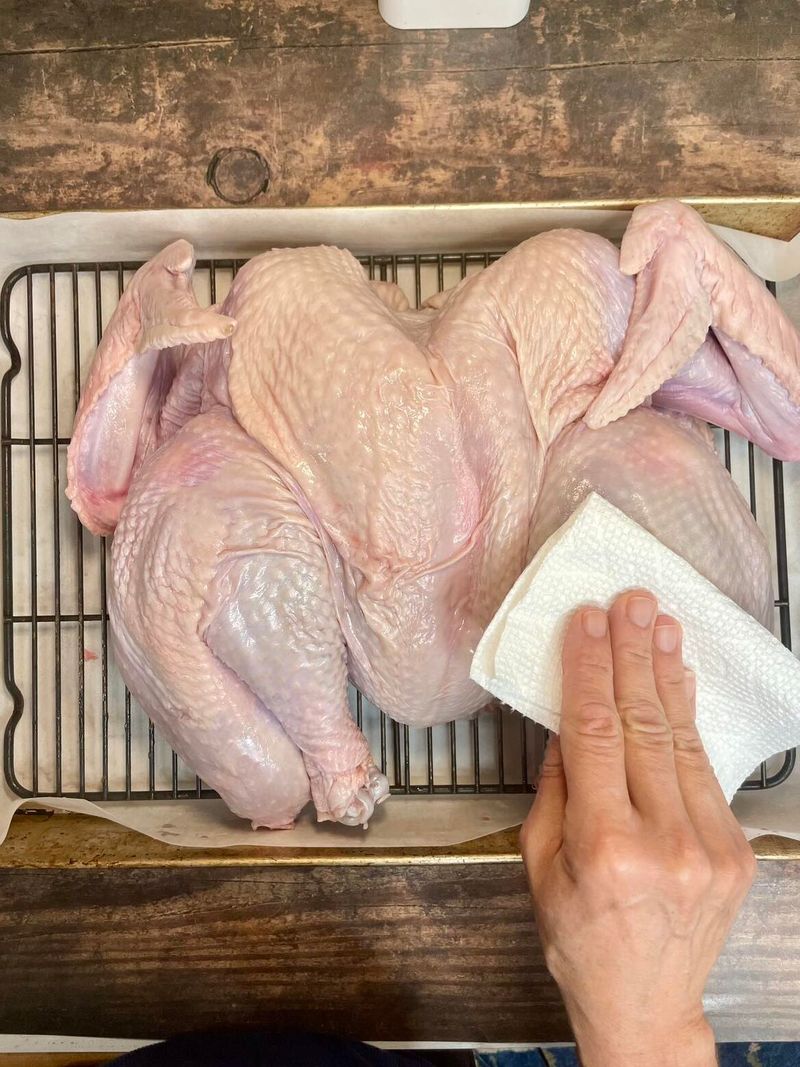
Water is the enemy of browning. After brining or marinating, pat the chicken completely dry with paper towels. A dry surface sets you up for fast Maillard reaction and crisp edges.
If the chicken is wet, it steams and sticks. Drying also reduces flare ups since less sugary liquid drips into the fire. When the surface is matte and tacky, you are ready for clean grill marks and deep flavor.
4. Two Zone Heat Is Non Negotiable
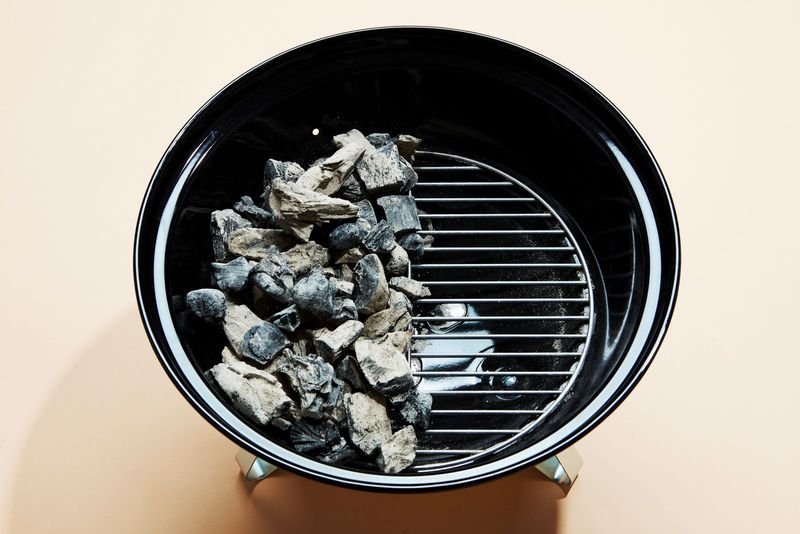
Set your grill with a hot side and a cooler side. Sear the chicken over high heat, then move it to the indirect zone to finish gently. This prevents burnt skin and raw centers.
On charcoal, bank coals to one side. On gas, run one burner high and keep one low. The cooler zone becomes your safety net for flare ups and consistent doneness without frantic flipping.
5. Oil Lightly, Season Boldly

Brush the chicken with a thin film of neutral oil right before it hits the grates. Too much oil drips, causes flare ups, and tastes acrid. A light coat helps spices bloom and prevents sticking.
Season assertively with salt, pepper, and one hero flavor like smoked paprika or lemon zest. Big flavors stand up to fire. Keep sugar moderate to avoid scorching and add sweet glazes at the end.
6. Do Not Fight The Sticking
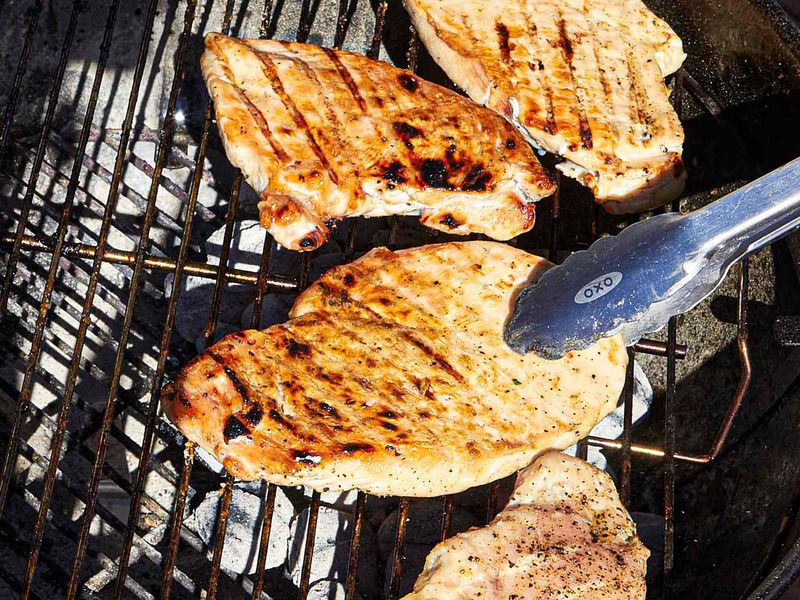
Chicken wants to stick until a crust forms. Lay it down and let it be. When the sear is ready, it releases easily with a gentle nudge.
Scrape and preheat the grates, then oil the food not the grill. Flip only when the surface lifts cleanly. This habit saves skin integrity and gives you restaurant style grill marks without tearing.
7. Glaze Late, Not Early
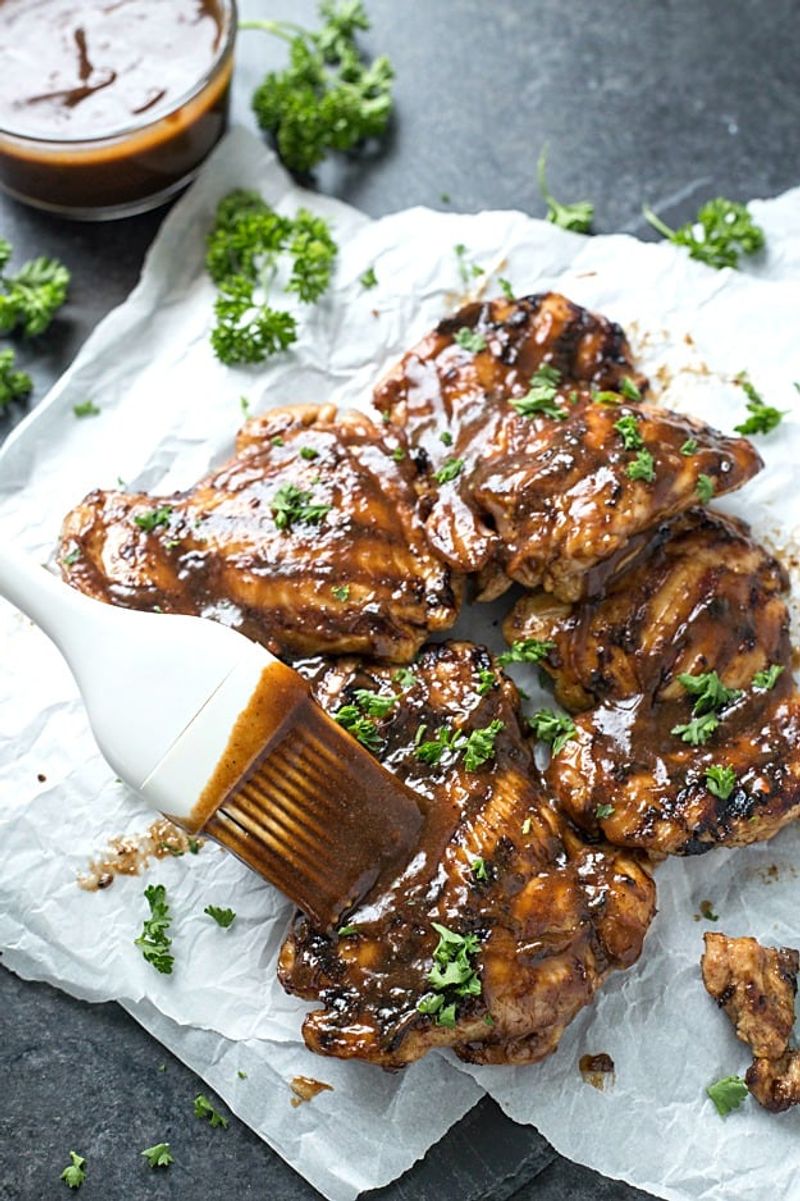
Sweet sauces scorch fast. If using barbecue sauce, honey, or teriyaki, wait until the last five minutes over indirect heat, then baste and set. You get lacquered shine without bitter burn.
Build layers by seasoning early and glazing late. For extra depth, finish over medium heat to set the glaze lightly. Brush, flip, brush again, then rest before slicing.
8. Use A Thermometer Every Time
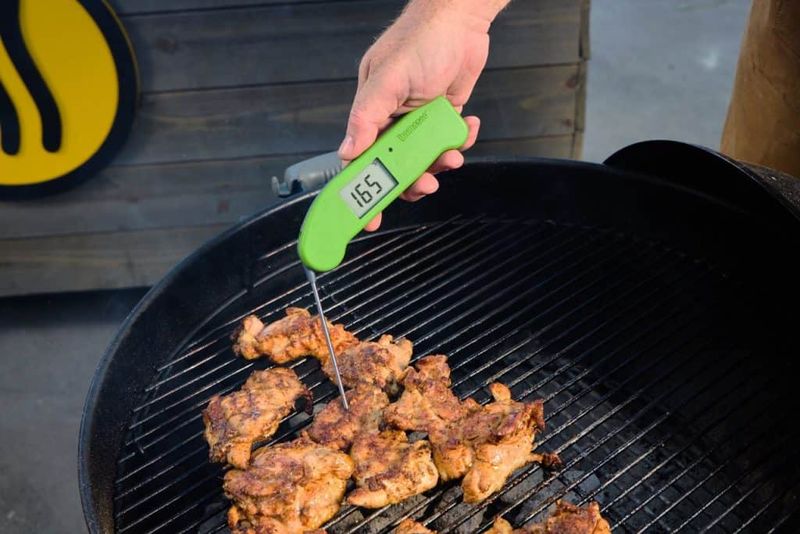
Guessing leads to dry chicken. Use an instant read thermometer and pull white meat at 160 F and dark meat at 175 F, allowing carryover to finish. Probe the thickest part without touching bone.
Consistent temps mean juicy results and safe food. Keep the lid closed between checks to retain heat. This one tool instantly upgrades your confidence and your chicken.
9. Rest And Recrisp
Resting lets juices redistribute so they stay in the meat, not on your cutting board. Tent loosely for five minutes, then flash over medium heat for 30 seconds per side to re tighten the skin. You get juiciness plus snap.
This small extra step rescues soggy skin from steam. It also wakes up glaze aromatics. Serve immediately after the quick recrisp for peak texture.
10. Finish With Brightness
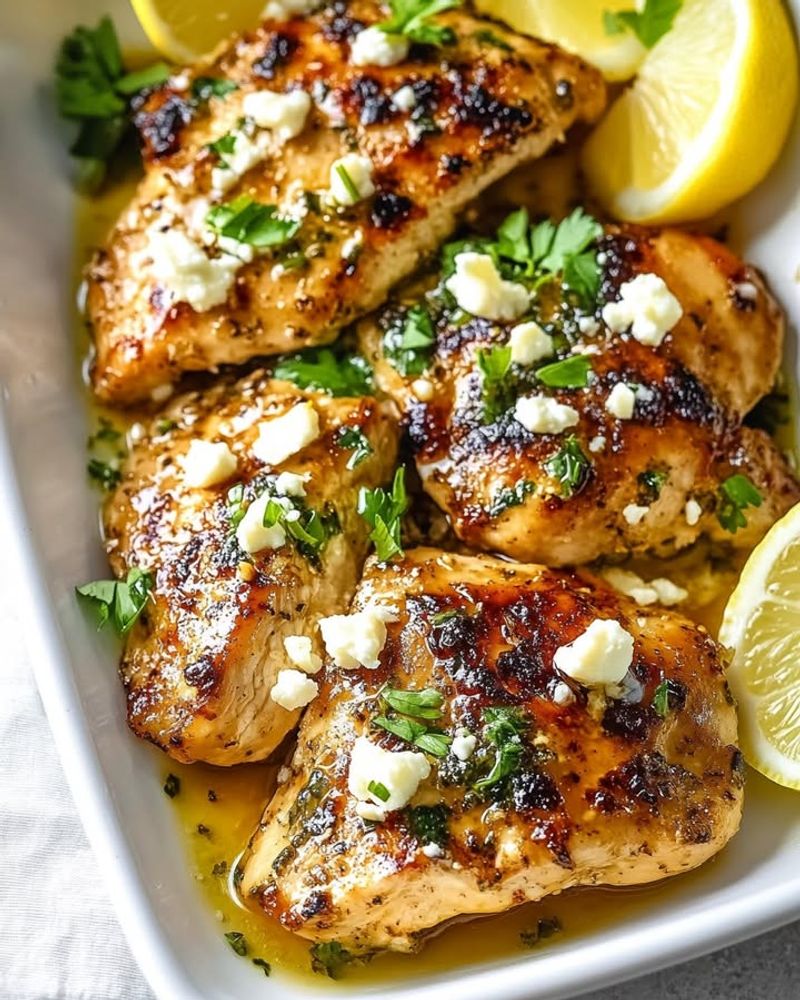
Fire loves acidity. A squeeze of lemon, a splash of sherry vinegar, or chopped herbs with olive oil makes flavors pop. Bright notes cut richness and make smoky edges sing.
Keep it simple and fresh. Zest, fresh chiles, or a quick garlic herb drizzle turn good chicken into craveable chicken. Add the garnish right before serving for maximum lift.