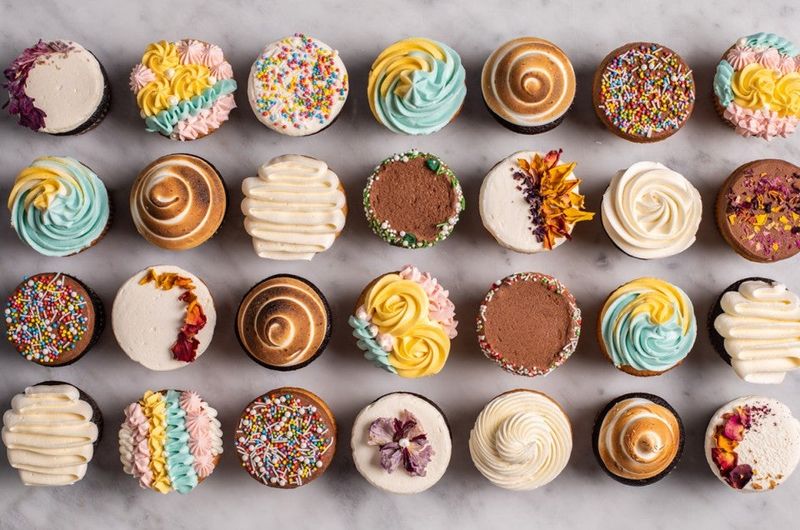
20 Simple Cupcake Decorating Ideas That Look Expert, Plus 10 You’ll Reuse Over And Over
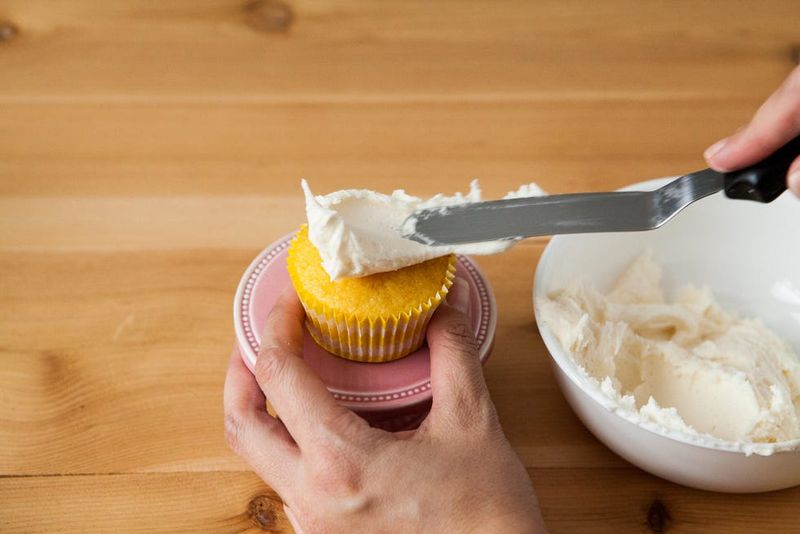
You do not need pastry school to make cupcakes look bakery level. With a few simple moves and smart shortcuts, you can turn any batch into a polished dessert tray.
These ideas are quick to learn, easy to repeat, and look impressive in photos and in person. Try one today, then mix and match for your signature style.
1. The classic tall swirl
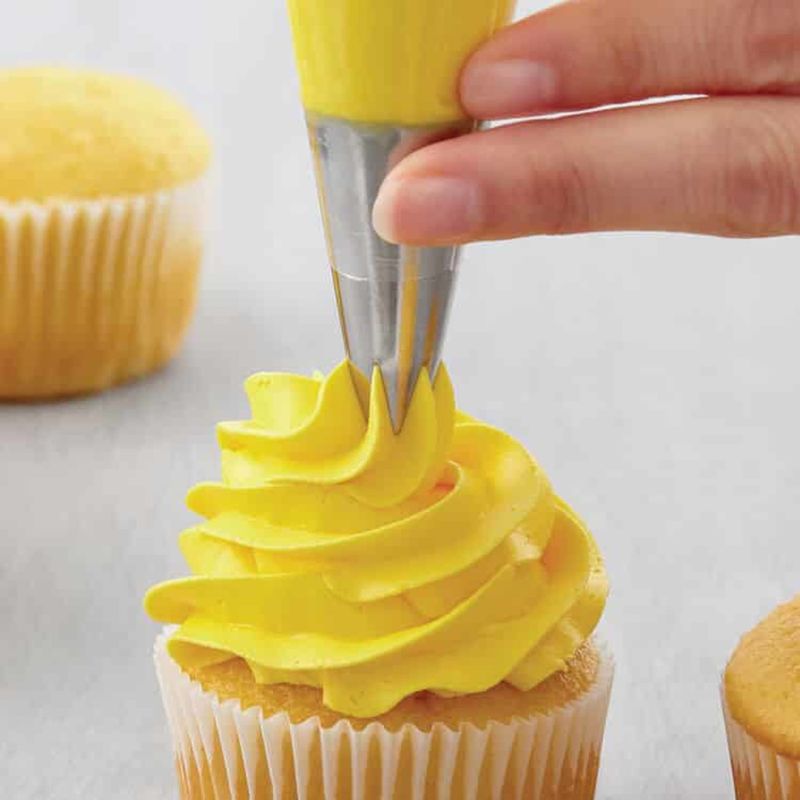
Pipe a tall swirl using a large star tip for instant bakery vibes. Start from the outer edge and move inward, then finish with a confident upward twist.
Keep pressure steady so the ridges look even and professional.
Chill your frosting slightly to hold shape, but not so firm that it tears. Practice on parchment first, then transfer the motion to cupcakes.
This technique photographs beautifully and stands up well to simple garnishes like a single berry.
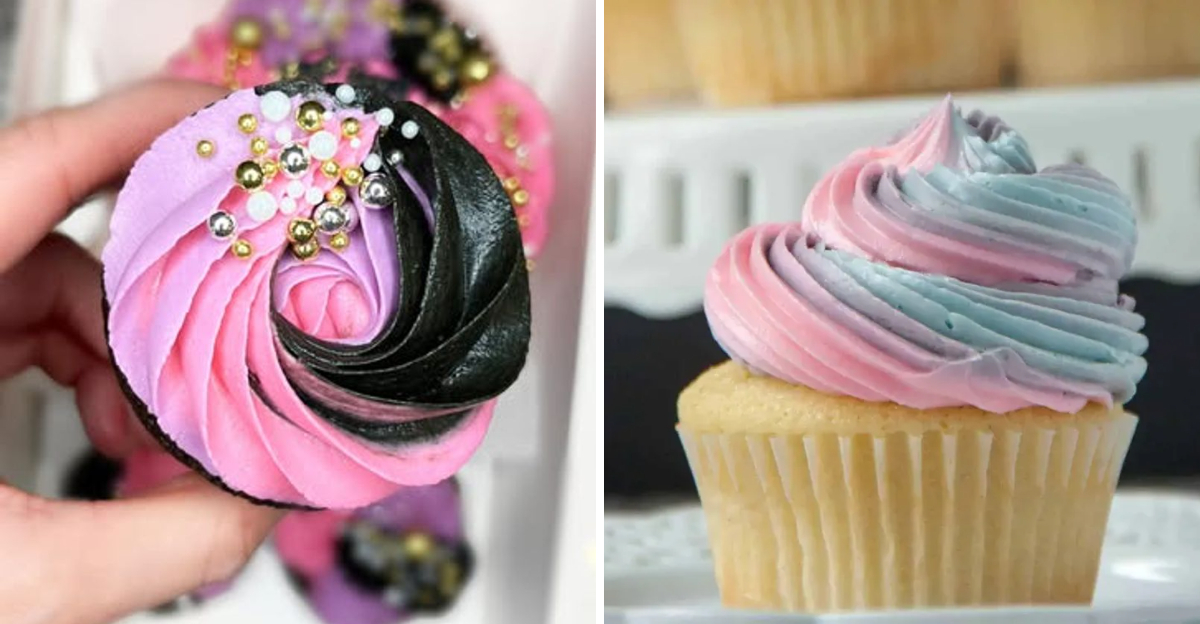
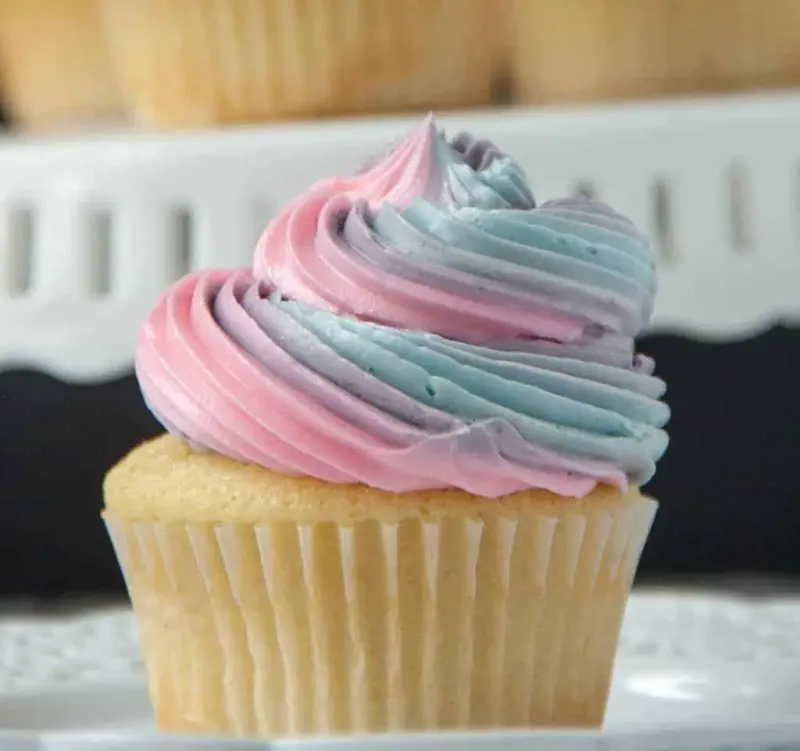
2. Two-tone swirl (no special skill)
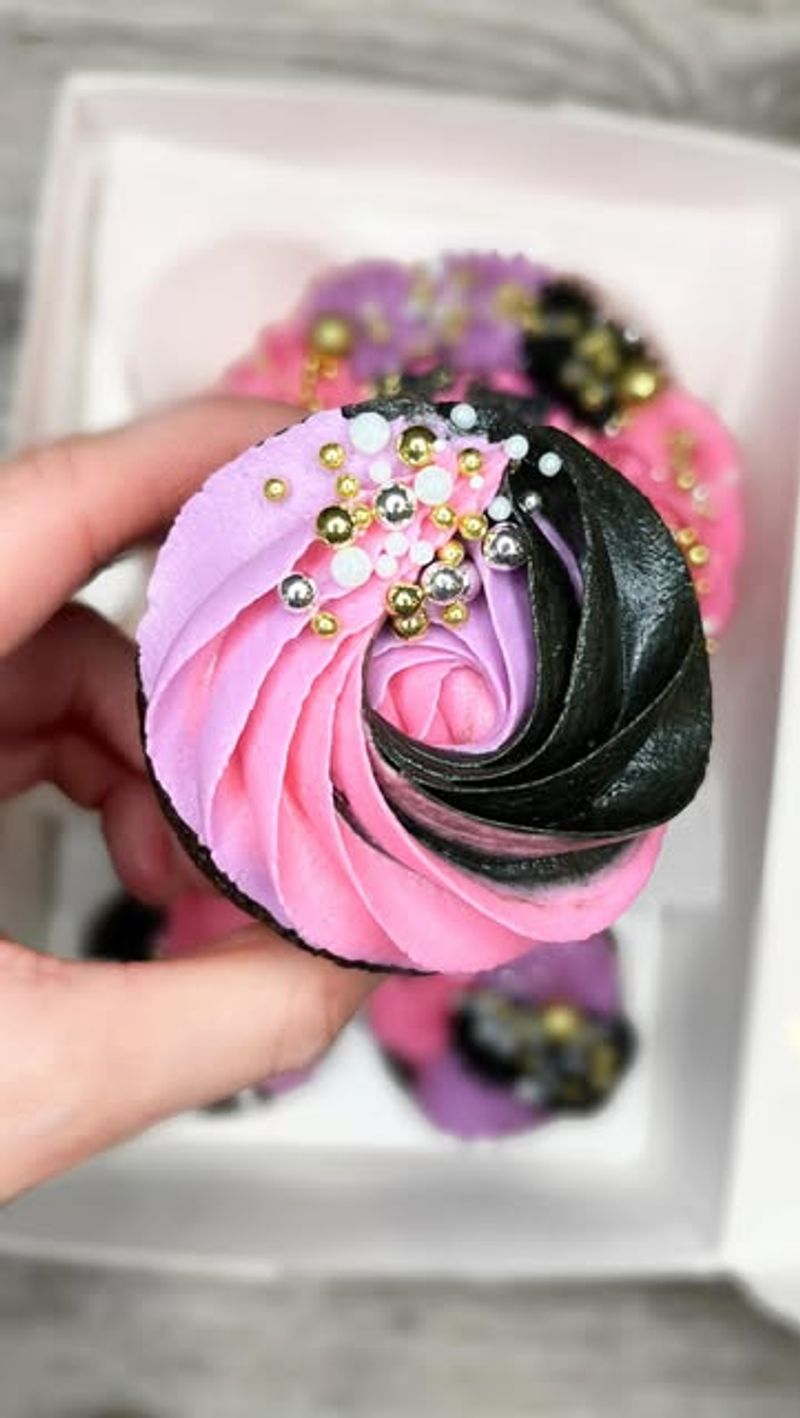
Spoon two frosting colors side by side in one piping bag for effortless drama. When you squeeze, the colors twist together into a striking swirl, no extra tips needed.
Choose hues that contrast or coordinate with your flavor theme.
Use a large open or star tip to let both colors show clearly. Scrape the bag sides smoothly so the seam runs straight and the colors stay even.
It is a fast way to make simple cupcakes look custom and party ready.
3. “Swoosh” frosting with a spoon
Add a generous dollop of frosting, then swipe a spoon in one clean curve. The motion leaves a sleek swoosh with a lifted tail that feels modern.
It is forgiving, fast, and surprisingly chic without any special tools.
Wipe the spoon between cupcakes for crisp lines. This look works best with thicker buttercreams that can hold shape.
Finish with a tiny garnish like citrus zest or a single chocolate curl to amplify that clean, editorial feel without clutter.
4. Rustic spatula swoops
Use a small offset spatula to push, pull, and flick frosting into casual peaks. The uneven waves look intentionally artsy, like rustic bakery cases.
This style hides imperfections and gives texture that catches light beautifully.
Work in three or four quick strokes per cupcake to avoid overworking. Aim for varied heights so it appears organic, not flat.
Sprinkle a light dusting of cocoa or a few chopped nuts to emphasize movement and make the whole top look alive.
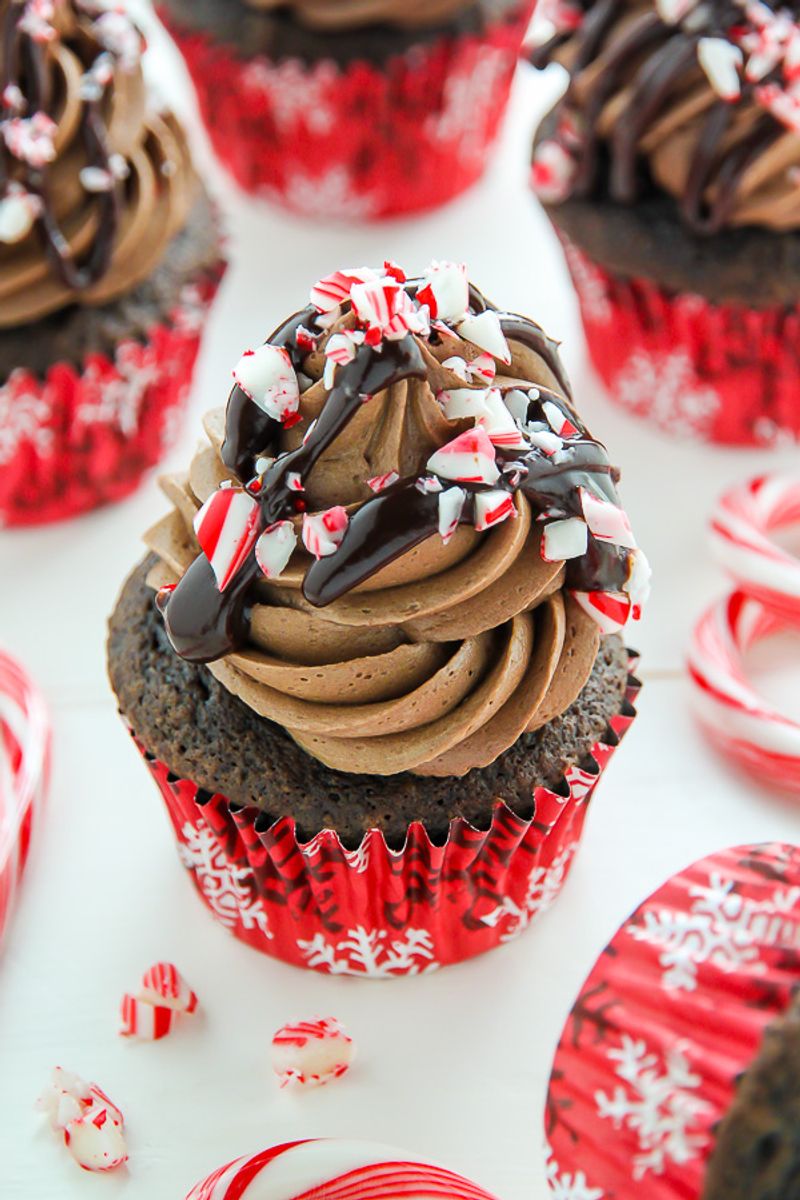
5. Drip glaze over frosted tops
Warm a simple ganache or caramel until pourable, then spoon tiny amounts around the edges. Let gravity create graceful drips while the center stays crowned.
The contrast between matte frosting and glossy glaze looks premium immediately.
Chill the frosted cupcakes first so drips set quickly and do not run. Test one drip to gauge thickness, then continue around the rim.
Finish with a sprinkle or a single garnish to balance the richness and keep everything looking deliberate, not messy.
6. Sprinkle “halo” around the edge
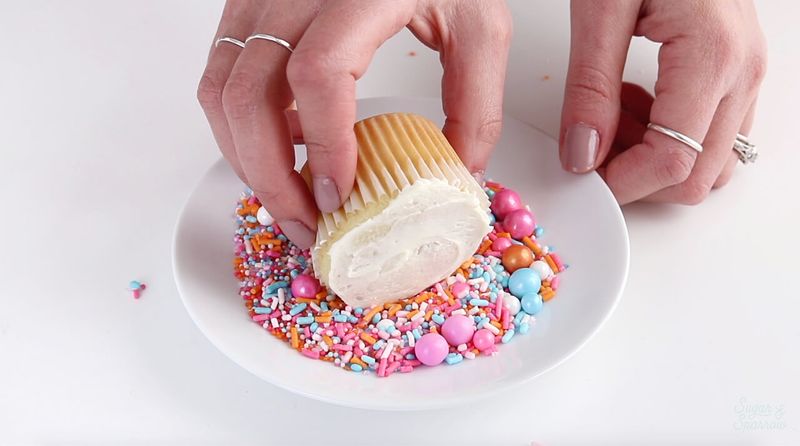
Press sprinkles just along the rim for a refined halo and a tidy center. This trick feels more grown up than dumping sprinkles everywhere.
The neat border frames any topper and keeps the design from looking busy.
Chill cupcakes briefly to firm frosting, then roll edges through sprinkles or press by hand. Choose a single color for a chic look, or a coordinated mix for parties.
Leave the center open for a berry, chocolate square, or swirl tail.
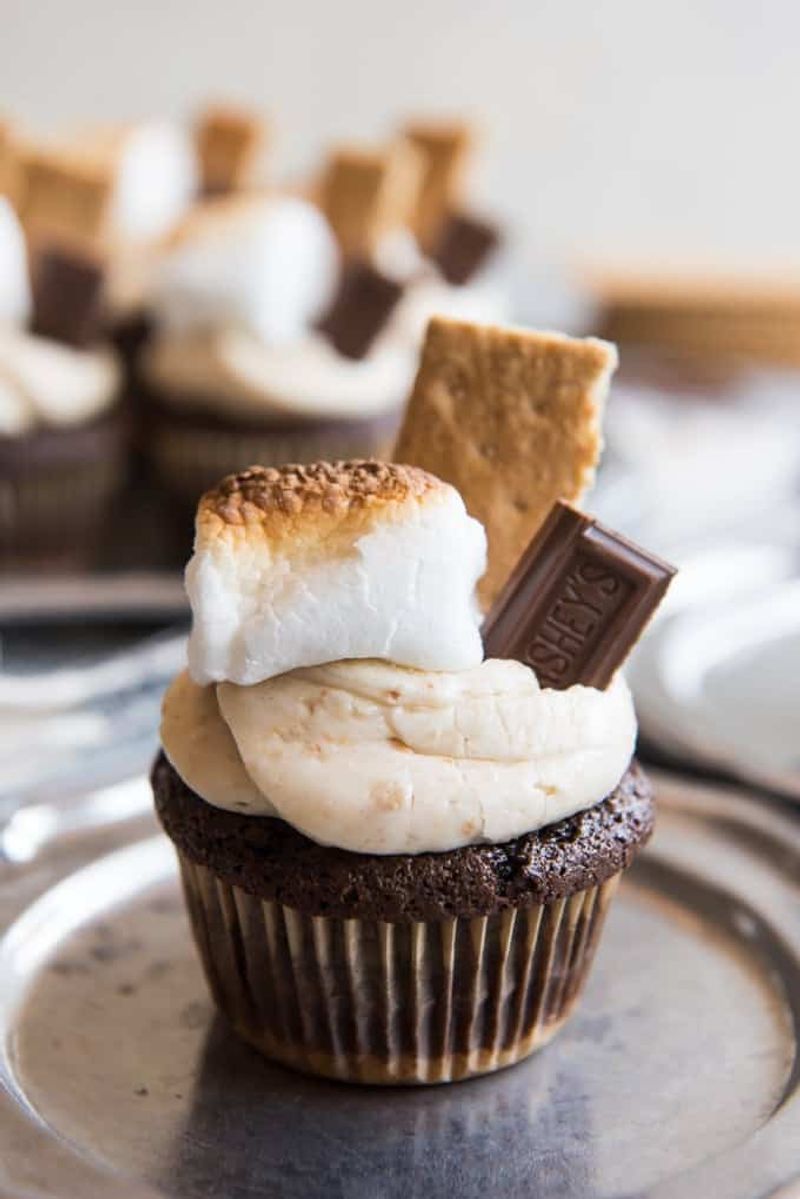
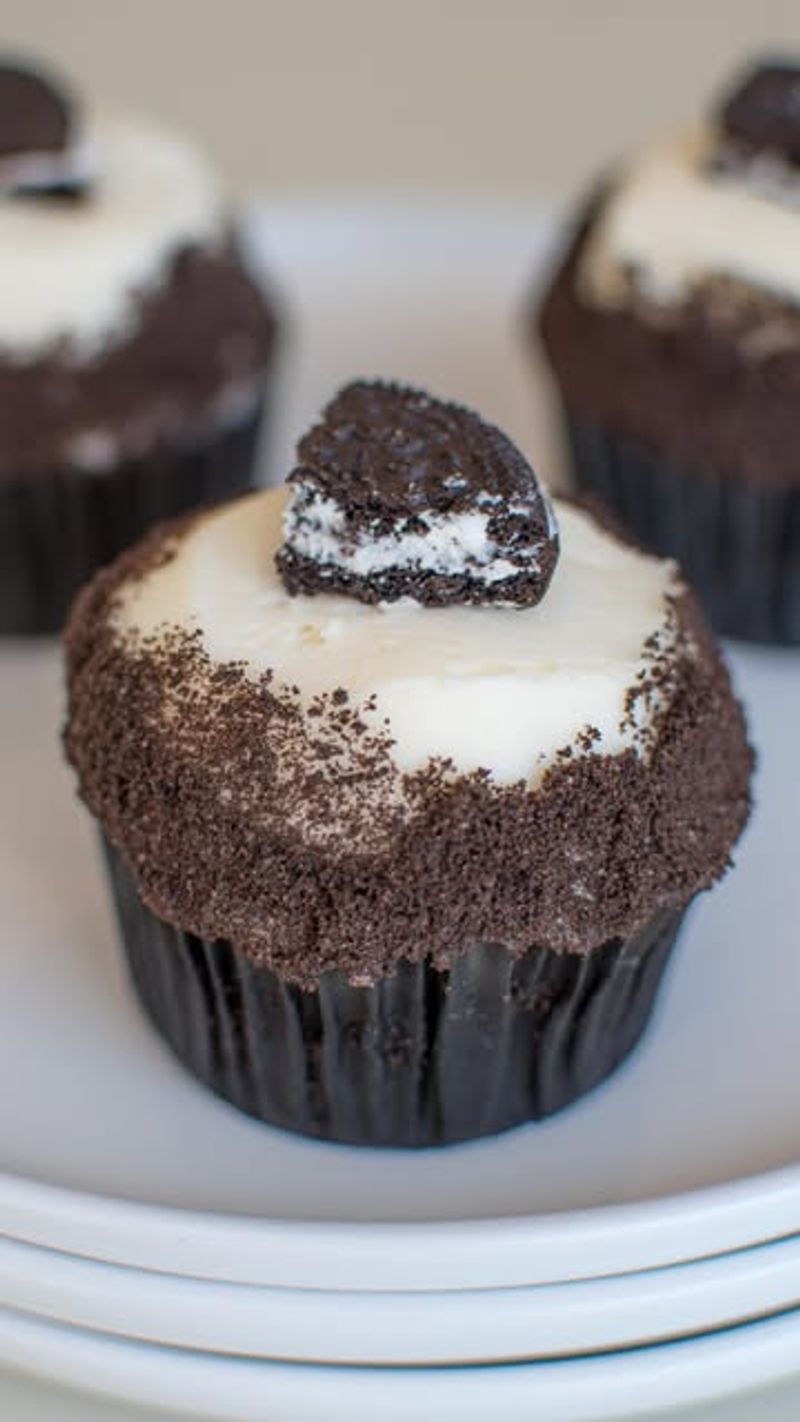
7. Mini cookie topper
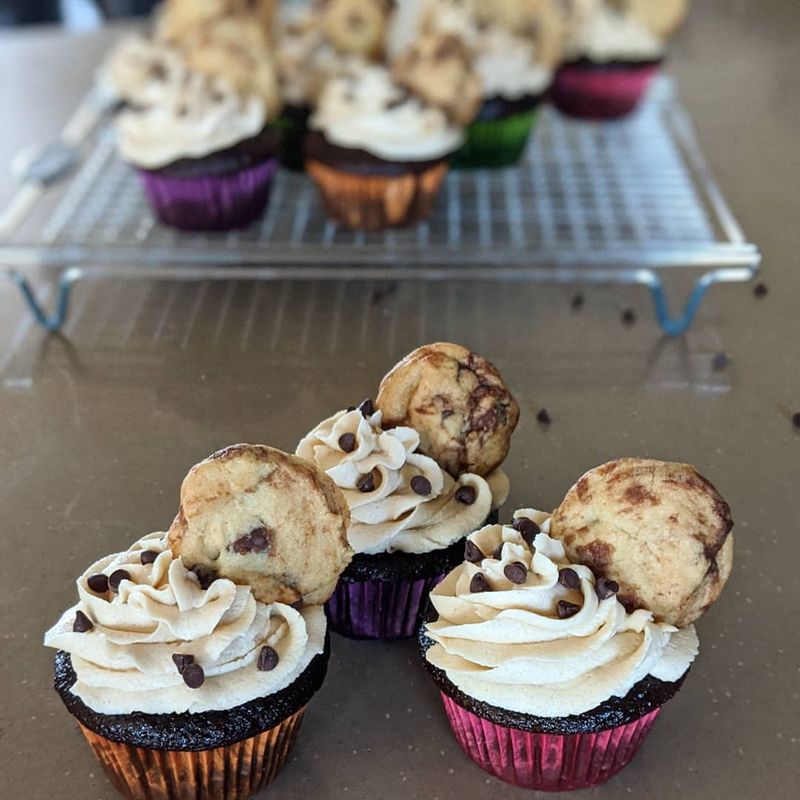
Push half a mini cookie into the frosting at an angle for instant height. It adds crunch, nostalgia, and a bakery feel without effort.
Chocolate chip, sandwich cookies, or shortbread all work and photograph adorably.
Keep the cookie small so it does not overwhelm the swirl. Pair with a sprinkle halo or drizzle for a layered look.
If the cookie is crumbly, dip the edge in melted chocolate first so it holds together and adds glossy contrast.
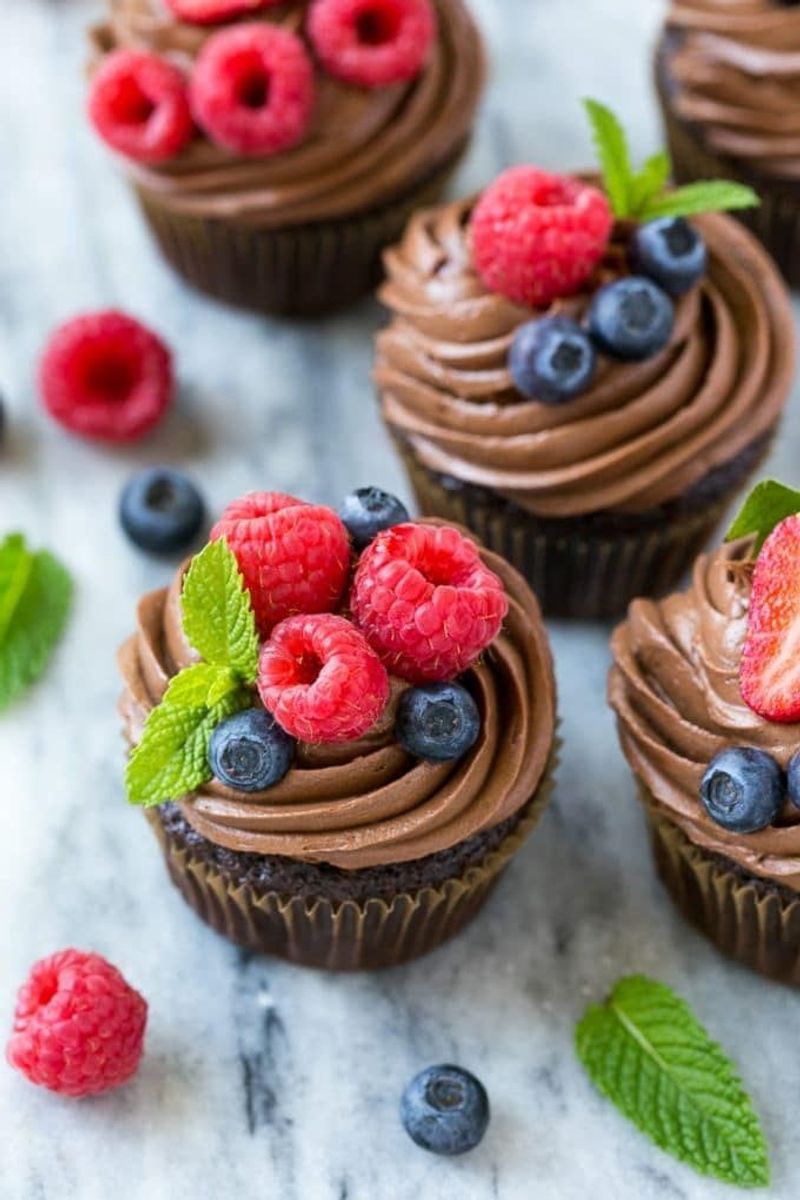
8. Fresh berry crown
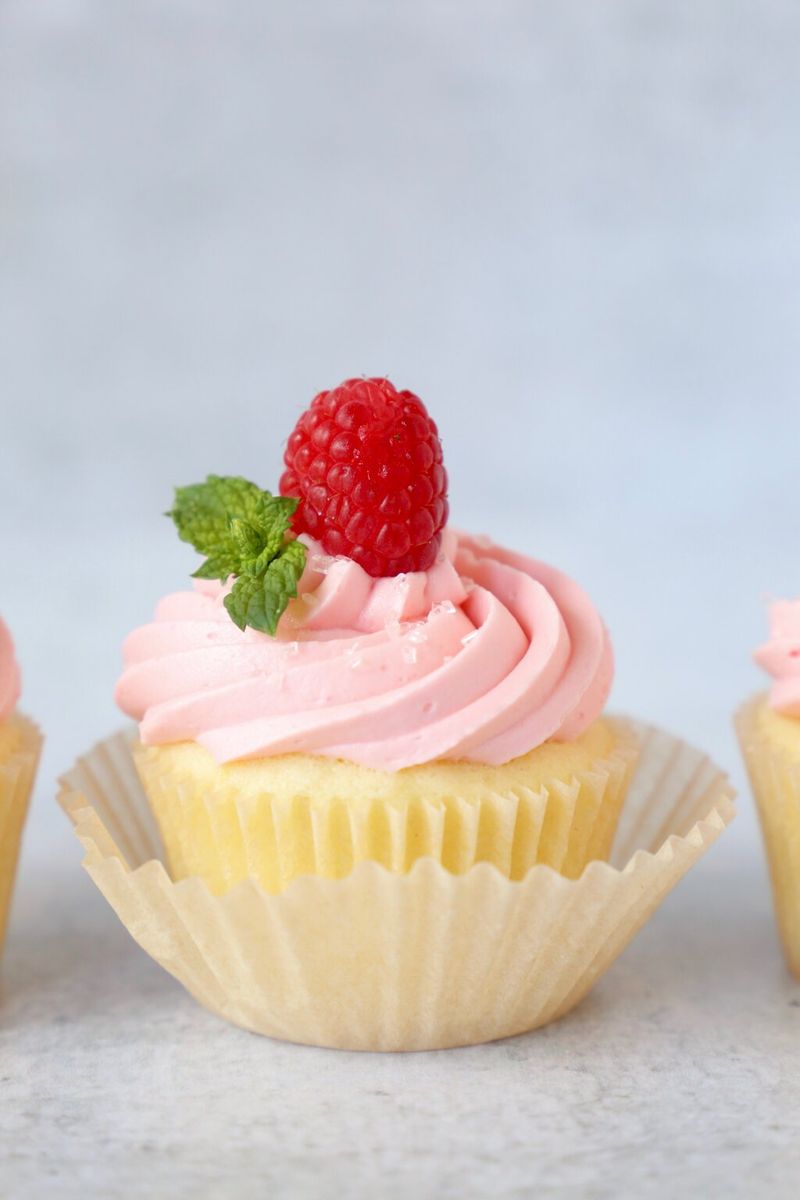
Place a raspberry or a trio of blueberries on top for effortless elegance. The pop of color and fresh shine make cupcakes look high end immediately.
Berries also cue flavor nicely when paired with lemon, vanilla, or chocolate bases.
Pat berries dry so they do not bleed or slide. Add a tiny mint leaf for contrast and fragrance.
If transporting, set berries at the venue to keep them vibrant. This is the easiest trick to make cupcakes feel seasonal and refined.
9. Citrus zest finish
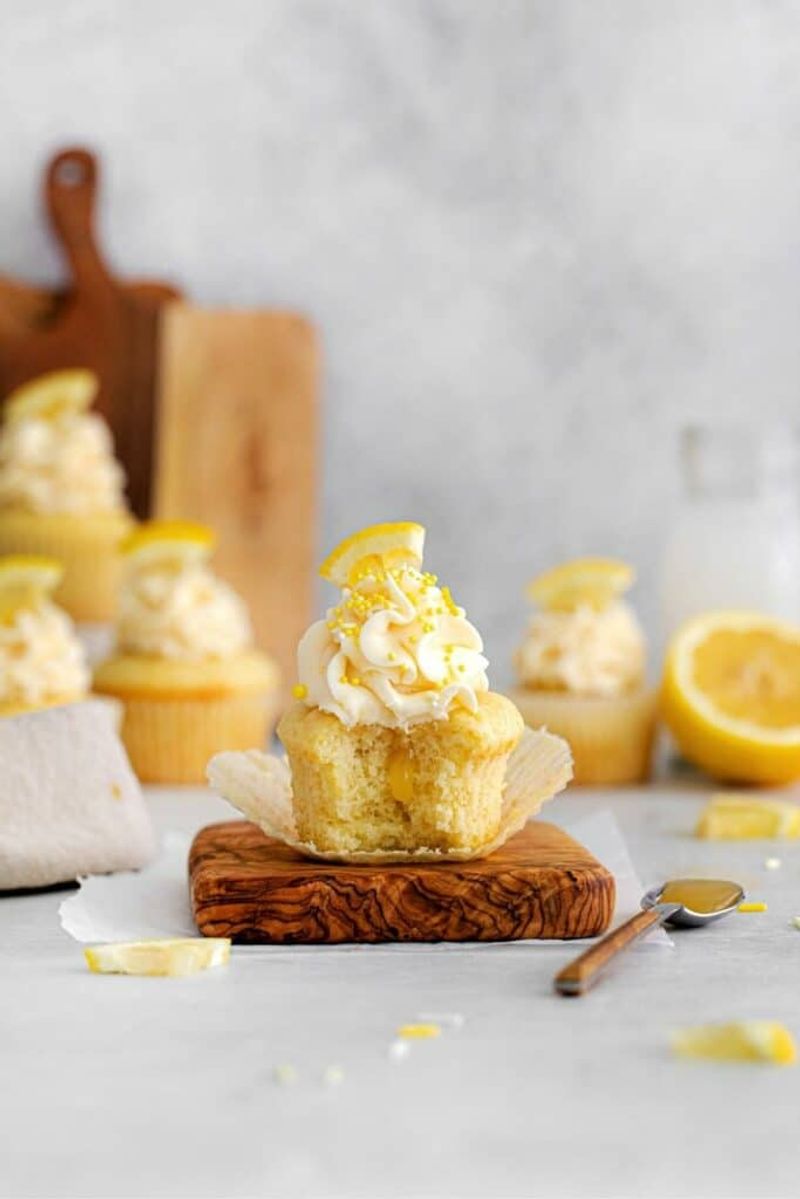
Microplane a whisper of lemon or orange zest over frosted tops. The specks glow against white buttercream and smell amazing.
It is a tiny move that screams fresh and thoughtful without any extra tools.
Use only the colored peel to avoid bitterness. Zest right before serving for maximum aroma.
Pair with a thin slice of candied citrus or a small mint sprig if you want more pop. This finish looks airy, clean, and restaurant worthy.
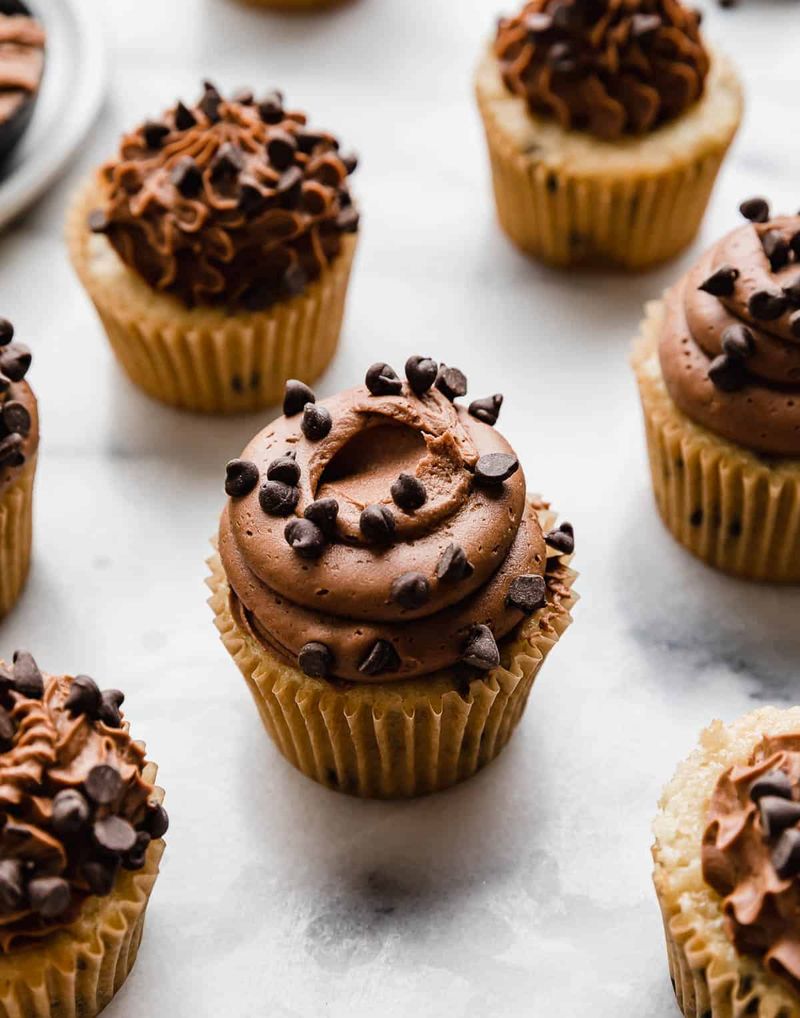
10. Chocolate shavings
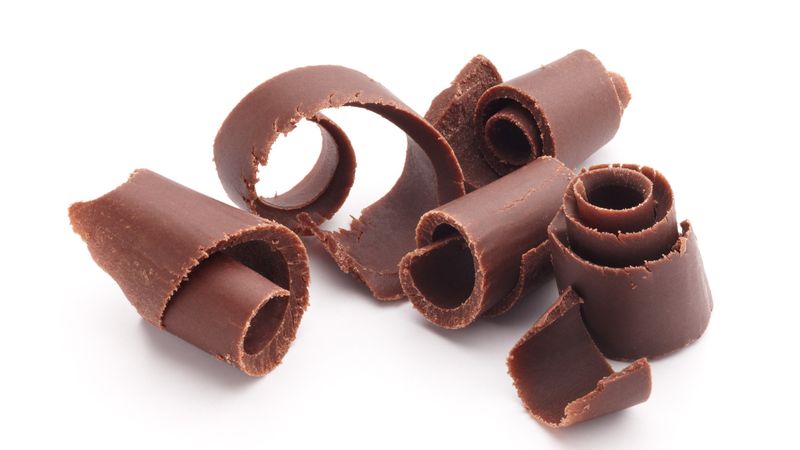
Run a vegetable peeler down a chocolate bar to create soft curls and shards. Drop them gently over frosting for a fancy cafe vibe.
The texture looks luxurious without being fussy, and it pairs with almost any flavor.
Use room temperature chocolate so it curls instead of crumbling. For dramatic curls, warm the bar slightly with your hands.
Mix sizes for a natural scatter, then add a tiny dusting of cocoa to deepen contrast. Minimal effort, maximum effect.
11. Cocoa dusting
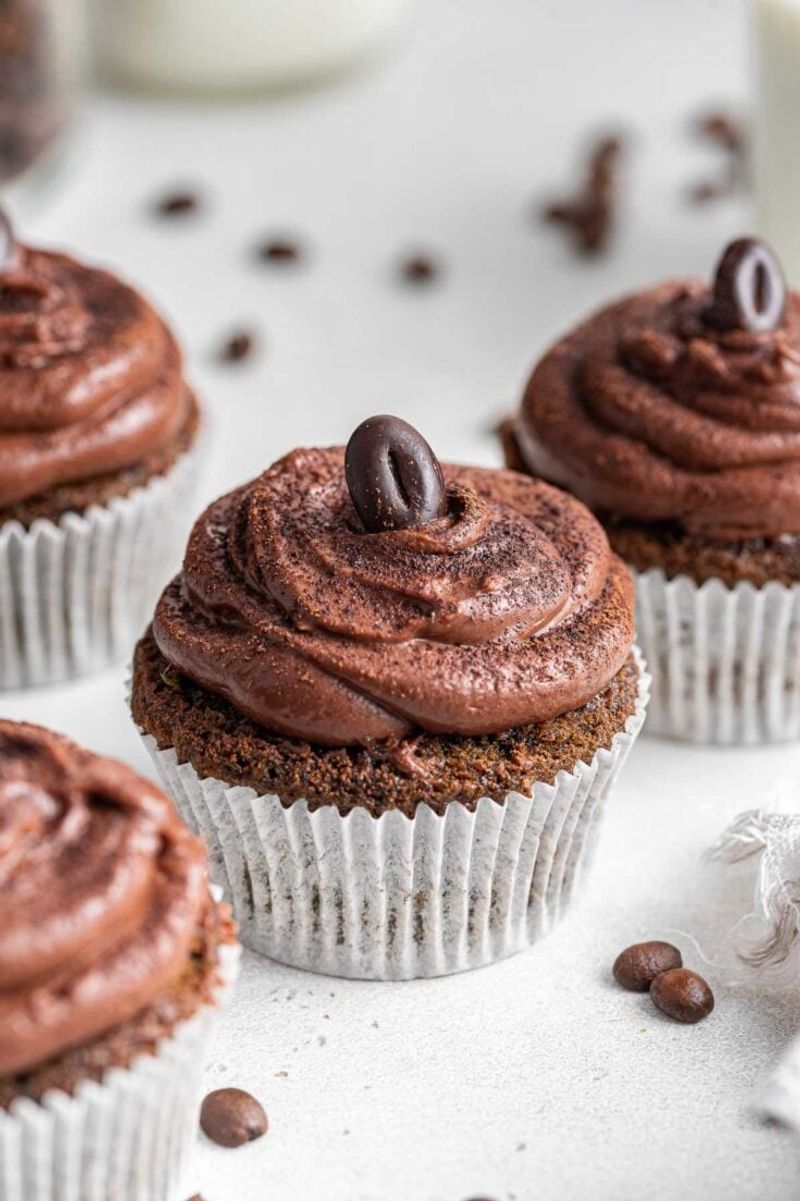
Tap unsweetened cocoa through a fine sieve for a velvety dusting. The soft shadowing adds drama and makes ridges pop on piped swirls.
It is a classic move that instantly reads sophisticated, especially on vanilla or mocha cupcakes.
Shield the liner with a paper ring if you want a crisp edge. Dust right before serving to avoid absorption.
Combine with chocolate shavings or a single espresso bean for an elegant finish that feels intentional, not overdone.
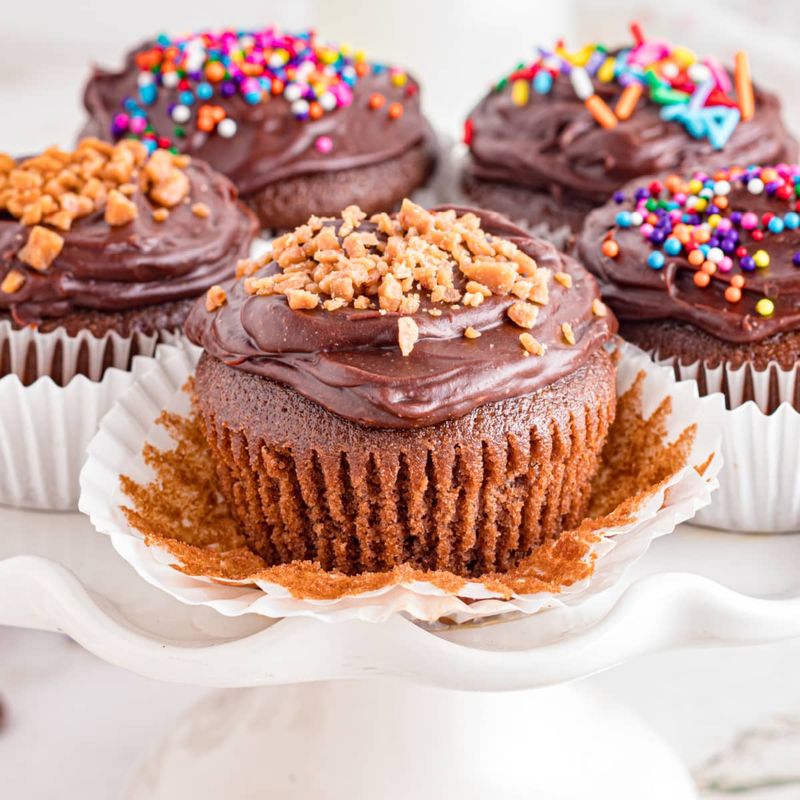
12. Crushed candy topping
Smash a favorite candy bar and sprinkle the pieces over soft frosting. The mix of textures and colors looks fun and tastes nostalgic.
It is a crowd pleaser that turns simple cupcakes into a party tray in minutes.
Use a zip bag and rolling pin to control the crumble size. Keep pieces small so they stick and do not topple.
Drizzle a bit of chocolate or caramel first to create glue, then finish with a few larger shards for interest.
13. Cinnamon-sugar sparkle

Blend cinnamon with fine sugar and shower it over the frosting for sparkle and warmth. This pairs beautifully with vanilla, apple, pumpkin, and spice cupcakes.
The gentle crunch and aroma feel cozy and polished.
Use a small sieve for even coverage, or press the rim into the mixture for a halo. Add a micro dusting of nutmeg for depth if you like.
A tiny apple slice or leaf-shaped sprinkle tops it all off perfectly.
14. Toasted coconut snow
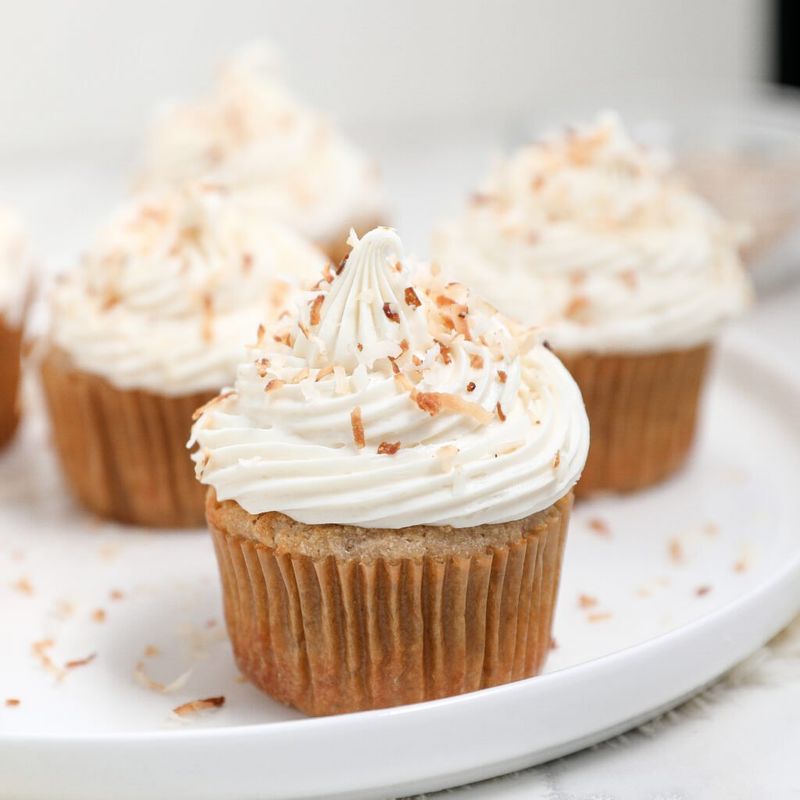
Toast shredded coconut until golden, then press it onto fresh frosting. The snowy texture looks clean and pretty, while the nutty flavor adds depth.
It hides frosting imperfections and travels well.
Let coconut cool fully before pressing so it stays crisp. For a neater rim, roll just the edges and leave the top bare for a garnish.
Pair with lime zest, pineapple bits, or white chocolate curls for a tropical bakery look without fuss.
15. Chopped nuts for crunch
Sprinkle finely chopped pistachios, pecans, or almonds for color and crunch. The tiny pieces catch light and make cupcakes feel gourmet fast.
Aim for uniform size so they cling to frosting and look tidy.
Toast nuts lightly to boost flavor and aroma. Roll just the outer edge for a border, or scatter the top for a fuller effect.
Pair with honey drizzle or chocolate shavings for an upscale finish guests will notice immediately.
16. Jam center “peek”
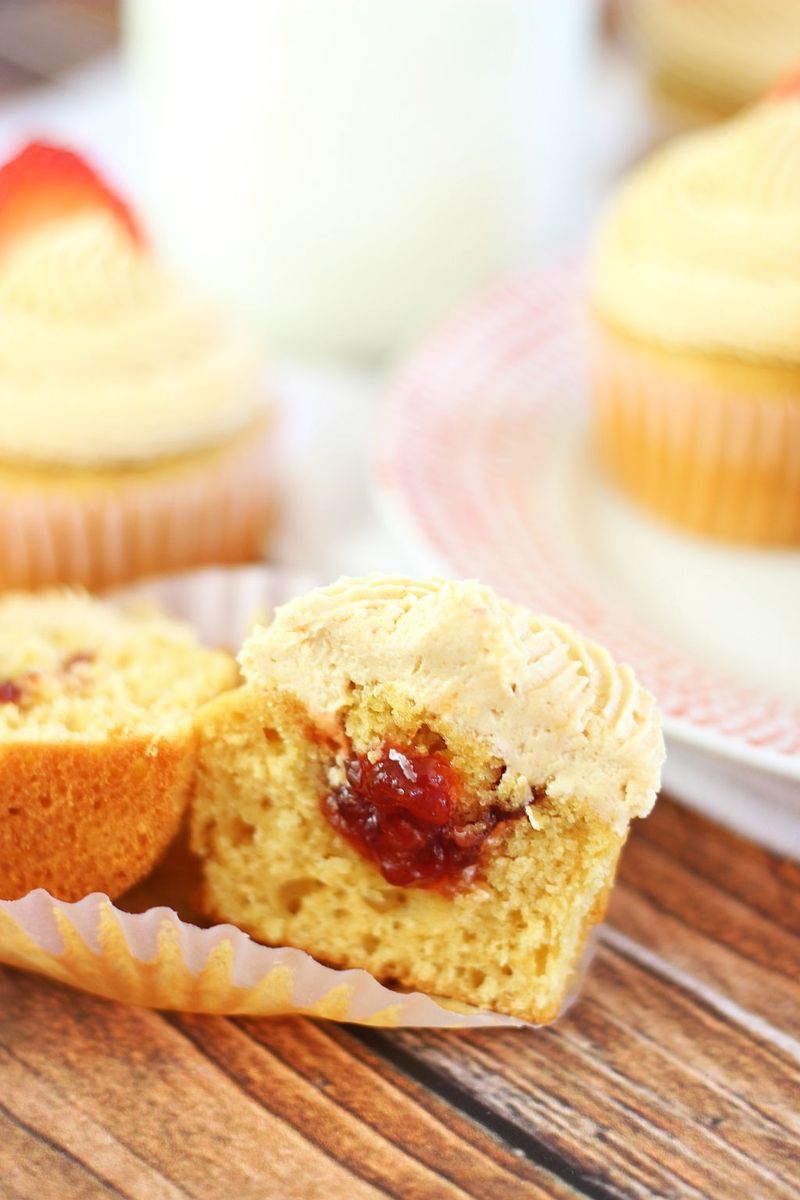
Spoon a tiny dot of jam onto the center of your frosting so it glows like a jewel. This hint suggests a filled cupcake even when it is not.
It adds shine, color, and instant flavor recognition.
Choose thicker jam so it holds its dome and does not bleed. Wipe the spoon between dots for clean edges.
Pair with a matching zest sprinkle or a single berry for cohesion that looks planned, not accidental.
17. Chocolate “nest” style
Scatter mini chocolate chips or shavings in a loose ring to mimic a nest. The texture feels playful and adds crunch at every bite.
It frames a central topper like a berry, candy, or tiny egg for themed bakes.
Stick the chips while frosting is soft so they adhere. Mix milk and dark for depth, or use white for contrast.
Keep the ring narrow for a tidy look, leaving a clean center for a simple garnish.
18. Simple rosette (mini version)

Pipe a short swirl with a star tip to form a mini rosette. Start in the center and spiral outward just once.
It is quick, elegant, and perfect for topping a flat frosting base or creating clusters.
Keep pressure consistent so the petals read clearly. Add a sprinkle of sanding sugar for sparkle or dot with a micro pearl.
This technique is great for wedding style trays where you want a cohesive, delicate look without heavy piping.
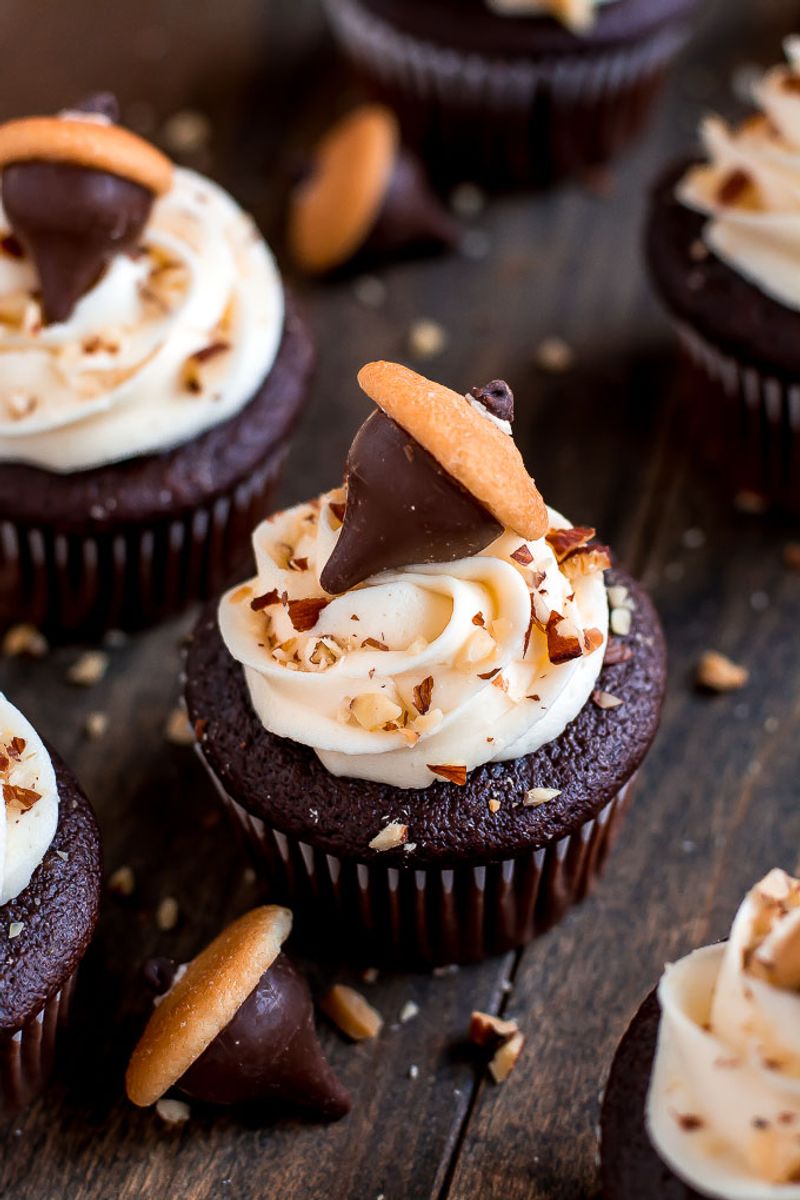
19. Pretzel twist topper
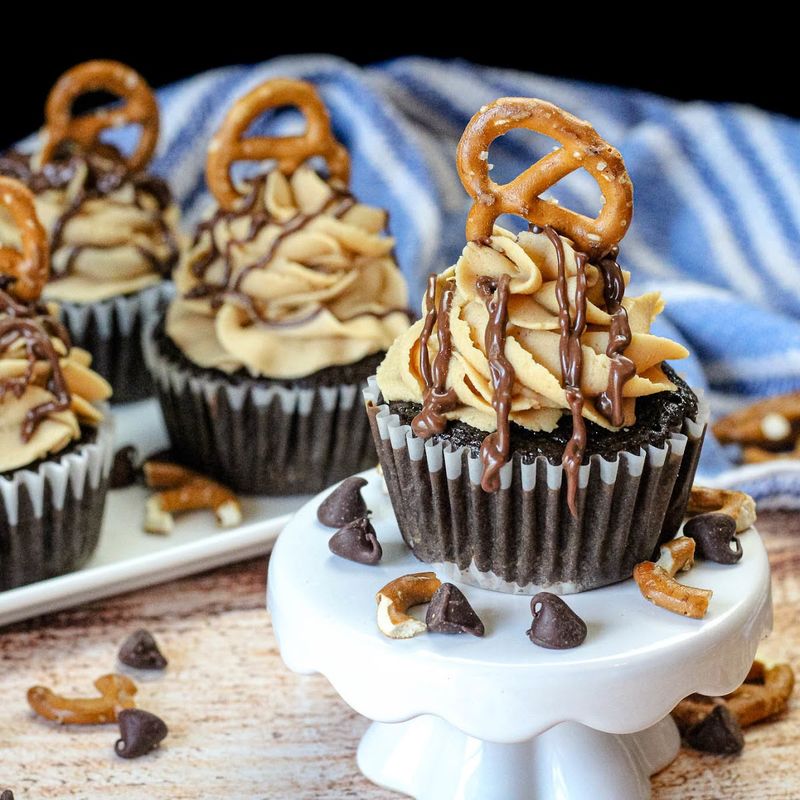
Nestle a mini pretzel twist into the frosting for instant height and crunch. The sweet salty bite feels trendy and photogenic.
It pairs especially well with caramel drizzle, chocolate glaze, or peanut butter frosting.
Use fresh pretzels so they stay crisp. Dip the bottom in melted chocolate to prevent sogginess and add a glossy anchor.
Finish with a few salt crystals or a caramel thread to tie the flavors together and make it look intentional.
20. The “one perfect garnish” rule
Choose a single clean topper and commit. One strawberry slice, one chocolate square, or one mint leaf looks curated.
The restraint reads expert because everything feels chosen, not crowded.
Keep the frosting simple to support the hero garnish. Align pieces at the same angle across the tray for a unified look.
This rule is especially helpful when time is short because it reduces decisions while delivering a professional finish every time.
21. Powdered sugar snowfall
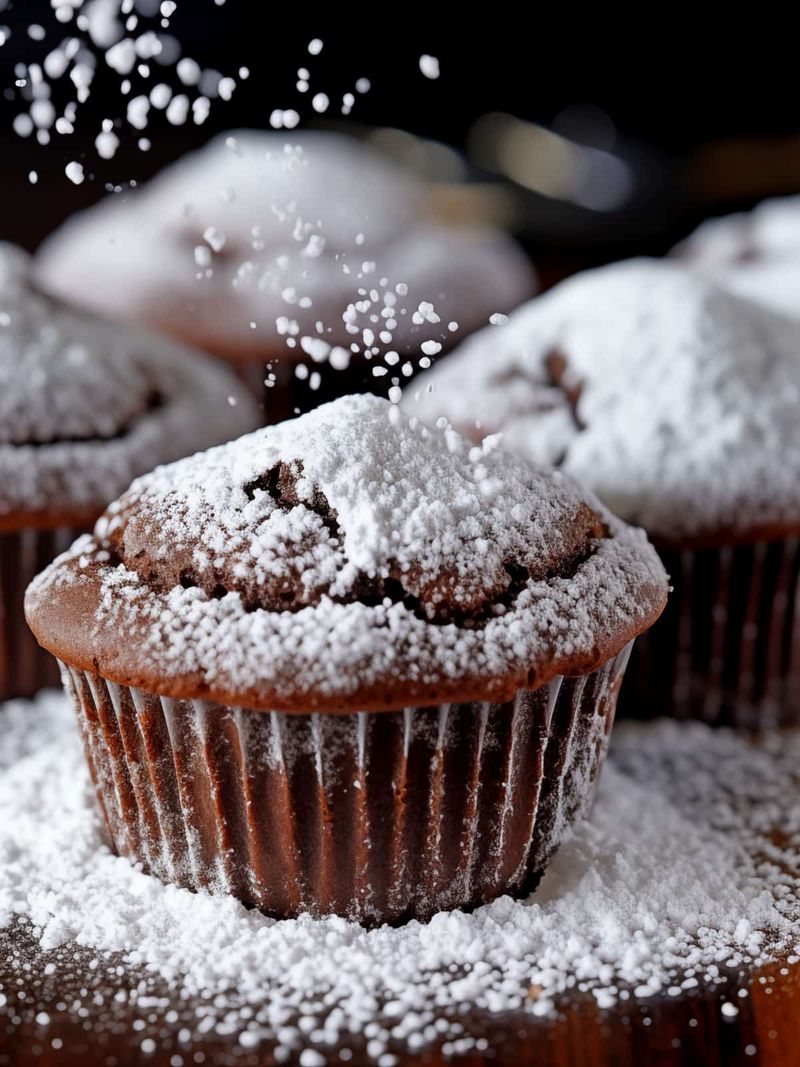
Dust cupcakes with powdered sugar for a classic snowy finish. It softens edges and makes everything look dreamy.
This trick works beautifully on unfrosted or lightly frosted cupcakes when you want something light and elegant.
Use a fine sieve and tap gently for a cloudlike layer. Add a stencil for patterns if you want extra drama.
Dust just before serving because moisture can absorb the sugar. Simple, quick, and always charming.
22. Colored sanding sugar sparkle
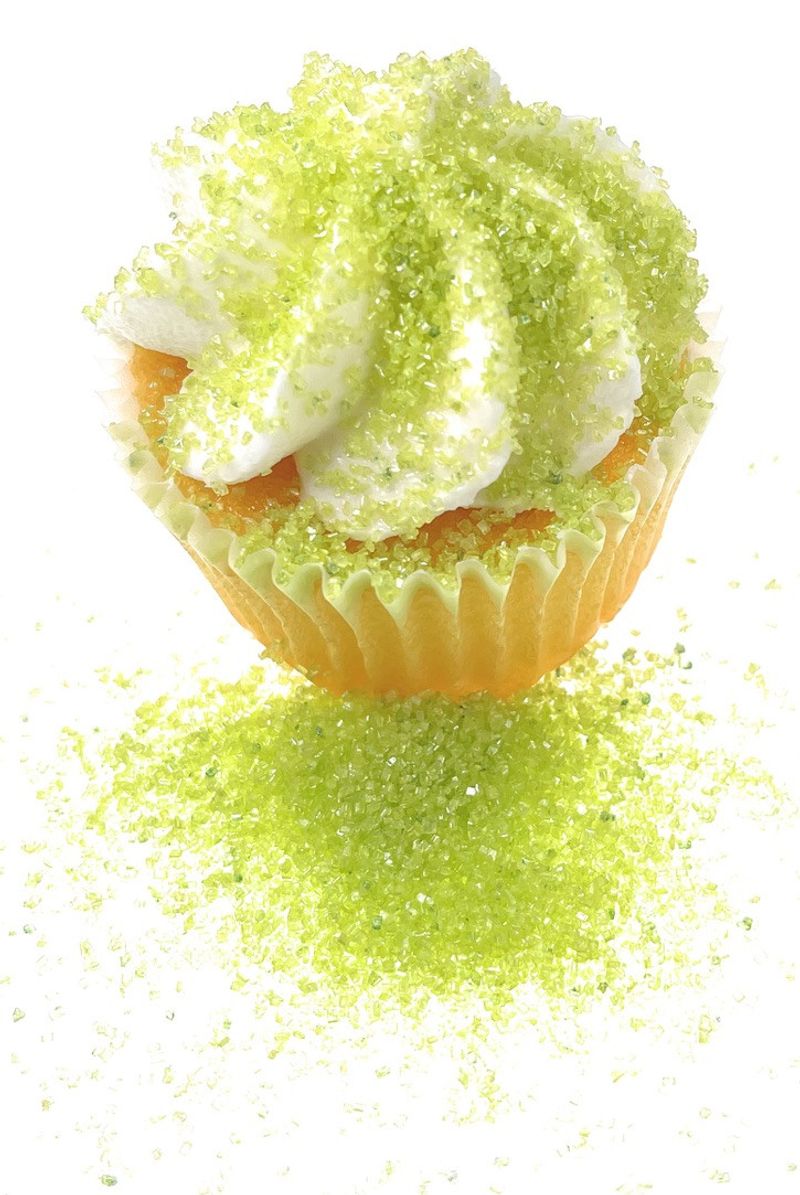
Sprinkle colored sanding sugar for instant sparkle and a clean pop of color. The larger crystals catch light without bleeding.
It is perfect for birthdays, holidays, or team themes when you want quick impact.
Choose one color to avoid clutter and look intentional. For precise placement, press the rim into sugar or use a pinch along ridges.
Pair with a matching liner to tie the whole design together and look planned.
23. Mini chocolate bar piece
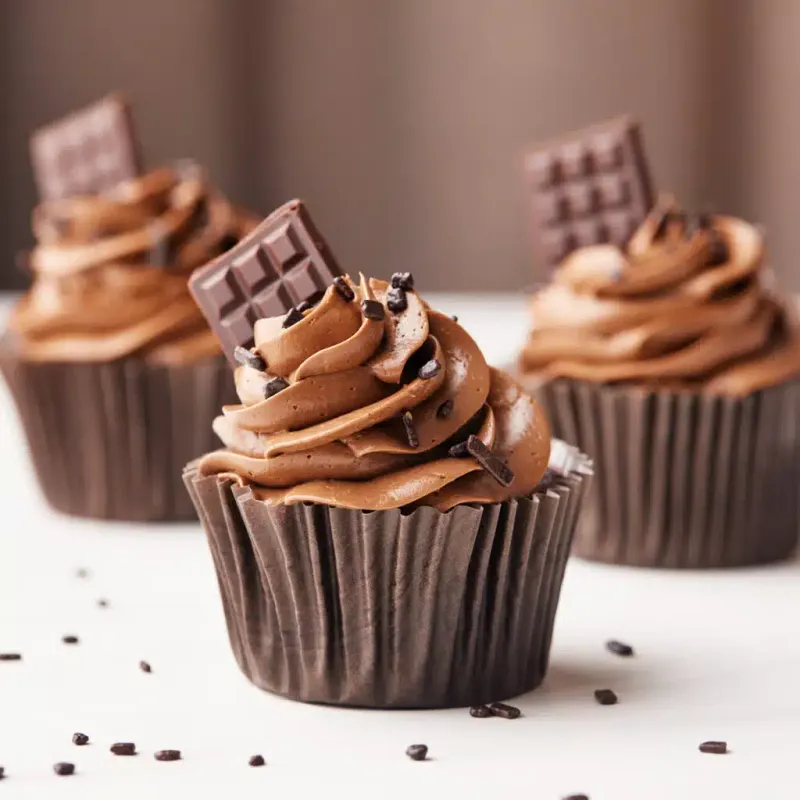
Break a chocolate bar into neat rectangles and perch one on each cupcake. The geometric shape instantly looks expensive.
Choose good quality chocolate with a clear snap and logo for extra polish.
Angle the piece slightly into the swirl so it stands securely. Add a faint cocoa dust or gold shimmer for a luxe finish.
This topper pairs well with coffee, caramel, or vanilla frostings and makes gifting feel boutique level.
24. Drizzle + sprinkle combo

Lay down a quick drizzle first, then immediately add sprinkles so they anchor in place. The combo reads professional because it layers shine and texture thoughtfully.
It is the easiest way to fill space without clutter.
Keep the drizzle thin and directional, then choose one sprinkle style for cohesion. Work in small batches so the drizzle stays tacky.
Finish with a single topper if desired, but keep restraint so the design still looks edited and deliberate.
25. White chocolate curls

Use a peeler on a white chocolate block to make soft, ivory curls. Scatter them over fruit or vanilla frostings for an elegant contrast.
The creamy tone reads special occasion with very little effort.
Warm the chocolate slightly in your hands for longer curls. Store curls in the fridge on parchment, then add just before serving so they keep shape.
A tiny zest sprinkle or berry completes the look and keeps the palette fresh and polished.
26. Edible flowers (simple, not overloaded)
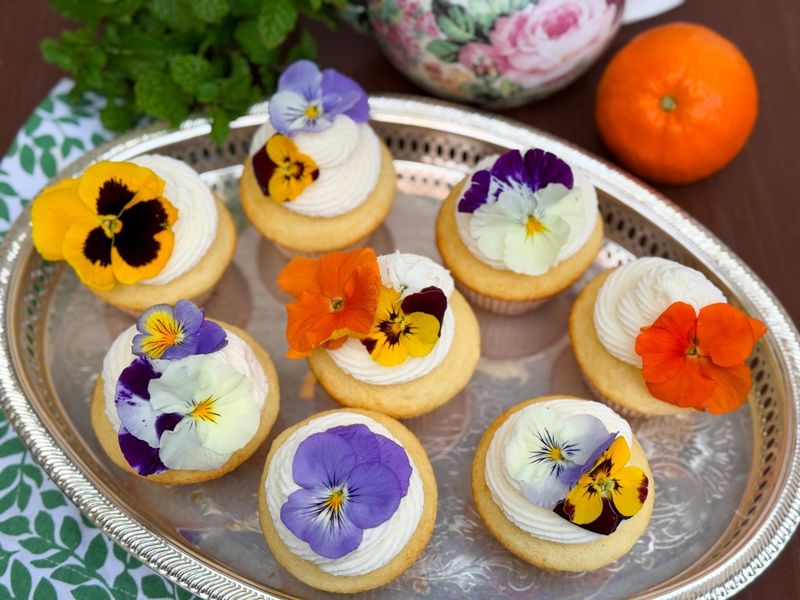
Place one small edible flower on each cupcake for a delicate, wedding ready finish. Think violas, pansies, or micro blooms.
The key is restraint so it looks refined, not like a garden exploded.
Confirm flowers are food safe and pesticide free. Add them at the last minute to prevent wilting.
Pair with a smooth frosting swoosh or mini rosette so the bloom remains the star. A coordinating sprinkle halo can frame without stealing the show.
27. Fruit + mint
Add a single fruit piece plus a tiny mint leaf for instant polish. The fresh green makes colors pop and signals bright flavor.
This combo feels like a plated dessert but takes seconds.
Dry fruit surfaces before placing to avoid sliding. Slice strawberries thinly for a lightweight topper, or use a blueberry cluster for balance.
Keep mint small so it does not dominate. A light drizzle of honey or white chocolate can tie everything together.
28. Cookie crumbs around the edge
Crush cookies into fine crumbs and press them into the outer frosting for a tidy border. Oreos, graham crackers, or speculoos add color and flavor.
The ring frames the top and leaves space for a simple centerpiece.
Roll chilled cupcakes for the cleanest edge. Use matching crumbs to hint at the cupcake flavor inside.
Add a mini cookie piece or a drizzle in the center to finish the graphic look without adding bulk.
29. The “dip the top” trick
Frost smoothly, then invert the cupcake and dip the top into sprinkles or crumbs. You get a perfectly even coat in one move.
This creates a clean edge and hides any frosting swirls for a graphic finish.
Use a shallow bowl and rotate gently for coverage. Choose smaller sprinkles or fine crumbs for better adhesion.
Add a single topper afterward so the surface stays level and intentional, not bumpy and chaotic.
30. Themed color match
Pick one accent color and carry it through sprinkles, liners, and a small topper. The unified palette instantly looks designer.
It simplifies decisions and keeps trays looking curated.
Stick to neutrals for everything else so the accent color shines. Repeat elements across the batch to feel intentional, not random.
This tactic is perfect for holidays, team events, or weddings where cohesion matters more than complex piping work.