These Tips Make Flawless Mashed Potatoes
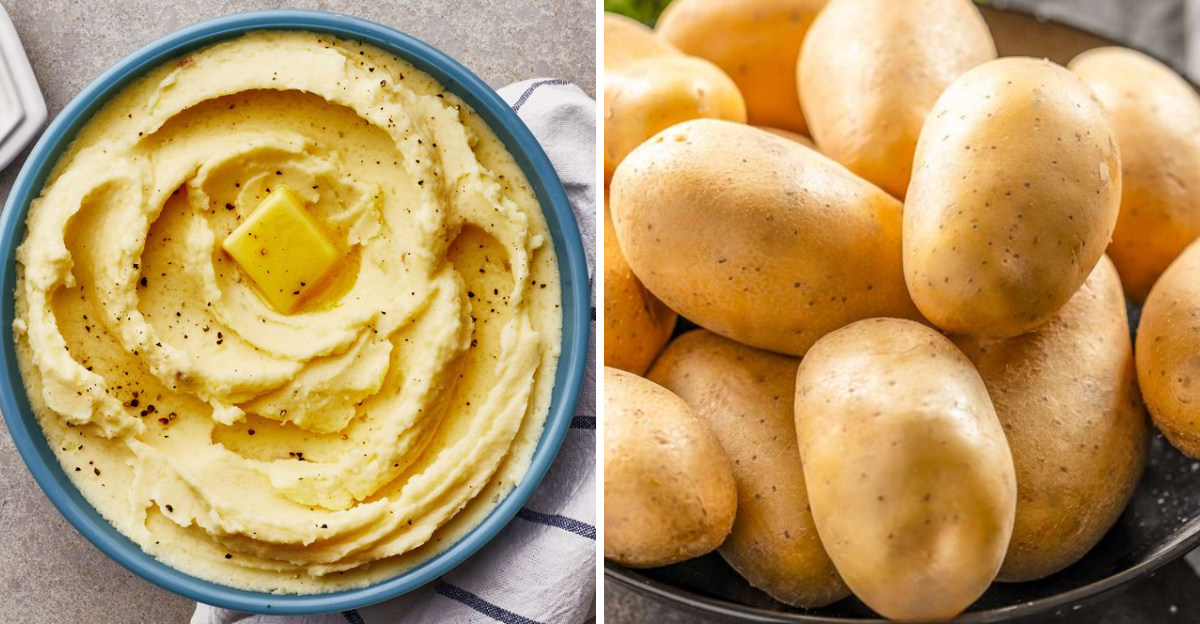
Perfect mashed potatoes do not happen by accident. With a few smart techniques, you can get creamy, cloud like results every time without stress. These tips remove the guesswork so your holiday table or weeknight dinner shines. Ready to level up your mash and wow everyone at the table?
1. Pick the right potato

Start with the right potatoes because texture begins at the source. Yukon Golds create naturally buttery, golden mash with a medium starch profile. Russets are starchier, yielding fluffier, lighter results when you want that classic cloud.
Choosing a mix gives you a balance of creaminess and lift. Avoid waxy varieties like red potatoes for traditional mash because they can turn gluey fast. Pick firm, smooth potatoes without sprouts for consistent cooking.
Store them in a cool, dark spot and never in the fridge. Chilled potatoes convert starches oddly, affecting texture. Begin with quality, and everything else becomes easier.
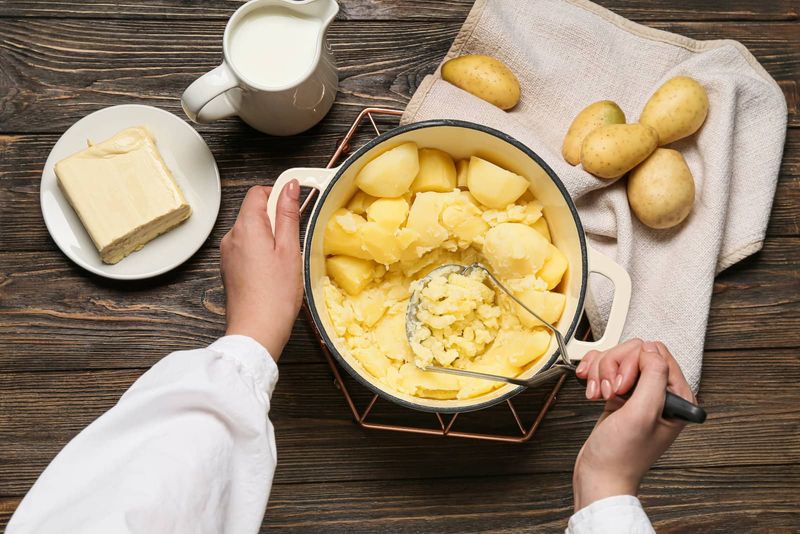
2. Cut evenly for consistent cooking
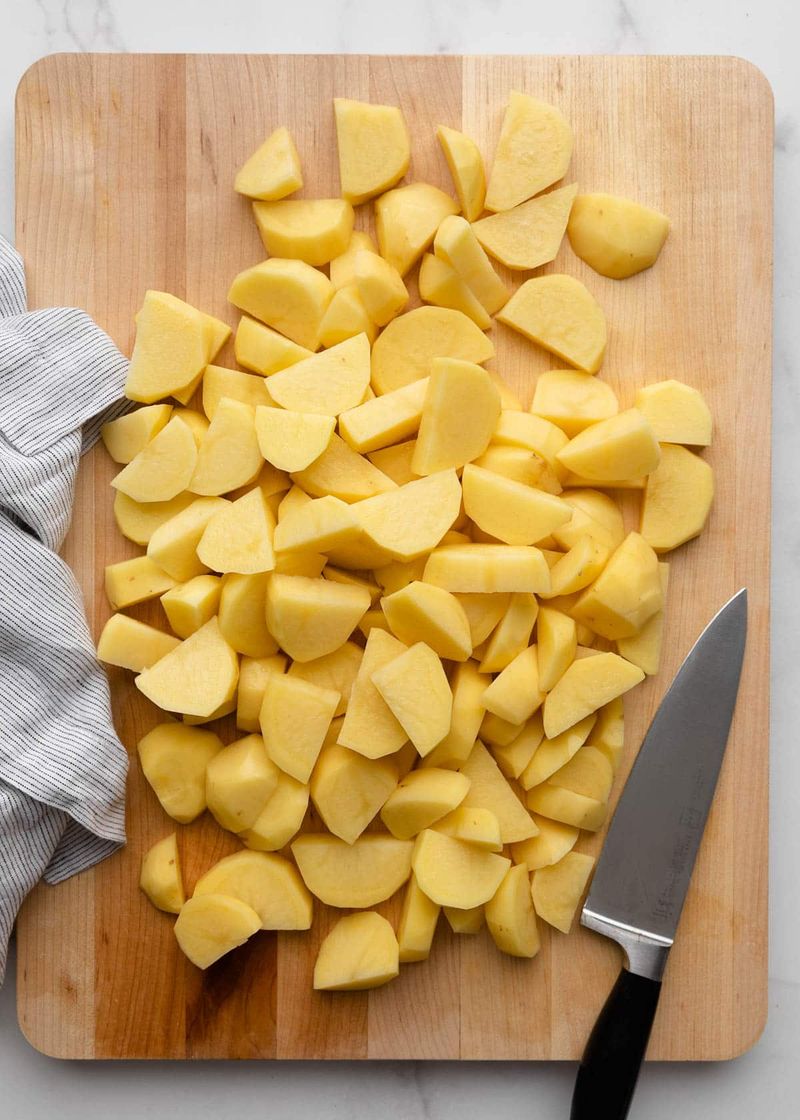
Even pieces cook at the same rate, preventing undercooked centers and mushy edges. Aim for chunks about the size of golf balls or slightly smaller. Consistency matters more than exact dimensions, so match sizes carefully.
Rinse cut potatoes under cold water to wash off surface starch, which can cause gumminess. Then keep them submerged to avoid browning while you prep. You will get cleaner flavors and better texture later.
Uniform cuts also make timing predictable, which reduces stress. Your mash will taste better because every piece cooks perfectly. Small effort now saves frustration later.
3. Start in cold, salted water
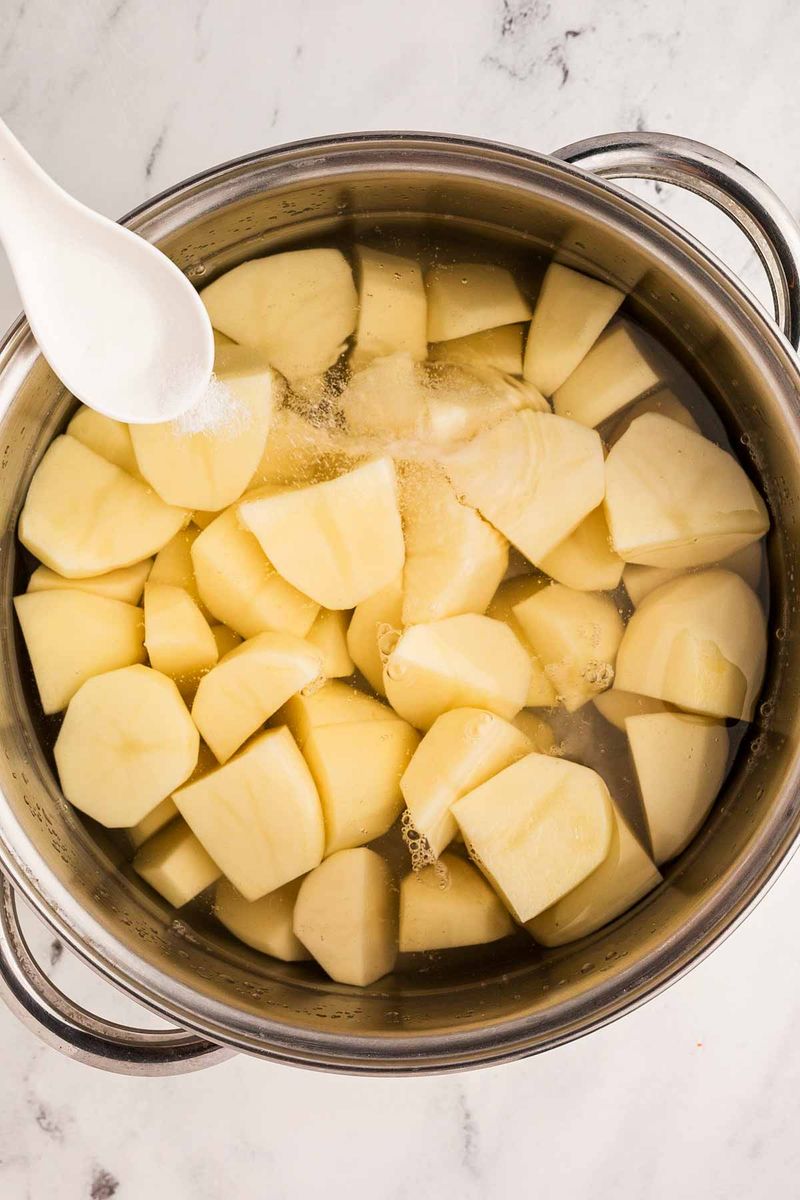
Cover potatoes with cold water so heat penetrates gradually, cooking centers and exteriors evenly. Starting hot can overcook the outside while the middle lags behind. Salt the water generously so seasoning infuses every bite.
Think of it like seasoning pasta water. You will build flavor early, which means less salting later. It also helps the potatoes taste like more than just butter and cream.
Bring to a gentle simmer, not a rolling boil, to avoid breaking potatoes apart. Aim for tender but not falling apart. This foundation delivers dependable, balanced texture every time.
4. Cook until just tender

Boil gently until a fork slips in with little resistance and the edges just begin to fissure. Overcooking waterlogs starches and dilutes flavor. Undercooking leaves unpleasant lumps that will never mash smoothly.
Taste a piece for salt and texture before draining. You should sense soft centers without graininess. Adjust cook time in small increments rather than walking away.
Remember elevation, pot size, and potato variety affect timing. Keep the simmer steady and calm for reliable results. Perfect doneness means fluffy mash with structure, not soggy paste.
5. Dry the potatoes well
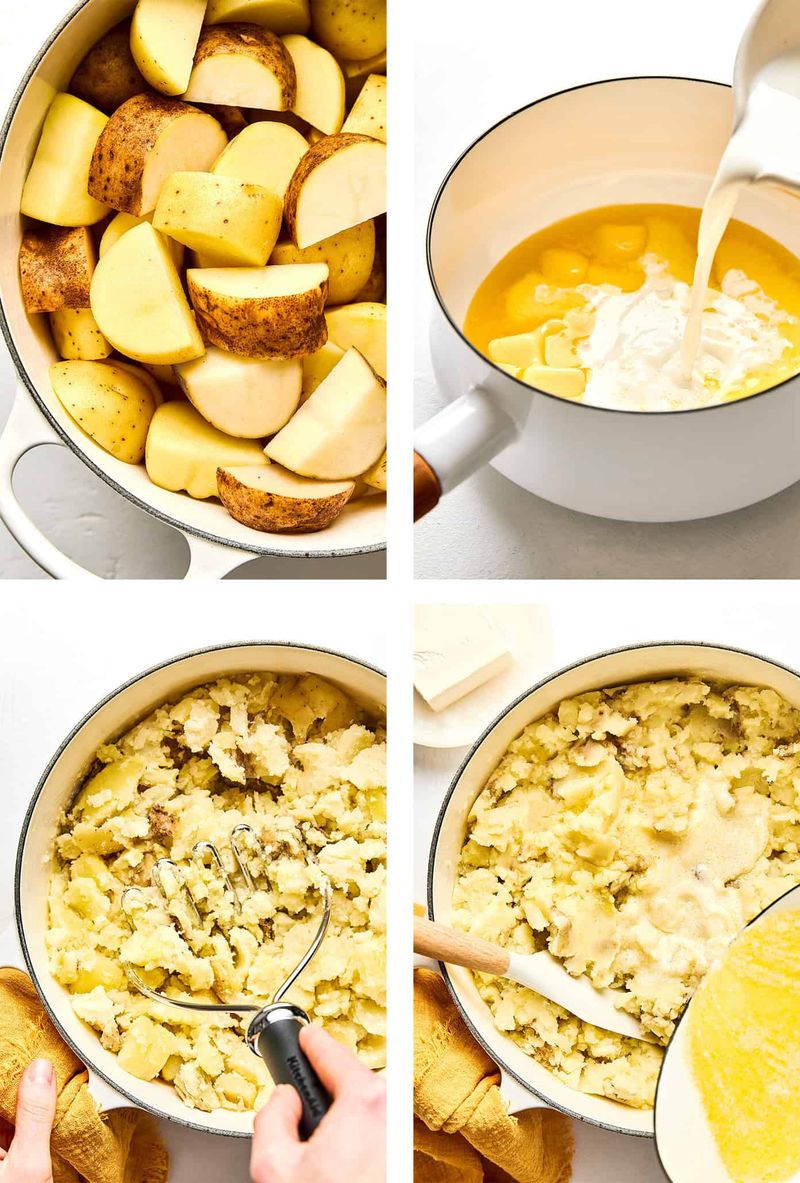
After draining, return potatoes to the hot pot and set over low heat. Stir gently to let excess moisture steam off. Drier potatoes absorb fat better, giving you a silkier, richer mash.
Moisture is the enemy of flavor concentration. A minute or two is enough to chase away water without browning. You will see steam lessen and surfaces look matte.
This step prevents watery mash that tastes thin. It also helps butter and dairy cling to the starch. Quick drying transforms good mash into great mash.
6. Warm the dairy first
Cold dairy shocks hot potatoes, tightening starches and forming gluey paste. Warm butter and milk or cream before adding, ideally to a gentle steam. This keeps everything supple and ready to blend.
Melt butter separately so fat coats starch granules first for a luxurious feel. Then stream in warm dairy until you reach your desired texture. The potatoes will drink it up like a sponge.
Season gradually as warmth can amplify salt. Keep everything cozy and fluid for maximum creaminess. Small temperature control pays big dividends in texture and flavor.
7. Mash, do not overwork
Overworking releases too much starch and turns mash gummy. Use a ricer or food mill for the smoothest texture, or a sturdy masher for rustic results. Avoid electric mixers that can pulverize potatoes into glue.
Work quickly while everything stays warm. Fold in butter first, then warm dairy, using gentle strokes. Stop as soon as you reach your target consistency.
This light touch preserves fluff and sheen. You will enjoy silky mash with body rather than paste. Let texture guide you, not the urge to keep stirring.
8. Season in layers
Seasoning is not a single moment. Salt the cooking water, taste after mashing with butter, then adjust after adding dairy. Layered seasoning builds depth without overshooting.
Use kosher salt for control and white pepper if you want a speck free look. Consider garlic powder or roasted garlic for gentle warmth. Fresh chives add brightness at the end.
Taste more than once because heat and fat change perception. You will learn your perfect balance through small tweaks. Great mashed potatoes whisper flavor rather than shout.
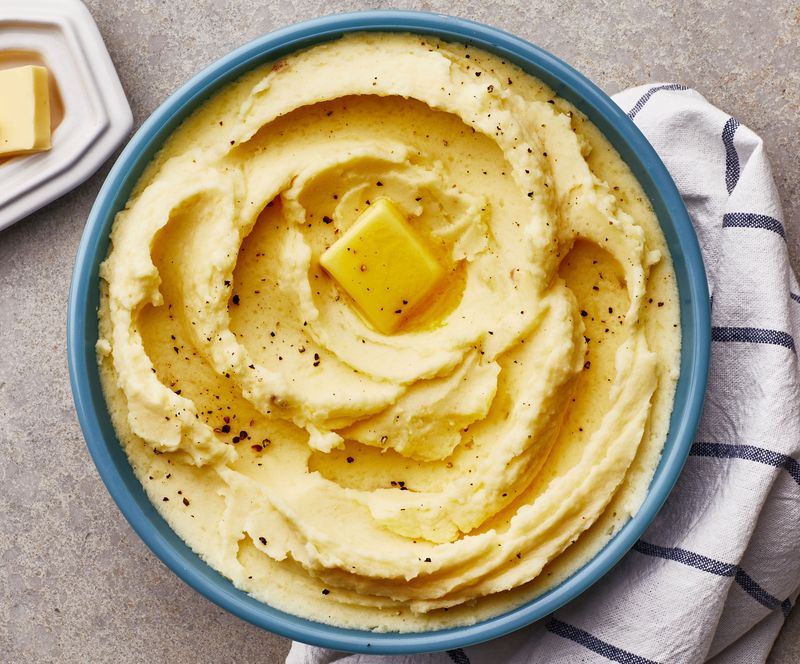
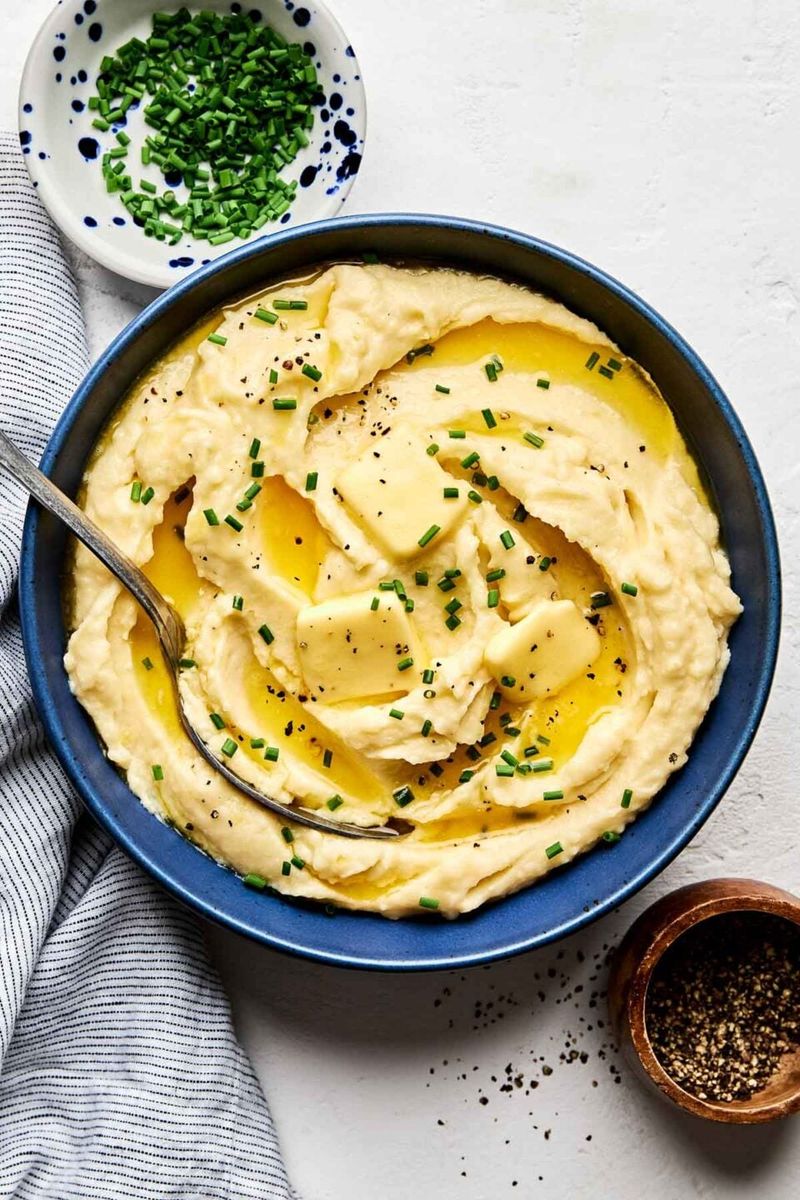
9. Finish with texture boosters

Texture on top makes every bite exciting. Try butter puddles, a drizzle of good olive oil, or a spoon of sour cream for tang. Crispy shallots, toasted breadcrumbs, or bacon bits bring delightful crunch.
Fold in grated Parmesan for savory depth or cream cheese for body. You can also stir in roasted garlic for sweetness. These boosters turn simple mash into a signature side.
Keep the base silky and the toppings playful. Guests will ask what your secret is. You will love the contrast of creamy, crunchy, and rich.
10. Hold and reheat the right way
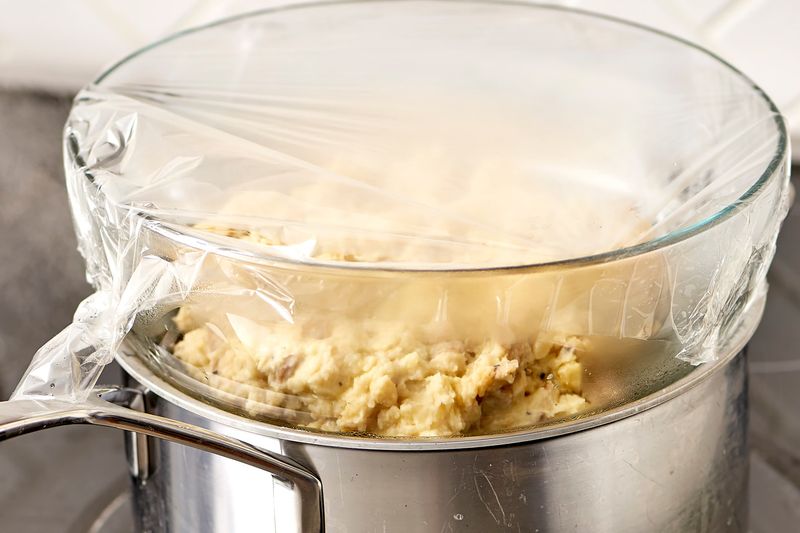
Keep mashed potatoes warm in a covered pot over a gentle double boiler so they do not scorch. Stir occasionally and add a splash of warm cream if thickening. This method preserves texture for service.
For reheating, microwave in short bursts, folding gently each time. Or warm on the stove with added butter and cream. Avoid high heat which can split the dairy.
Store leftovers promptly and reheat only what you need. With care, yesterday’s mash tastes newly made. You will keep that silky finish from first serving to last.