20 Things You Need To Know About Hard-Boiled Eggs

Hard-boiled eggs seem simple, but tiny tweaks can make or break the result. If you have fought sticky shells, green rings, or rubbery whites, this guide will save you time and frustration. You will learn reliable steps, science-backed tips, and clever fixes that work in real kitchens. Stick around and you will crack perfect eggs every time.
1. Freshness Matters More Than You Think
Fresh eggs are great for frying, but not ideal for hard boiling. Slightly older eggs, about 7 to 10 days, peel easier because the albumen loosens and the pH rises. You will notice less tearing and fewer craters in the whites.
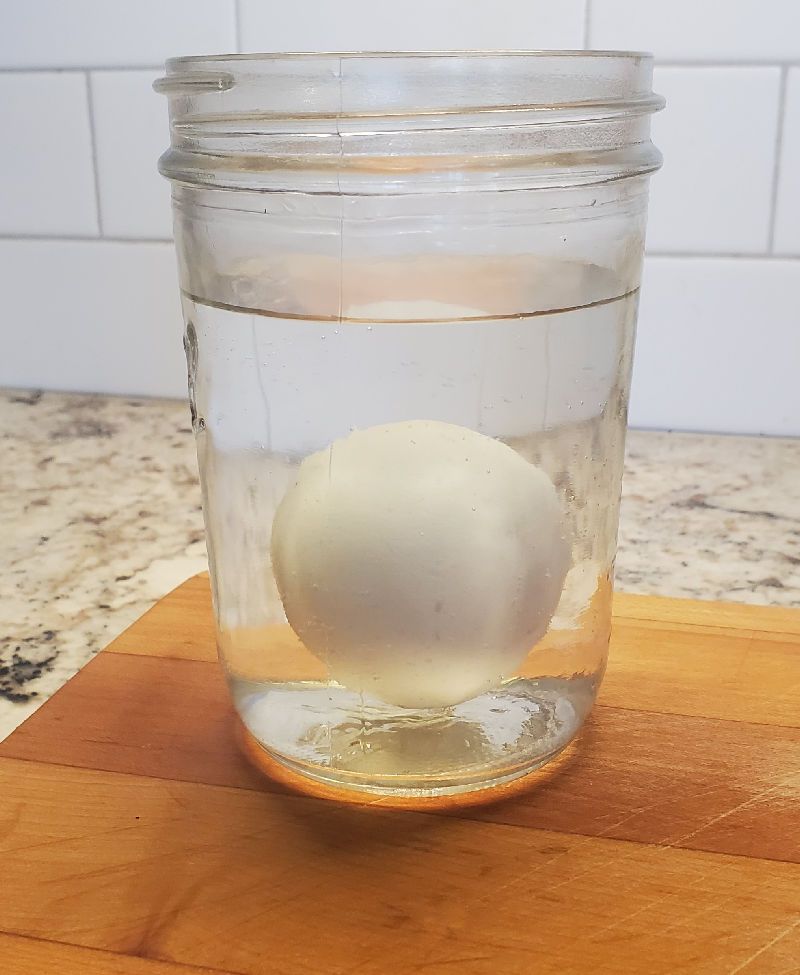
To gauge freshness, try the float test. Place eggs in a bowl of water: very fresh eggs lie flat, older ones tilt or stand. Standing is fine for boiling, floating means too old. Use those floaters for compost, not cooking.
2. Start With A Gentle Simmer, Not A Furious Boil
Raging bubbles can crack shells and create spongey whites. A gentle simmer keeps heat even and reduces turbulence, protecting the egg’s structure. You will get fewer leaks and cleaner shapes.
Bring water to a full boil, then reduce to a modest simmer before adding eggs or add eggs first and adjust heat. Keep bubbles small and steady. If shells crack, lower the temperature and try again. Control equals consistency.
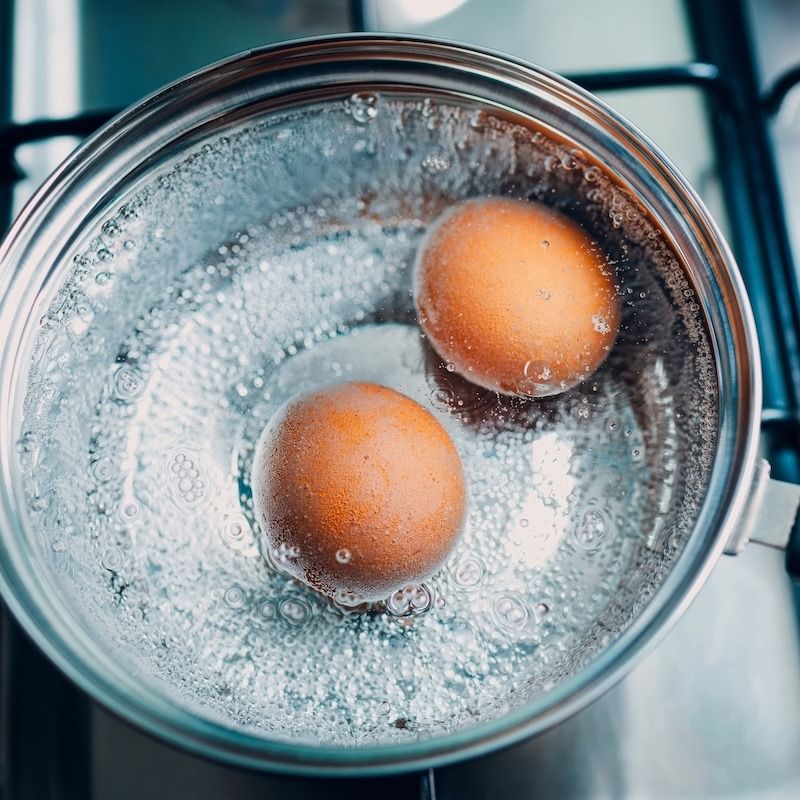
3. Cold Start vs Hot Start
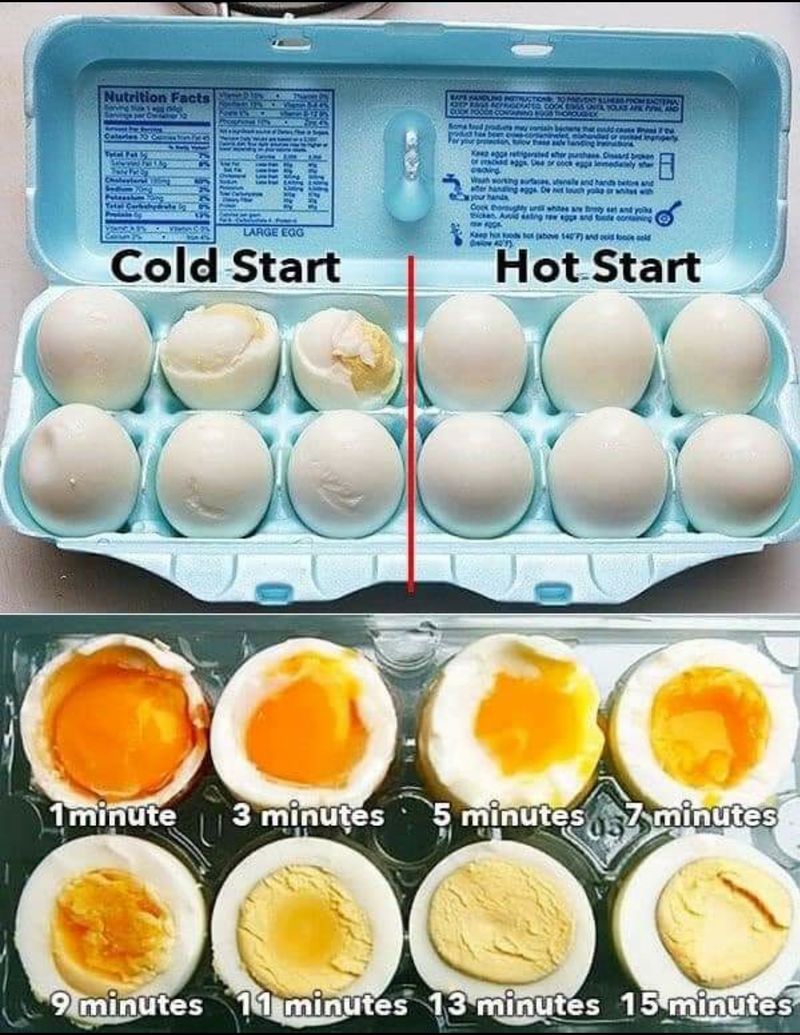
Cold starting means placing eggs in cold water then heating together. Hot starting drops eggs into already boiling water. Both work, but results differ in peeling and doneness predictability.
Hot start often peels cleaner because proteins set quickly and separate from the shell membrane. Cold start can reduce micro-cracks and is gentler for very fresh eggs. Try both and note your preference. Keep variables like egg size and timing consistent when comparing.
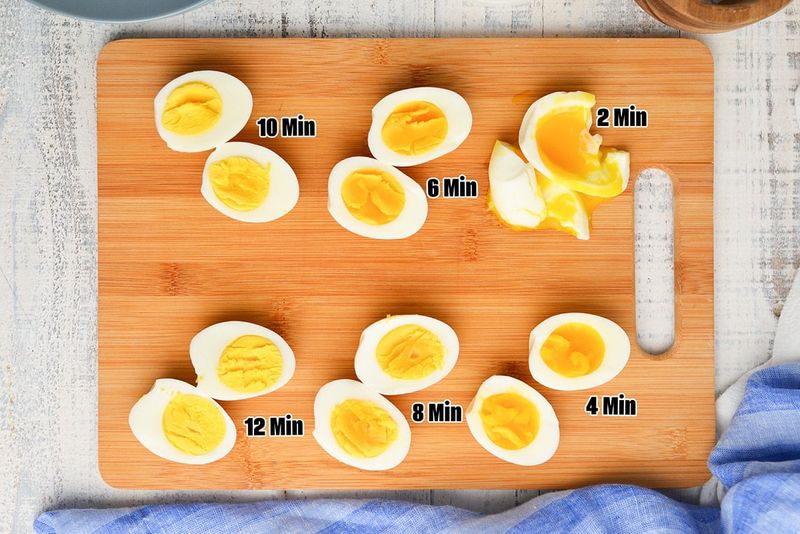
4. Timing For Your Preferred Doneness
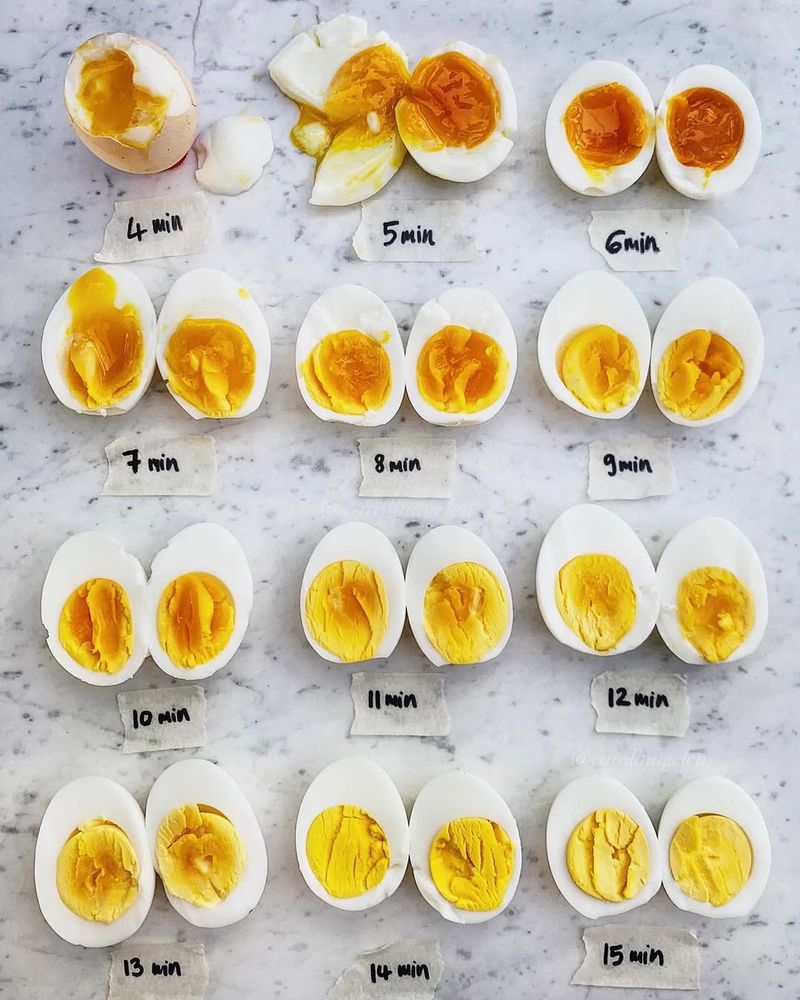
Time governs yolk texture. Around 6 to 7 minutes gives jammy centers, 9 to 10 minutes yields creamy firm, and 11 to 12 minutes brings fully set yolks without chalkiness. Over 13 risks dry, sulfurous notes.
Start timing the moment eggs hit hot water if using a hot start. For cold start, begin when water reaches a simmer. Adjust 30 to 60 seconds for very large or small eggs. Keep notes to lock your perfect window.
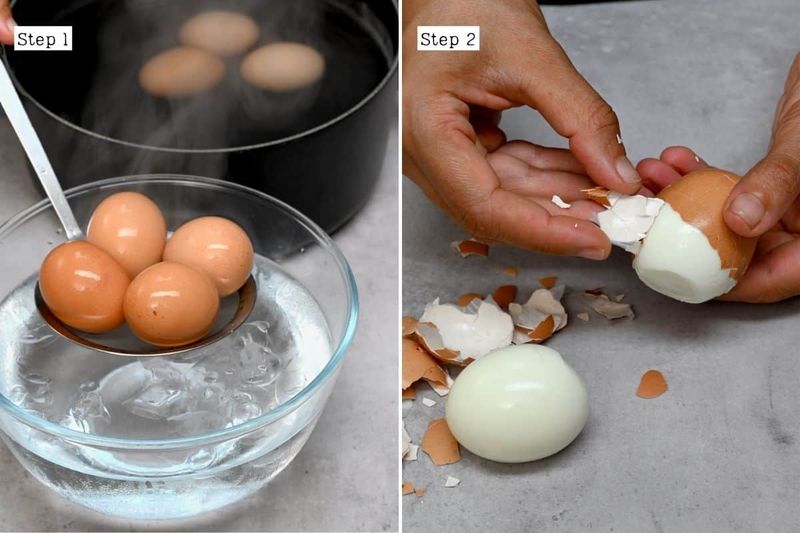
5. The Ice Bath Is Nonnegotiable
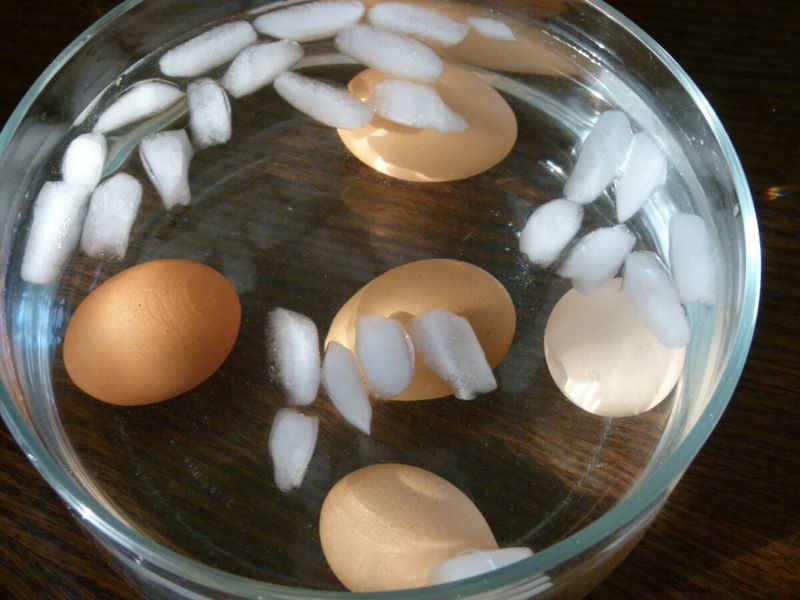
Shocking eggs in an ice bath halts carryover cooking and prevents green rings. Rapid cooling also contracts the egg slightly, loosening it from the shell. You will get clearer lines between white and membrane.
Prepare a large bowl with ice and water before you start boiling. Transfer eggs immediately after cooking and chill 10 minutes. Swirl occasionally to cool evenly. If you hate peeling, do not skip this step.
6. How To Prevent The Green Ring
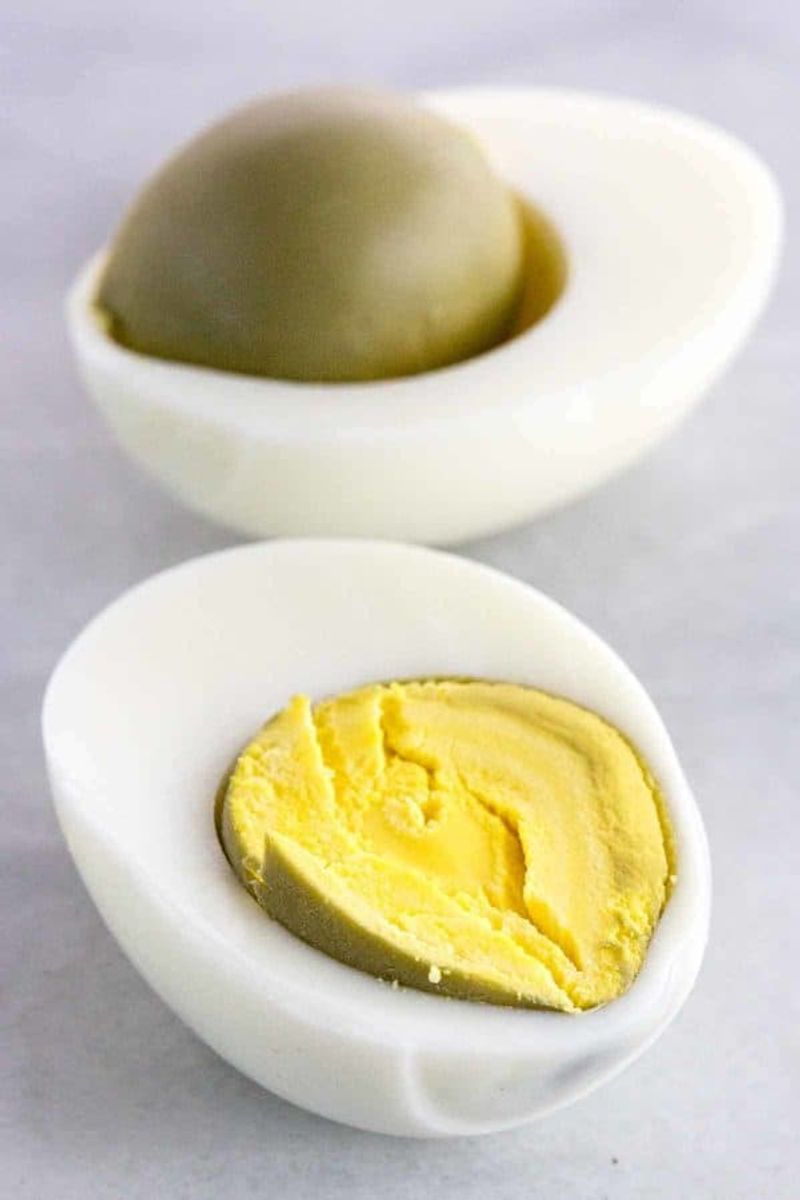
The greenish gray ring around yolks comes from iron and sulfur reacting at high temperatures. It looks unappealing but is harmless. Control heat and cool quickly to avoid it.
Keep cook time within your target window and use an ice bath immediately. Gentle simmering reduces hot spots that drive the reaction. If it appears, you likely overcooked or cooled too slowly. Adjust timing by one minute next batch.
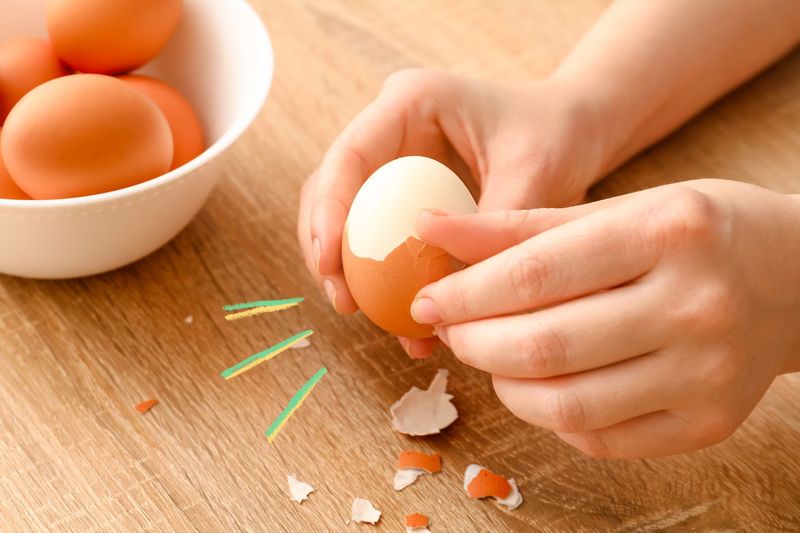
7. Crack Before You Chill For Easier Peeling
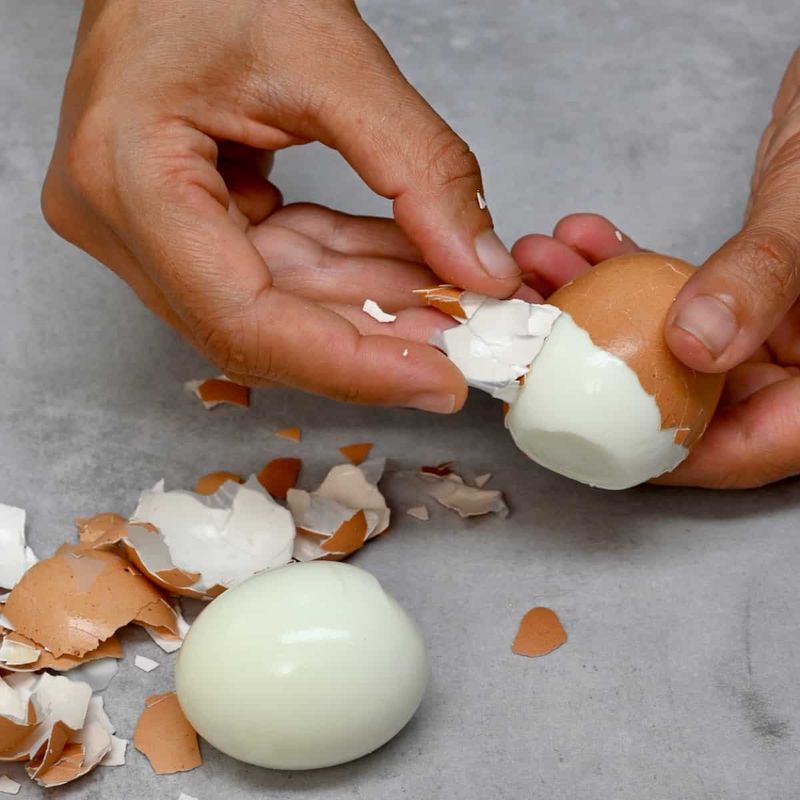
Lightly crack shells all over before placing eggs into the ice bath. Water seeps between the membrane and white, helping peel later. This trick is especially helpful for stubborn shells.
Tap gently on the pot or countertop to spiderweb the shell without tearing the white. Roll the egg under your palm for even cracks. Then chill fully. You will notice satisfying big-sheet peels instead of tiny shards.
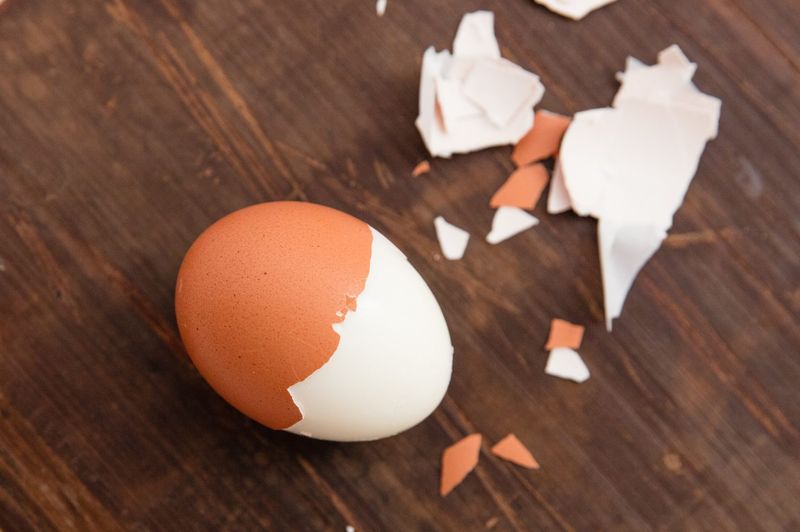
8. Peel Under Running Water
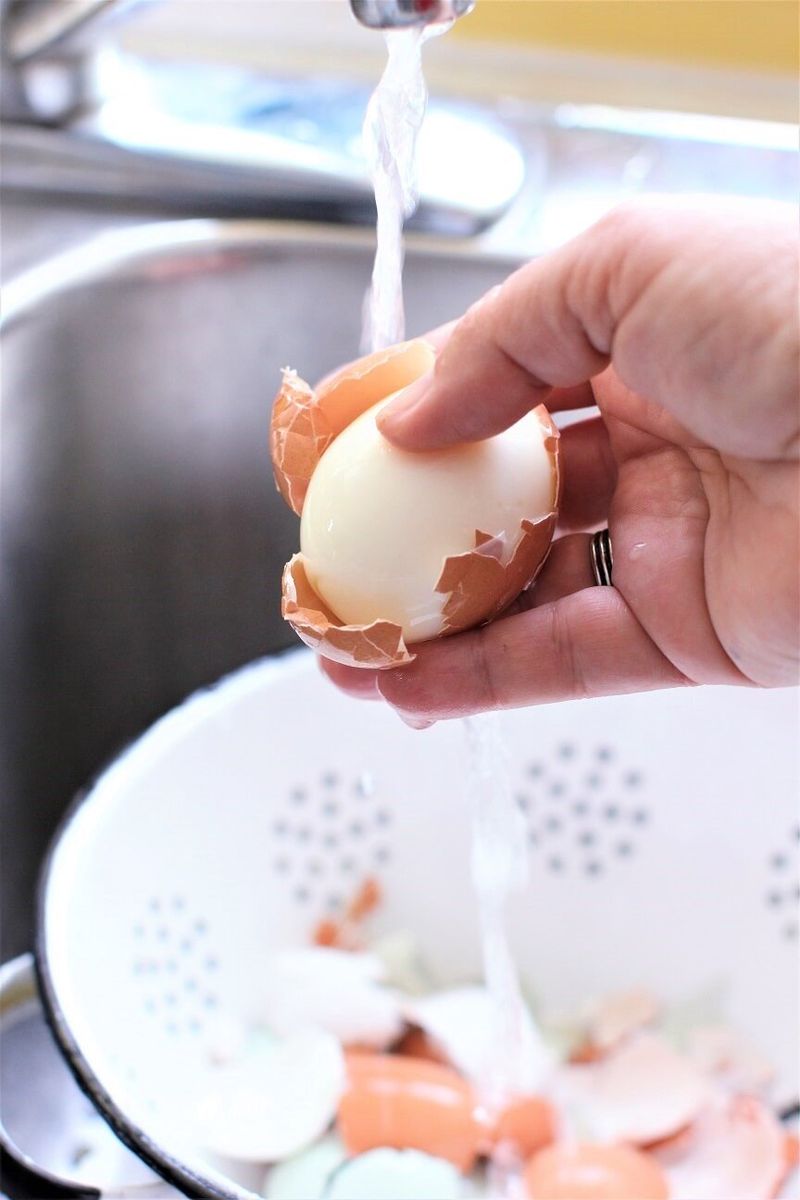
Peeling under a thin stream of cool water helps separate the membrane and wash away tiny shell bits. Start at the wider end where the air pocket sits, then work around. Keep pressure gentle to avoid pitting the whites.
If water waste worries you, use a bowl of water and swish instead. The key is lubrication and membrane release. This method rescues even tricky supermarket eggs. Your deviled eggs will look smooth and clean.
9. Add Baking Soda Or Vinegar With Caution
Some add baking soda to raise pH or a splash of vinegar to weaken shells. Results vary based on water hardness and egg age. You might see easier peeling, but flavor or texture can shift slightly.
Start tiny: 1 teaspoon baking soda or 1 tablespoon vinegar per quart of water. Test once before committing to a big batch. If you taste off-notes, skip additives and rely on timing plus ice baths instead.
10. Size And Temperature Change Timing
Jumbo eggs need more time, and fridge-cold eggs heat slower than room-temperature ones. Expect up to 1 to 2 extra minutes for large or cold eggs. Keep your baseline consistent for repeatable results.
When possible, let eggs sit 15 minutes at room temp before cooking. Or adjust the clock to compensate. If you switch brands or sizes, run a small test batch and note differences. Consistency is your best friend.
11. Steam Method For Stress-Free Peeling
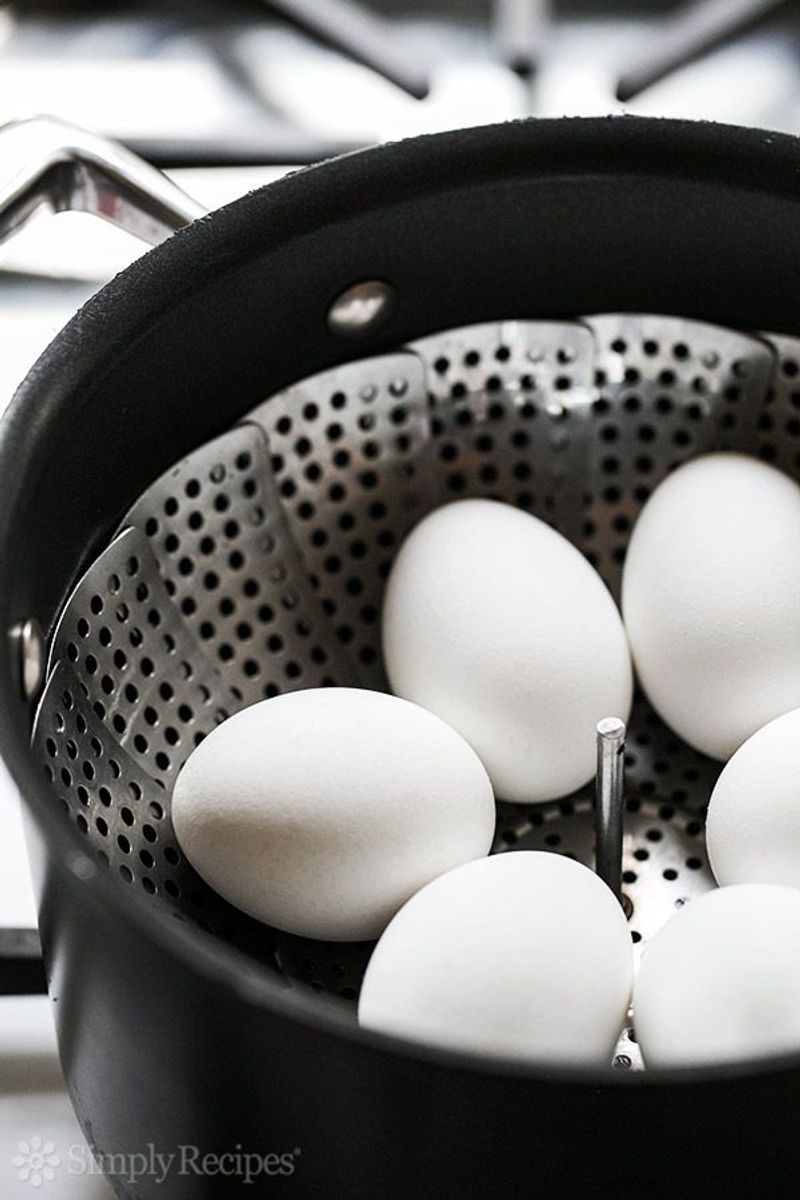
Steaming suspends eggs above boiling water, reducing jostling and providing even heat. Many find steamed eggs peel like a dream, even when quite fresh. Setup is simple with a basket or rack.
Bring an inch of water to boil, place eggs in steamer, cover, and cook 11 to 13 minutes depending on size. Then ice bath immediately. If boiling has failed you, steaming might be the hero method you needed.
12. Pressure Cooker Consistency
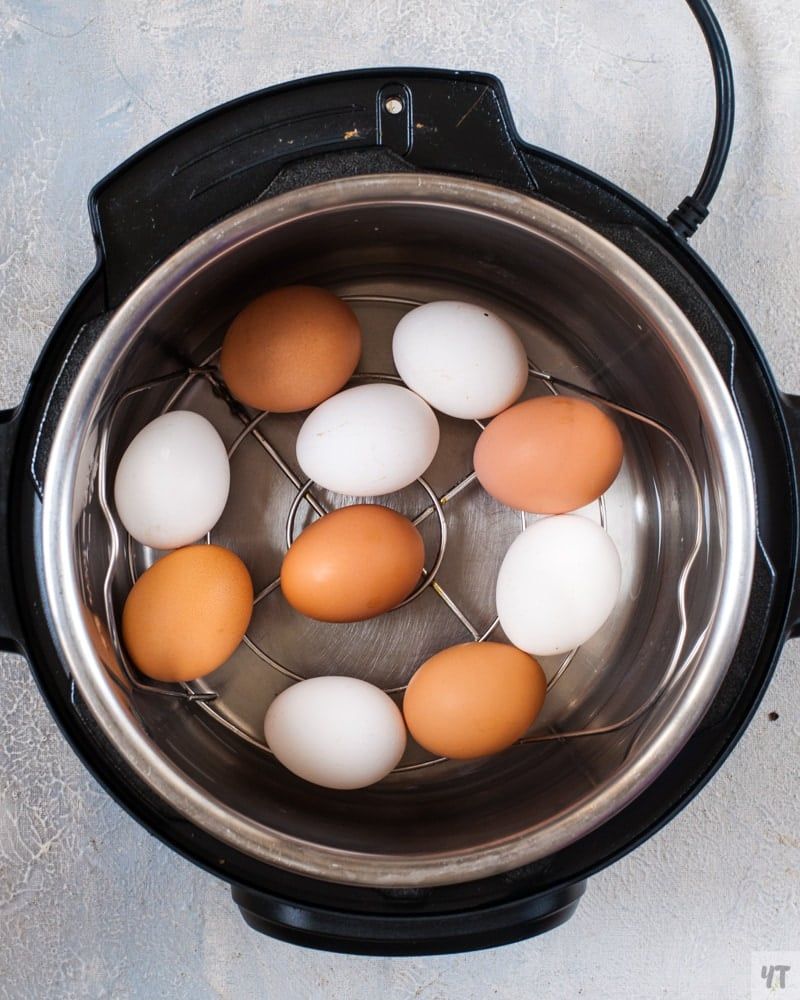
Electric pressure cookers give repeatable results with minimal monitoring. The 5-5-5 method is popular: 5 minutes high pressure, 5 minutes natural release, 5 minutes ice bath. Shells often slip off easily.
Altitude and egg size can nudge times, so note what works best for you. Avoid overcrowding to ensure even steam circulation. If yolks ring green, shorten pressure time 1 minute. Enjoy hands-off reliability.
13. Storage Safety And Shelf Life
Hard-boiled eggs should be refrigerated within two hours. In shells, they last up to one week. Peeled eggs dry out faster, so store in a sealed container with a damp paper towel for best texture.
Mark containers with dates to track freshness. If an egg smells sulfurous or looks slimy, toss it. When packing lunches, keep eggs chilled with an ice pack. Safety first keeps flavor consistent and stomachs happy.
14. How To Avoid Flat-Bottomed Eggs
Flat bottoms come from vigorous boiling or eggs banging the pot. Reduce agitation and keep a gentle simmer to preserve roundness. Lowering eggs slowly helps prevent cracks that cause leaks and deformities.
Use a spoon or basket to set eggs down softly. If you care about presentation for deviled eggs, this step matters. Smooth shapes look professional without extra effort. Gentle handling pays off.
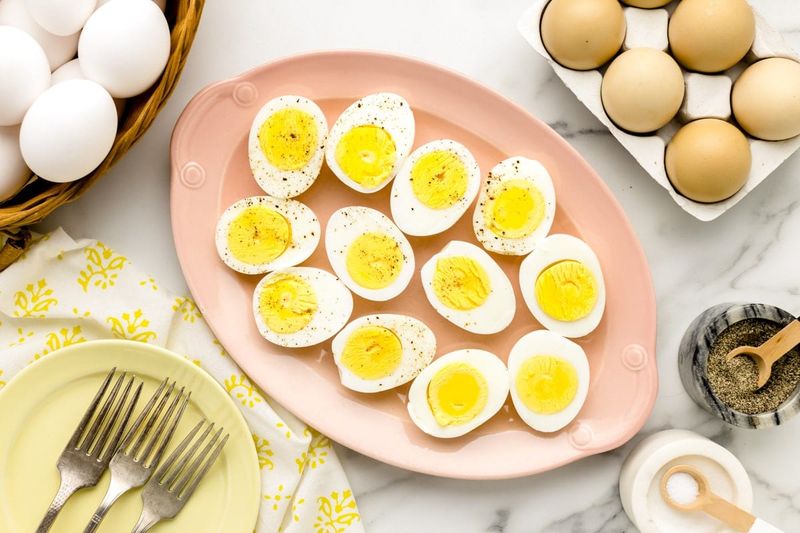
15. Peeling Older Eggs Cleanly For Deviled Eggs
Deviled eggs deserve smooth whites with no gouges. Choose week-old eggs, hot start, and chill immediately for shell release. Crack all over, peel under water, and keep patience steady.
If blemishes happen, reserve those for egg salad and plate the beauties. Garnish draws eyes, but clean edges seal the deal. Your tray will disappear at parties and you will be the reliable egg person.
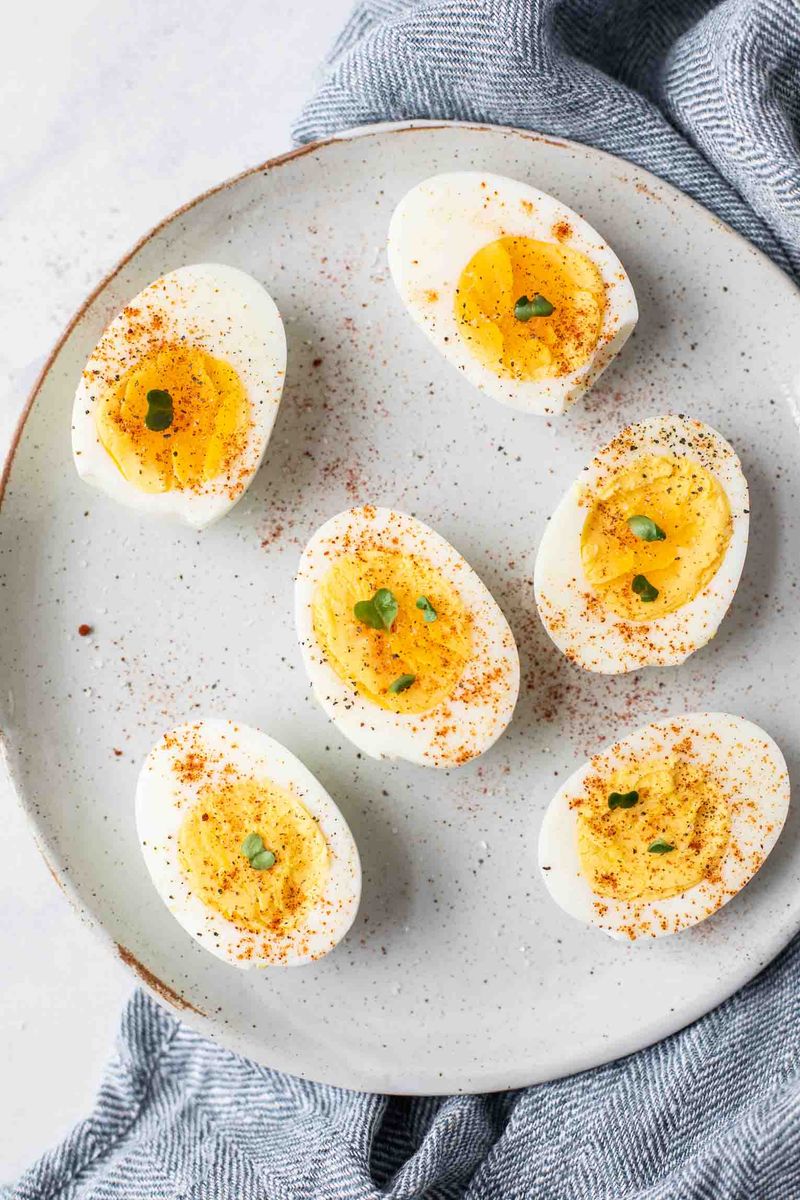
16. Seasoning Starts In The Water

While shells block heavy flavors, a pinch of salt in the water can help control albumen seepage and minor cracks. It does not truly season the inside. Real flavor comes after peeling.
Sprinkle flaky salt, pepper, and a drizzle of olive oil on warm eggs for a simple snack. Or mash with mayo, mustard, and herbs for salad. Season boldly and you will not miss the salt-in-water myth.
17. Cutting Cleanly Without Crumbling Yolks
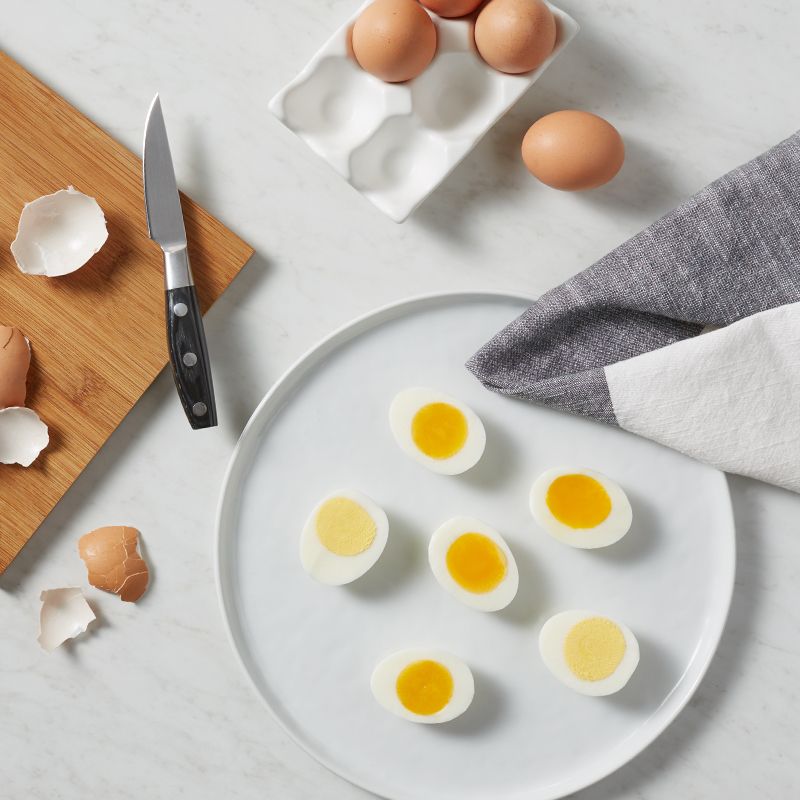
Use a thin sharp knife or dental floss for pristine halves. Wipe the blade between cuts to avoid smears. Warm the knife under hot water and dry to glide through whites.
For egg salad, crumbling is fine, but for presentation you want defined yolks. Slice confidently without sawing. A wire egg slicer is great for uniform pieces on toast and salads. Clean cuts look pro.
18. Creative Flavor Upgrades
Hard-boiled eggs love seasoning blends. Try everything spice, furikake, zaatar, or chili crunch. A dab of mayonnaise and mustard turns pieces into quick salad, while miso butter adds umami.
Slice over avocado toast, toss with soy sauce and sesame oil, or dust with smoked paprika and lemon zest. You will never be bored at snack time again. Keep a few peeled eggs ready for instant upgrades.
19. Egg Salad Without Mushiness
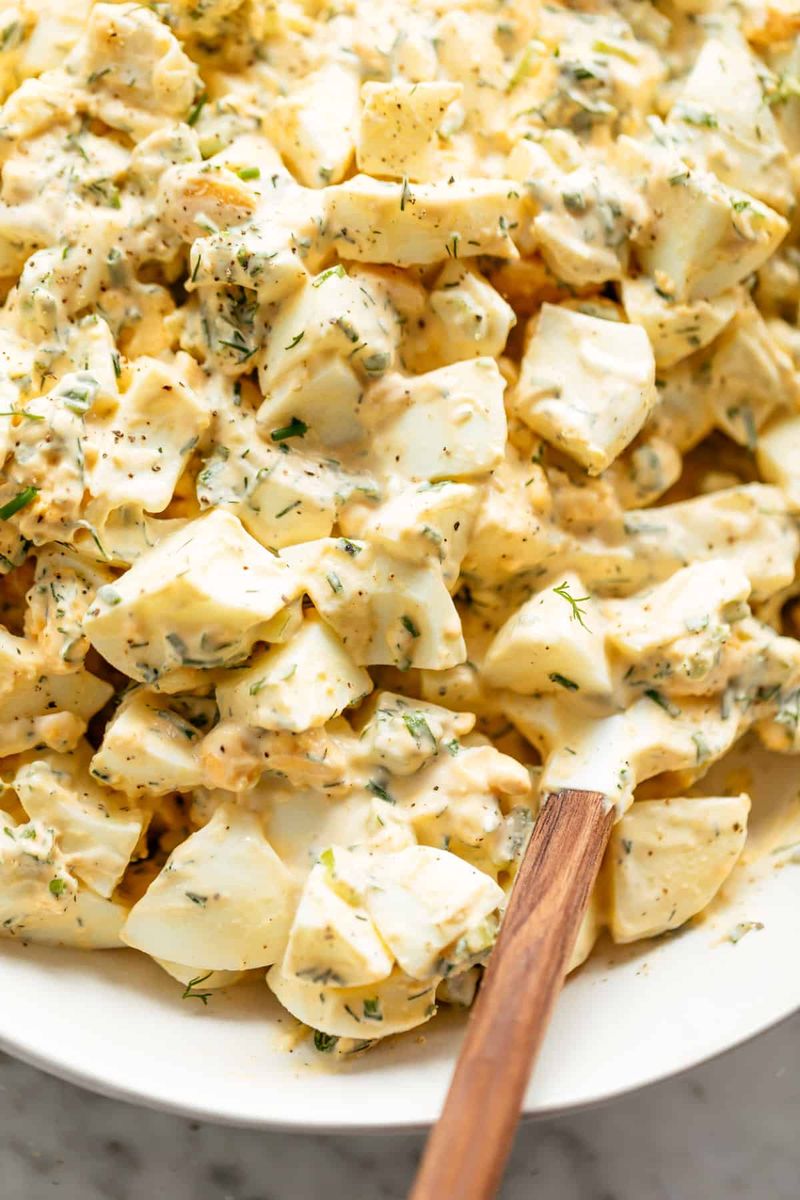
Overcooked yolks create chalky salad, and overmixing turns it gluey. Aim for 9 to 10 minute eggs and fold gently. Add texture with celery, pickles, and fresh herbs.
Use a fork to break eggs into chunks, then add mayo, Dijon, salt, and pepper. A splash of lemon or pickle brine brightens everything. Chill briefly to meld flavors without sogging bread. Balanced texture wins.
20. Travel Tips For On-The-Go Protein
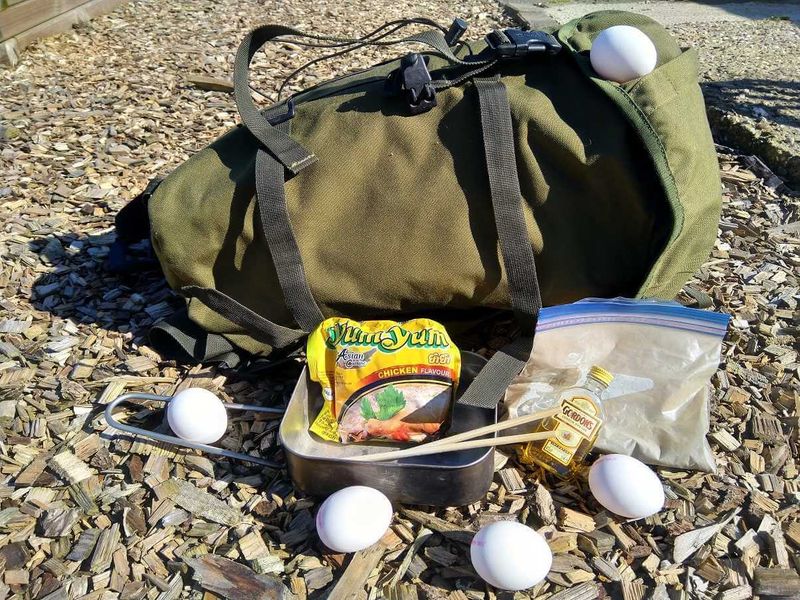
Hard-boiled eggs are perfect portable snacks. Keep them in the shell for better protection and moisture retention. Pack with an ice pack if they will be out over two hours.
Peel at your destination and add a pinch of salt from a tiny tin. If you need odor control, store peeled eggs in airtight containers. Simple planning gives you fresh, satisfying bites anywhere.