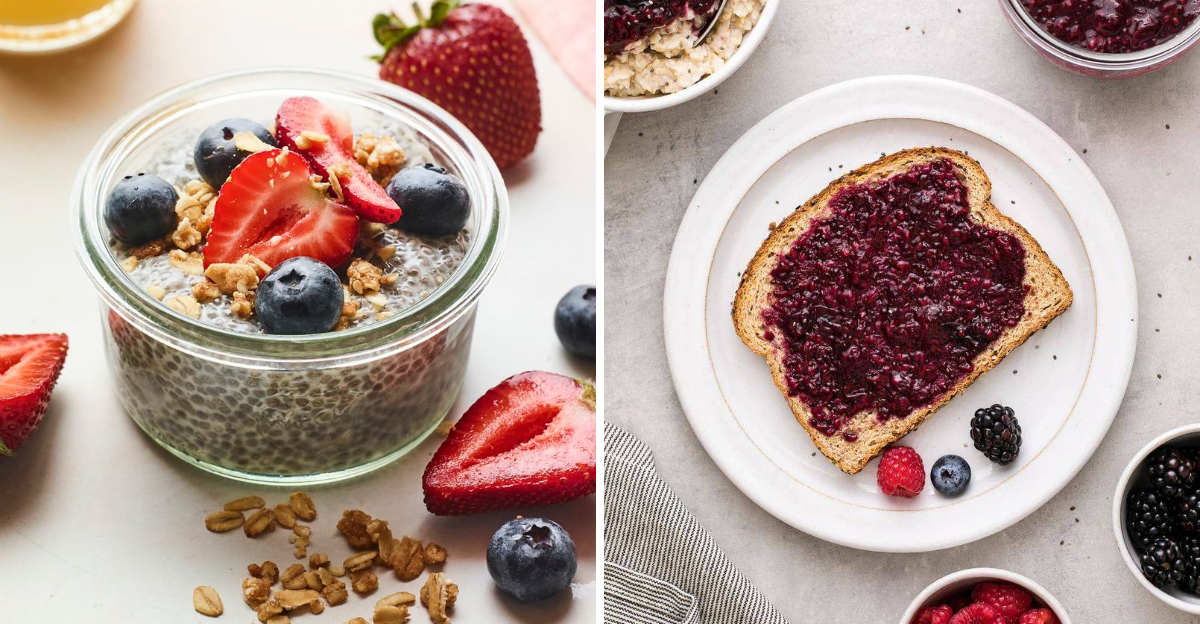
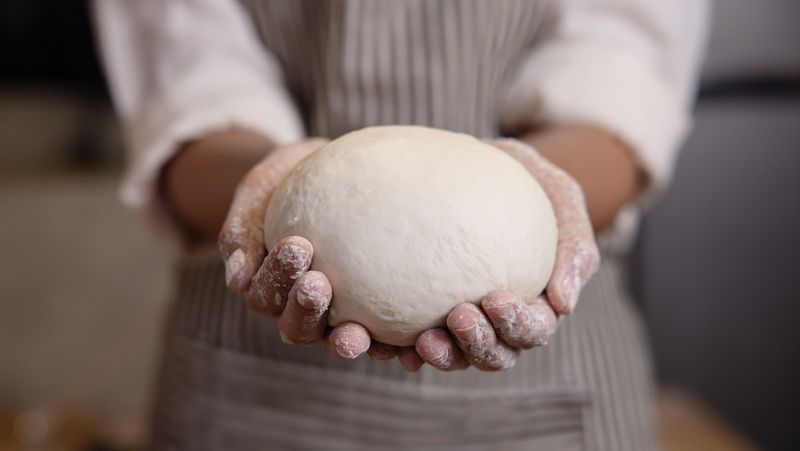
25 Baking Techniques To Perfect The Art Of Homemade Bread

Homemade bread is equal parts science and intuition, and a few smart habits can transform every loaf you bake. If your dough swings from sticky mess to dry brick, these techniques will guide you toward consistent, bakery-worthy results. You will learn when to trust the recipe, when to trust your hands, and how to read dough like a pro. Ready to upgrade your crust, crumb, and confidence all at once?
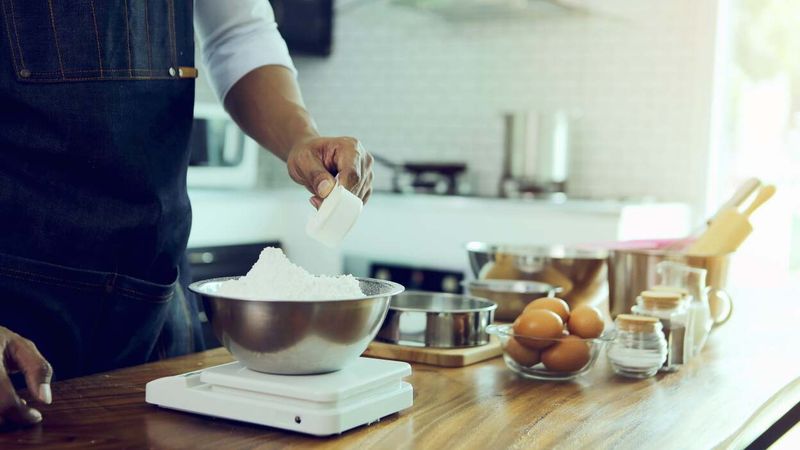
1. Weigh your ingredients
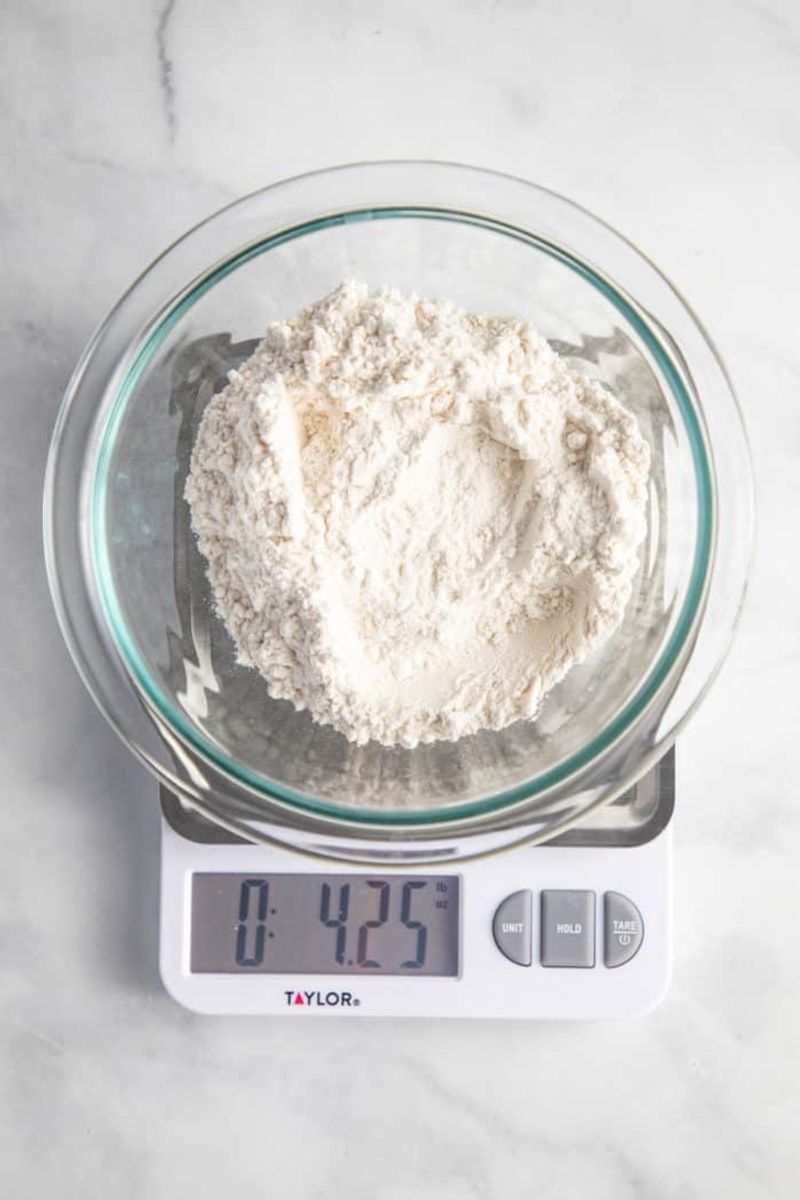
Stop guessing and start weighing. Flour compacts easily, so a cup today might not match a cup tomorrow. With a scale, you control hydration, flavor, and texture batch after batch.
Measure flour, water, salt, and yeast in grams for accuracy and repeatability. You will immediately see more consistent rises and fewer dry, dense loaves. A small digital scale pays for itself through fewer baking disappointments and better bread.
Place your bowl on the scale, tare to zero, then add each ingredient. It is fast, clean, and accurate.
2. Learn baker’s percentages
Baker’s percentages unlock flexible, scalable recipes. Think of flour as 100 percent, then calculate water, salt, and yeast as percentages of flour. Hydration becomes clear and you can adjust with confidence.
Want a softer crumb or crisper crust? Change hydration by a few percentage points and observe the difference. Scaling for a party or a single loaf becomes trivial when every component is proportional.
Write numbers down and do quick math with a calculator. Soon, you will tweak recipes intuitively and feel in control rather than guessing.
3. Choose the right flour
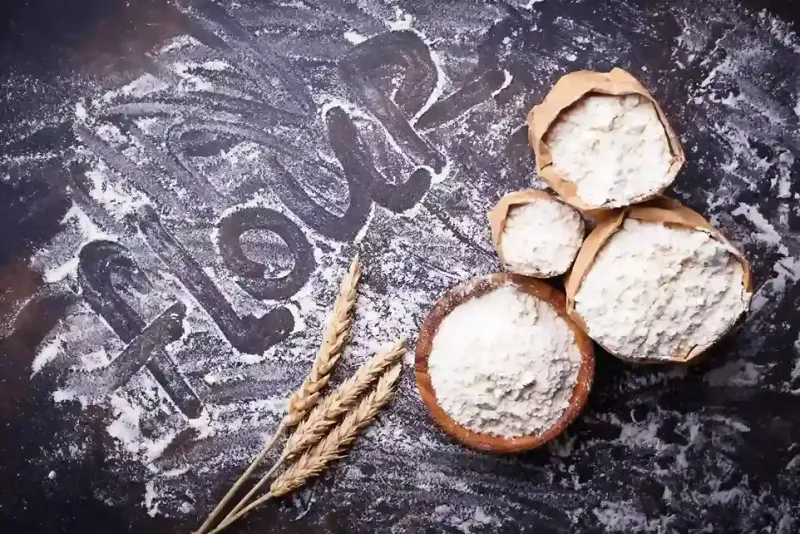
Flour choice shapes texture and flavor. Bread flour’s higher protein builds stronger gluten for chewier loaves. All-purpose flour works for many breads but may produce slightly softer structure.
Whole wheat brings nuttiness and nutrition, but it absorbs more water and benefits from longer rests. Consider mixing flours to balance taste, strength, and tenderness. You will quickly notice how each flour shifts the dough’s behavior.
Read labels for protein percentage and experiment with blends. Selecting the right flour for the job sets your dough up for success from the start.
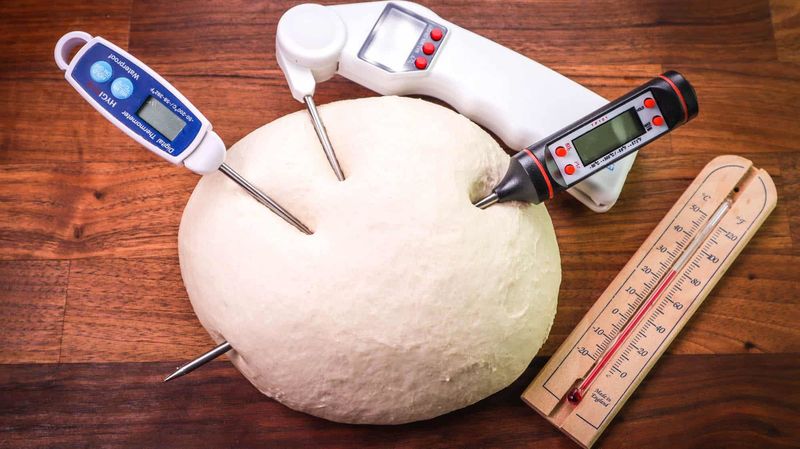
4. Control your water temperature
Water temperature directs fermentation speed. Warmer water nudges yeast to work faster, while cooler water slows rise and prevents overproofing in hot kitchens. Temperature control gives you scheduling power.
Use an instant-read thermometer and aim for the dough temperature your recipe targets. If your room is warm, reduce water temperature to keep the dough balanced. You will avoid blowouts and sluggish rises.
Adjust with ice cubes or slightly warm water as needed. Managing temperature keeps flavor development steady and your timeline predictable.
5. Autolyse for better dough

Autolyse is a simple rest that pays big dividends. Mix only flour and water, then let the dough sit 20 to 60 minutes. Gluten forms gently, boosting extensibility and reducing kneading time.
When you add salt and yeast afterward, the dough becomes smoother and easier to handle. You will often see better structure, improved flavor, and a more open crumb. It is a small step with big impact.
Set a timer and resist tinkering. That quiet rest lets enzymes work, turning shaggy dough into something cooperative and promising.
6. Add salt at the right time
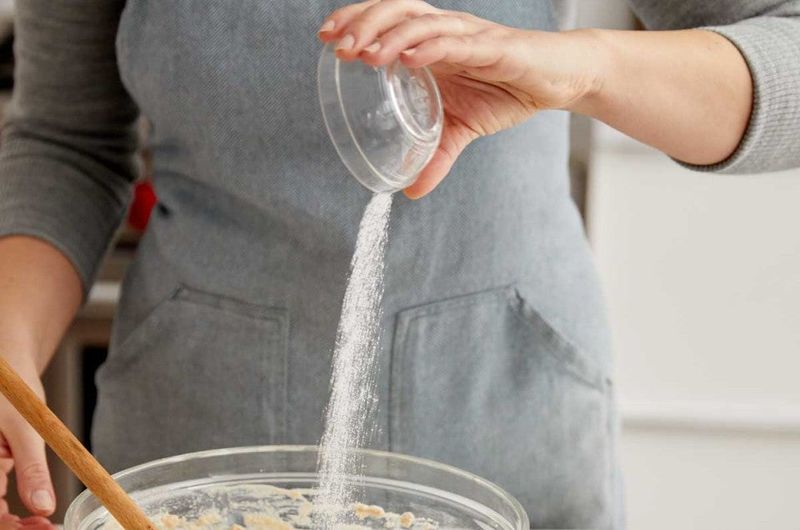
Salt is more than seasoning. It strengthens gluten, regulates fermentation, and enhances flavor. Forget it and the dough turns slack, sticky, and odd quickly.
Combine flour and water first if you are autolysing, then add salt and yeast afterward. If you mix everything together, just be sure salt is present, not forgotten. Your dough will behave consistently and taste better.
Taste the difference in crumb and crust. Balanced salt supports structure without overshadowing delicate wheat flavors you worked to develop.
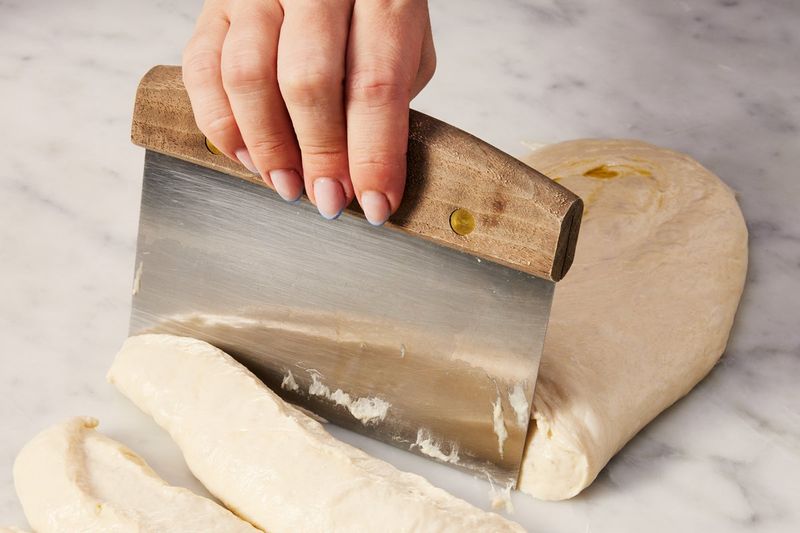
7. Hold back some flour

Do not dump all the flour in at once. Flour varies by brand and humidity, so dough hydration shifts from day to day. Holding back a small portion lets you fine-tune texture.
A slightly sticky dough usually bakes better than a dry, tight one. Add reserved flour only if the dough truly needs it. You will get softer crumbs and better oven spring by staying cautious.
Trust feel more than fear of stickiness. Your bench scraper and wet hands will keep things tidy while you dial hydration.
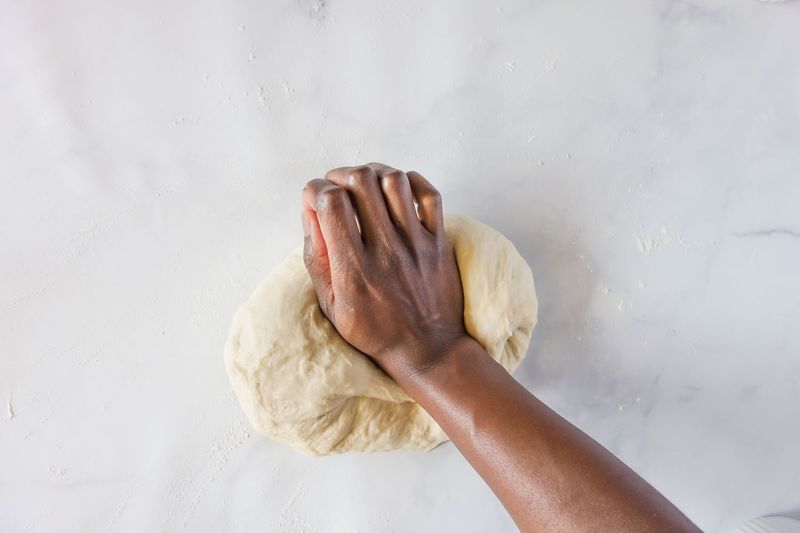
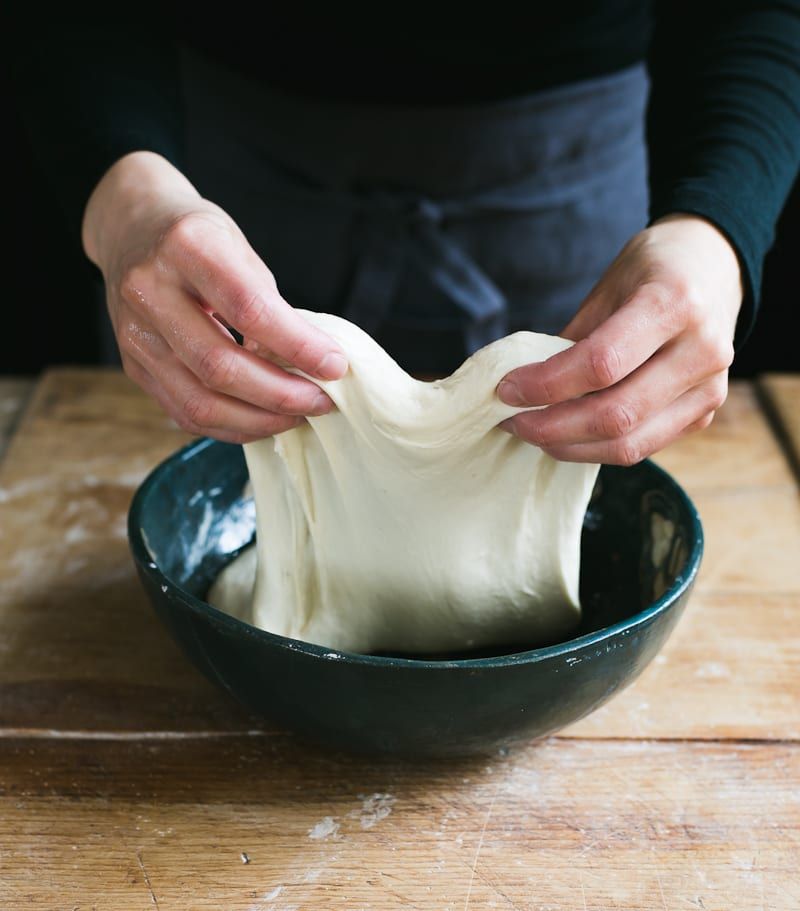
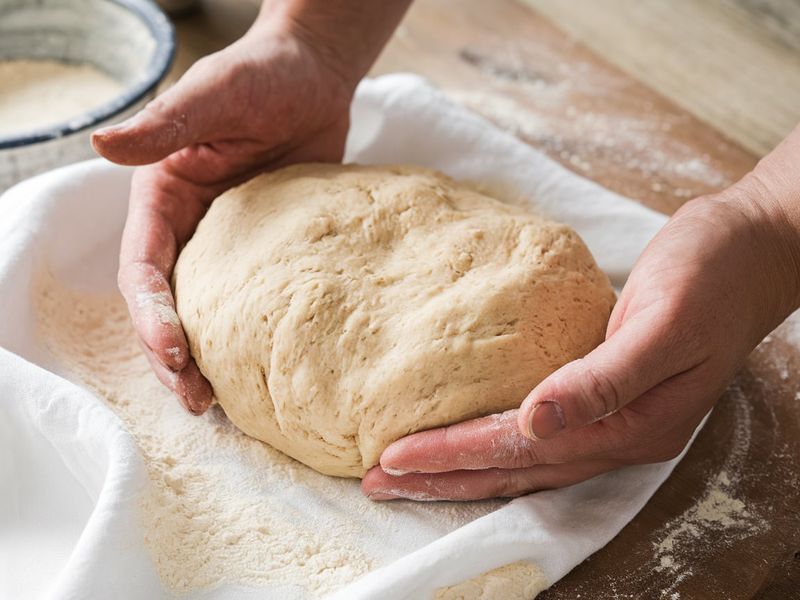
8. Use wet hands and a bench scraper
Extra flour during handling can tighten dough and dry it out. Instead, dampen your hands and rely on a bench scraper to corral stickiness. The dough stays hydrated and manageable.
Scoop, fold, and lift without dusting the whole counter. You will keep gluten relaxed and maintain the hydration needed for a tender crumb. Clean-up is easier too.
Keep a small bowl of water nearby to re-wet fingers. That simple swap encourages better structure and protects the delicate balance you built.
9. Knead with purpose
Kneading builds gluten, but it is not punishment. Use smooth, confident motions and stop when the dough feels elastic, cohesive, and slightly springy. Over-kneading by machine can toughen and tear.
Focus on feel rather than a fixed timer. If the dough resists and fights, rest it for a few minutes, then continue. You will develop structure without overheating or overworking.
Test progress with a quick stretch. Purposeful kneading, not frantic pounding, delivers strong yet supple dough prepared for fermentation.
10. Try stretch-and-folds
For wetter doughs, replace heavy kneading with periodic stretch-and-folds. During the first rise, lift one edge, stretch, and fold toward the center. Rotate the bowl and repeat every 20 to 30 minutes.
This gentle method aligns gluten without degassing excessively. You will build strength while preserving open crumb potential. It is ideal for ciabatta, country loaves, and high-hydration doughs.
Set reminders and keep sessions quick. Over time, the dough tightens, smooths, and stands taller, signaling readiness for shaping.
11. Use the windowpane test (lightly)
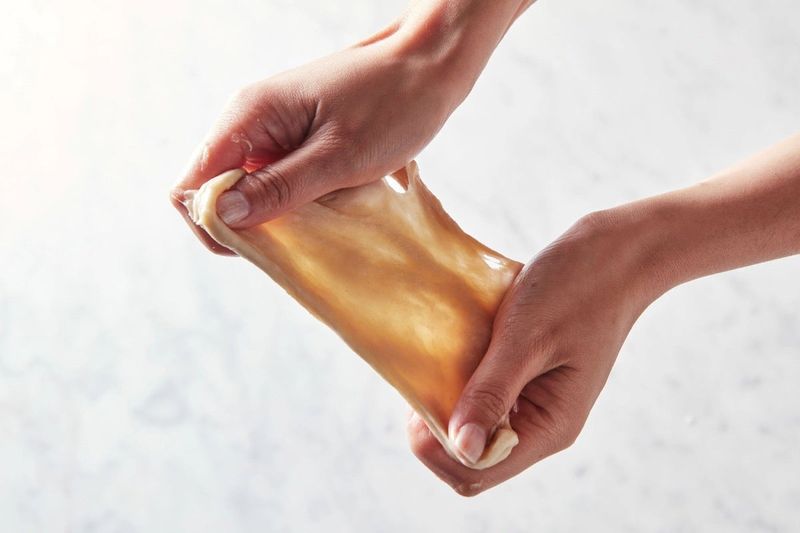
Pinch off a small piece and stretch it thin. If it forms a translucent window before tearing, gluten development is on track. If it rips immediately, give the dough more time or gentle work.
Do not obsess. The test is a guide, not a verdict. Some rustic breads prefer slightly less development to keep tenderness and character.
Use it alongside feel and appearance. With practice, you will sense elasticity and know when to move on without second-guessing.
12. Watch the dough, not the clock
Time is a suggestion. Temperature, yeast strength, and flour variability mean rise times change daily. Train your eye to read dough instead of chasing exact minutes.
Look for volume increase, smoothness, and airy feel. If it is slow, give it more time. If it is racing, move on sooner. You will avoid underproofed tight crumbs and overproofed collapses.
Confidence grows when you trust cues over numbers. Let the dough tell you when to act.
13. Use a straight-sided container
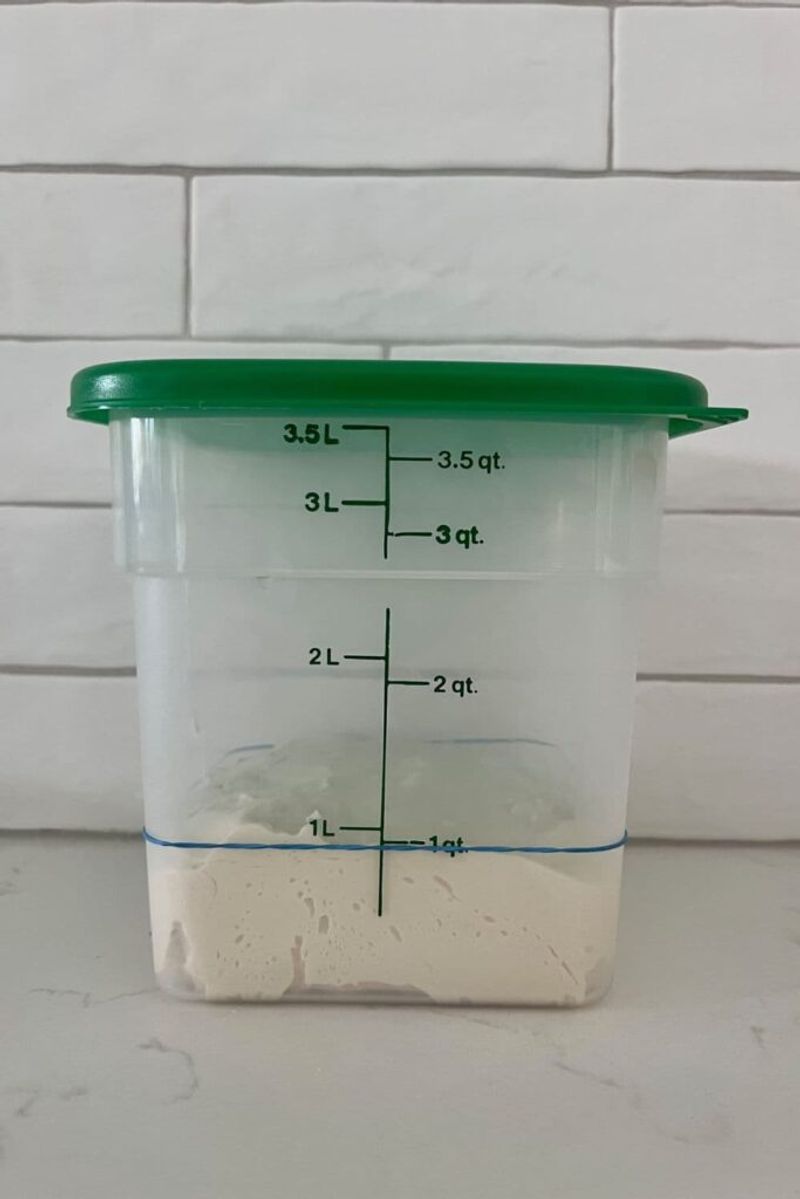
Straight-sided containers make rise assessment easy. Mark the starting level with a band or marker, then watch for doubling. The walls reveal bubbles and fermentation activity clearly.
Curved bowls can mislead your eye. A cylinder removes guesswork, helping you decide when bulk is complete. You will better predict timing and avoid rushed or sluggish transitions.
Choose food-safe plastic or glass with a lid. Clear sides turn invisible fermentation into readable data you can trust.
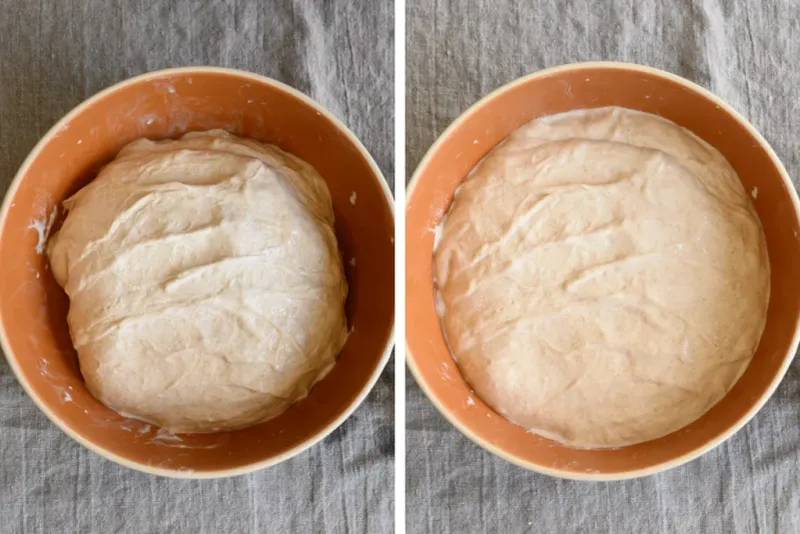
14. Know what properly risen looks like
Properly risen dough looks puffed, feels airy, and responds slowly to a gentle poke. The indentation should spring back gradually, not snap tight. Underproofed dough feels dense and bounces back quickly.
Learn the signs by touching and observing regularly. You will gain intuition that beats any timer. Visual cues and handling feedback tell the real story.
Take notes to reinforce patterns. Soon, you will recognize readiness at a glance and shape at the perfect moment.
15. Avoid overproofing
Overproofed dough turns fragile, collapses easily, and bakes flat with yeasty flavors. If it feels overly soft and jiggly, it likely went too far. Act sooner next time or chill to slow it down.
If you overshoot, gently reshape, give a short rest, and proof less the second round. Results will not be perfect, but they will improve. Learn from the timing.
Keep notes on temperature and fermentation speed. You will catch the sweet spot consistently and protect your loaf’s structure.
16. Build tension when shaping
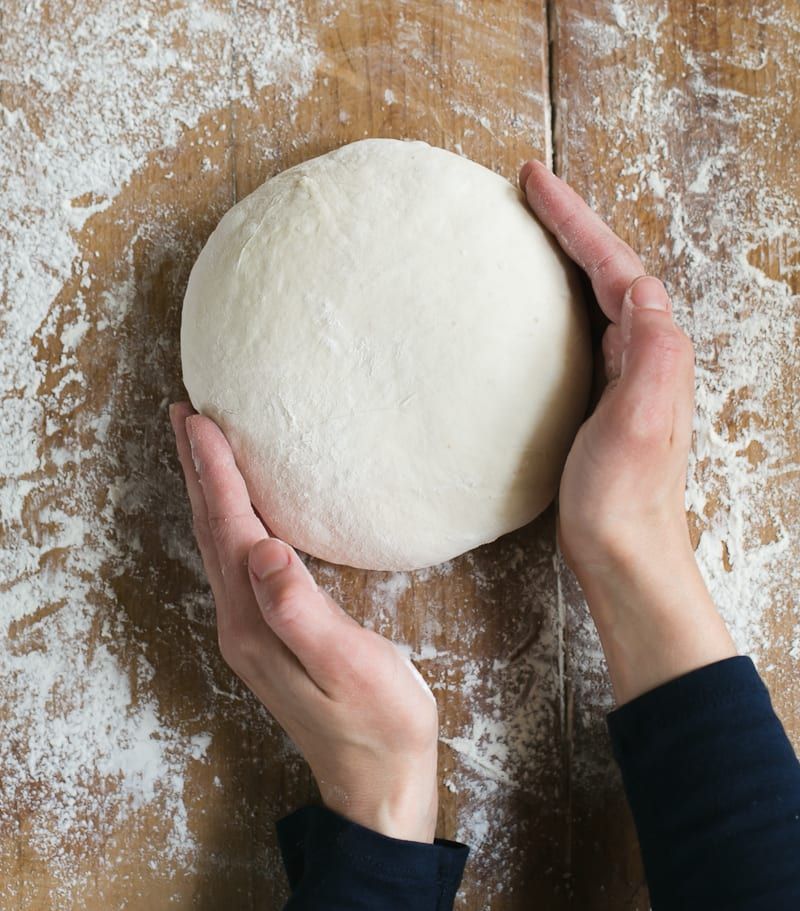
Shape with intention to create surface tension. Use the counter’s friction to tighten the dough skin so the loaf rises upward, not outward. This step separates homey loaves from bakery silhouettes.
Keep seams sealed to maintain gas and structure. Tight but not tearing is the goal. You will notice taller loaves and better oven spring.
Practice with gentle pulls and tucks. Each pass smooths the surface and organizes the interior for even crumb.
17. Bench rest before final shaping
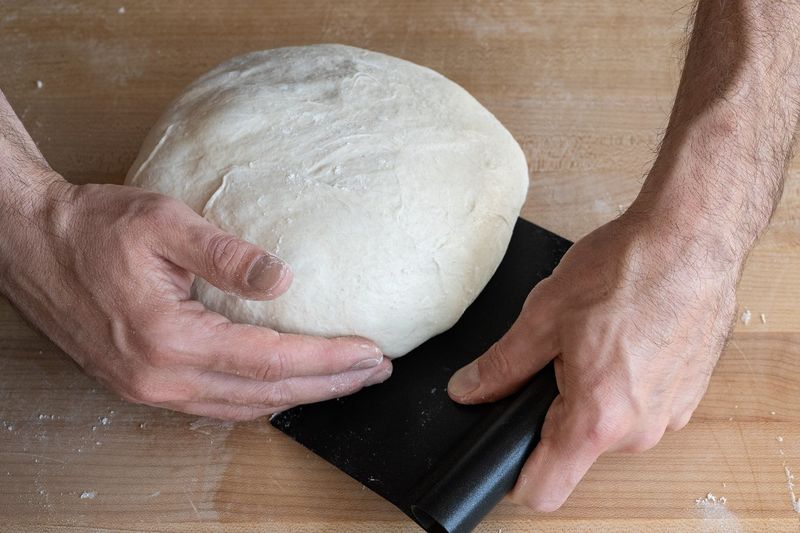
After dividing, let the dough relax 10 to 20 minutes. This bench rest eases tight gluten so final shaping becomes clean and controlled. Rushing invites tearing and misshapen loaves.
Cover pieces lightly to prevent drying. You will find sealing seams easier and forming consistent sizes simpler. It is a tiny pause that yields big shaping improvements.
Use the moment to prep proofing baskets and clear space. Organization and rest create smoother baking flow.
18. Use flour strategically
Flour can help or hinder. Dust lightly to prevent sticking, but avoid burying seams, which need friction to seal. Excess flour inside folds creates weak layers and gaps.
Target your dusting: exterior for handling, minimal on seam lines. You will get clean closures, better tension, and fewer floury streaks in the crumb. A brush helps remove excess.
Balance stick control with hydration protection. Strategic flouring keeps the dough supple while preserving structure.
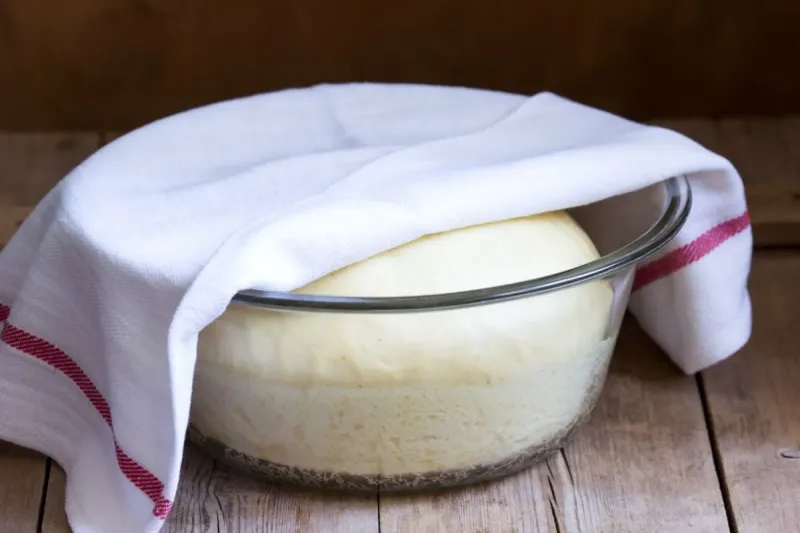
19. Proof in the right container

The proofing vessel shapes your loaf. A banneton, bowl with towel, or floured cloth in a colander supports the dough and preserves tension. Choose size and shape to match your vision.
Proper support prevents spreading and encourages upward rise. You will also get attractive flour patterns and consistent form. Line with a well-floured cloth if sticking worries you.
Keep containers clean and dry between uses. Good proofing setups make professional results repeatable.
20. Cold-proof in the fridge
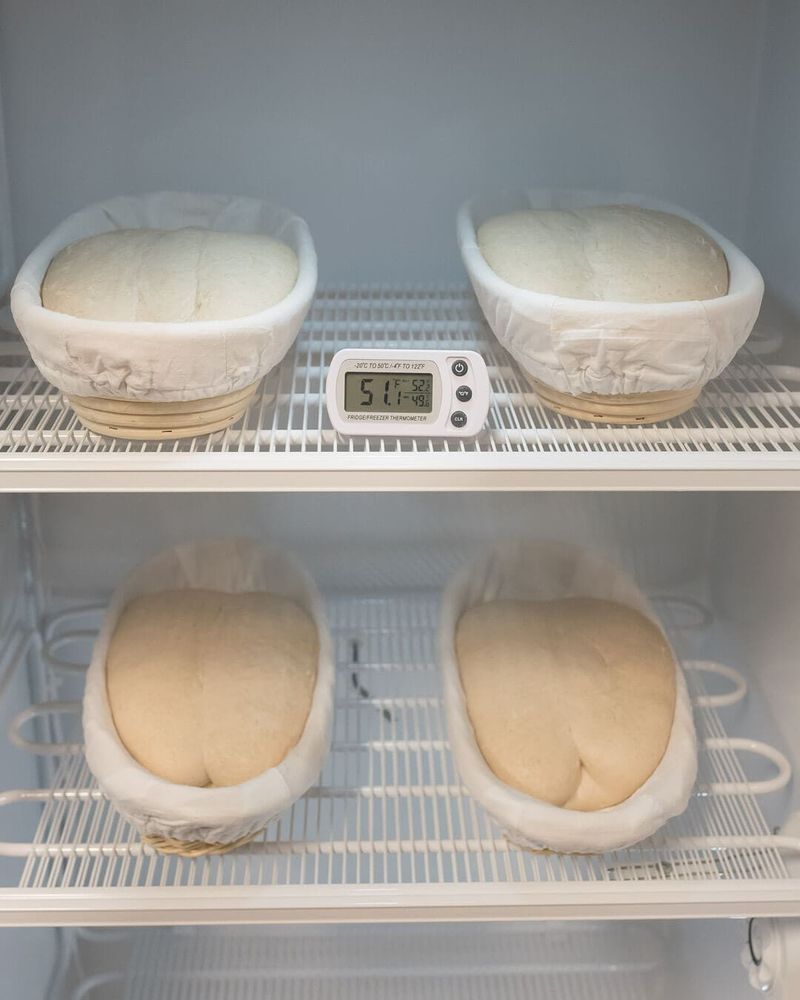
An overnight fridge proof adds flavor, flexibility, and easier scoring. Cold slows fermentation, letting enzymes build depth while you sleep. It also firms the dough so cuts are cleaner.
If your schedule is hectic, this gives you control. Bake straight from the fridge or after a brief warm-up. You will enjoy better crust color and nuanced aroma.
Cover well to prevent drying. Cold-proofing becomes your secret weapon for timing and taste.
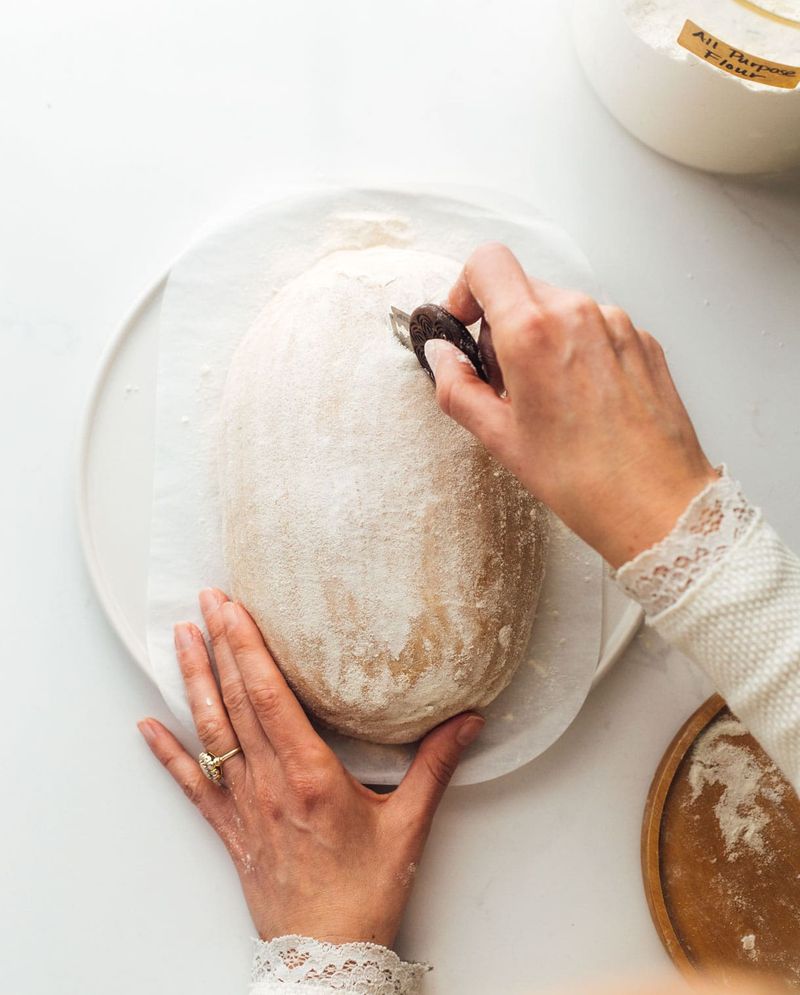
21. Score with confidence
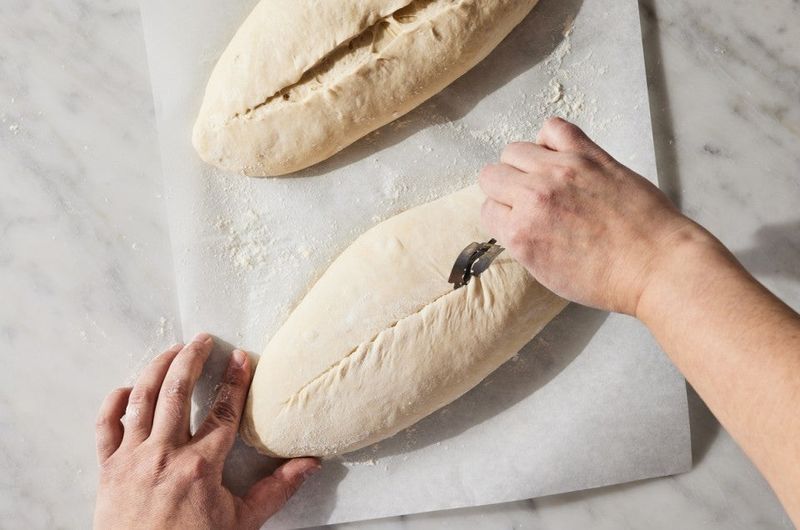
Scoring directs expansion. A shallow, hesitant cut can drag and seal, but a quick confident slash opens cleanly. Aim for consistent depth so steam can escape where you want.
Practice on chilled dough for easier handling. You will see controlled ears and appealing patterns. Do not saw or poke; glide decisively.
Keep your blade sharp and replace as needed. Clean scoring elevates both appearance and oven spring.
22. Angle your score for an ear
To encourage a lifted ear, tilt the blade around 30 degrees and cut with intention. The shallow angle creates a flap that peels back beautifully as the loaf expands. Depth should be moderate and even.
Combine angling with good surface tension for dramatic results. You will get that classic artisan look many bakers chase. Practice improves consistency quickly.
Photograph your cuts and outcomes. Comparing angles and depths helps dial in your personal style.
23. Preheat your oven thoroughly

Bread loves real heat, not almost-hot. Preheat longer than you think, especially when using stones or Dutch ovens. The extra time saturates surfaces and fuels powerful oven spring.
Use an oven thermometer to verify temperature. Many ovens run hot or cool. You will find crust color and texture improve dramatically when heat is truly stable.
Plan the preheat into your schedule. Consistent heat gives consistent bread.
24. Use steam for oven spring

Steam keeps the crust flexible during early baking so the loaf can expand fully. A covered Dutch oven traps steam from the dough itself, delivering reliable results. Without steam, crust hardens too soon.
Use a preheated Dutch oven or add steam to a stone setup with hot water on lava rocks. You will see taller loaves and shinier crusts. Be careful around hot steam.
Vent later in the bake to crisp the crust. Manage steam timing for best texture and appearance.
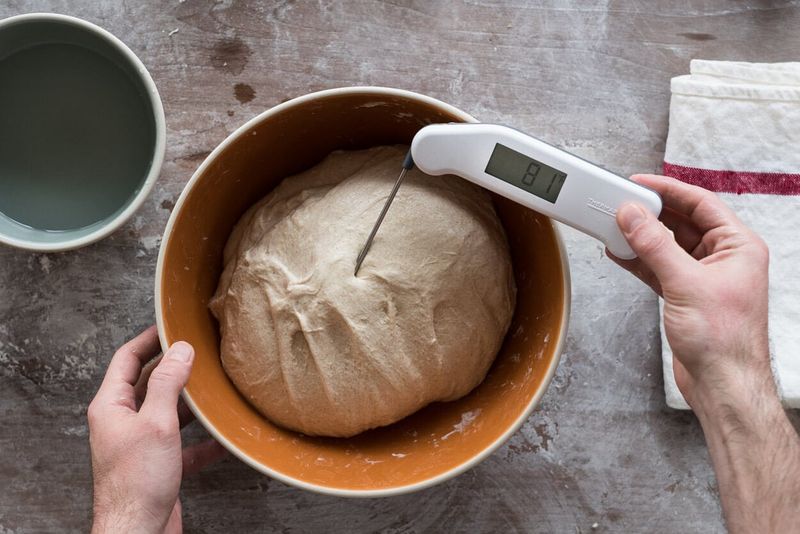
25. Mind dough temperature
Final dough temperature drives fermentation rhythm. Aim for a target range suited to your formula, often around mid-70s Fahrenheit. Adjust water temperature to hit your goal consistently.
Warm dough ferments faster, cool dough slower. You will gain predictable bulk times and flavor development. This single metric ties process variables together.
Measure after mixing and tweak next batch as needed. Tracking temperature brings calm control to your routine.